Windows 11 · Windows
Best OBS Streaming Settings 1080p 60 FPS No Lag
Original source date
Answer
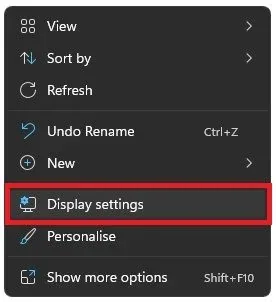
Open up OBS Studio and navigate to your Settings window. In the Video tab, set the Base or Canvas Resolution option to your native monitor resolution. It should show up for you here, but if you’re unsure about your monitor resolution, right-click your desktop and select Display Settings.
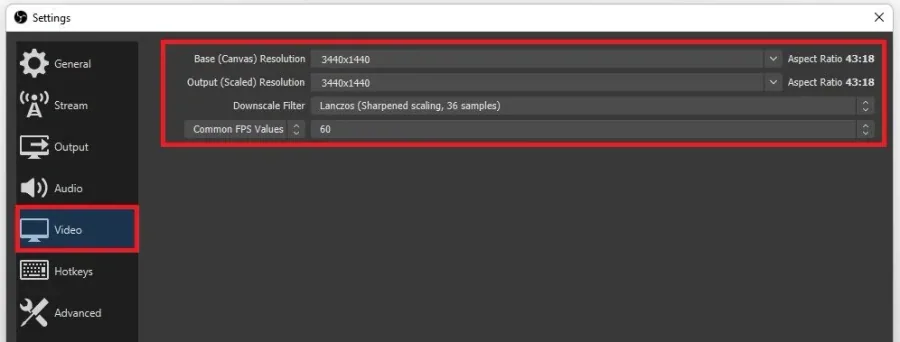
Optimize your OBS Studio Settings
Open up OBS Studio and navigate to your Settings window. In the Video tab, set the Base or Canvas Resolution option to your native monitor resolution.
Verify your Native Display Resolution
It should show up for you here, but if you’re unsure about your monitor resolution, right-click your desktop and select Display Settings.
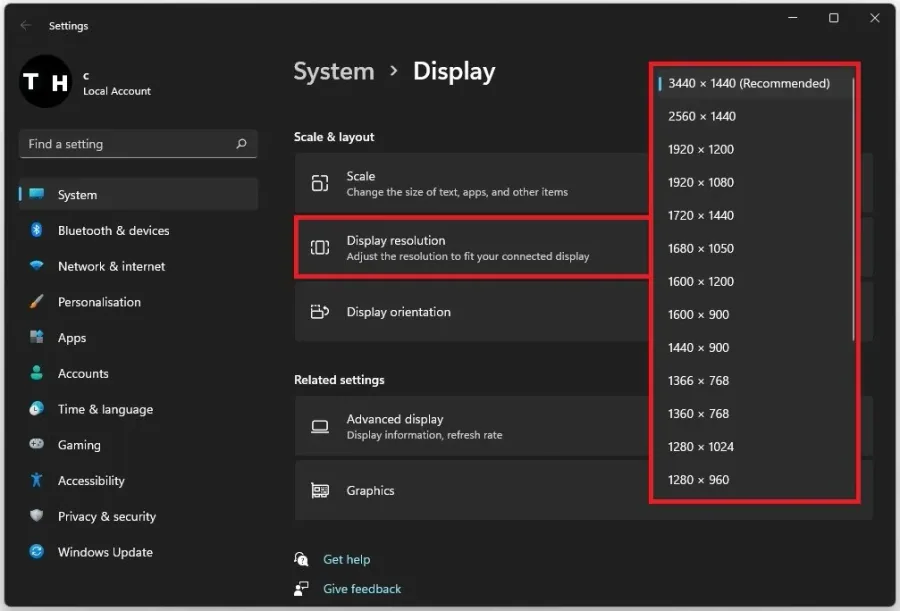
In your Display Settings, scroll down and under Scale & layout you'll be able to…
In your Display Settings, scroll down and under Scale & layout you'll be able to see your native Display resolution.
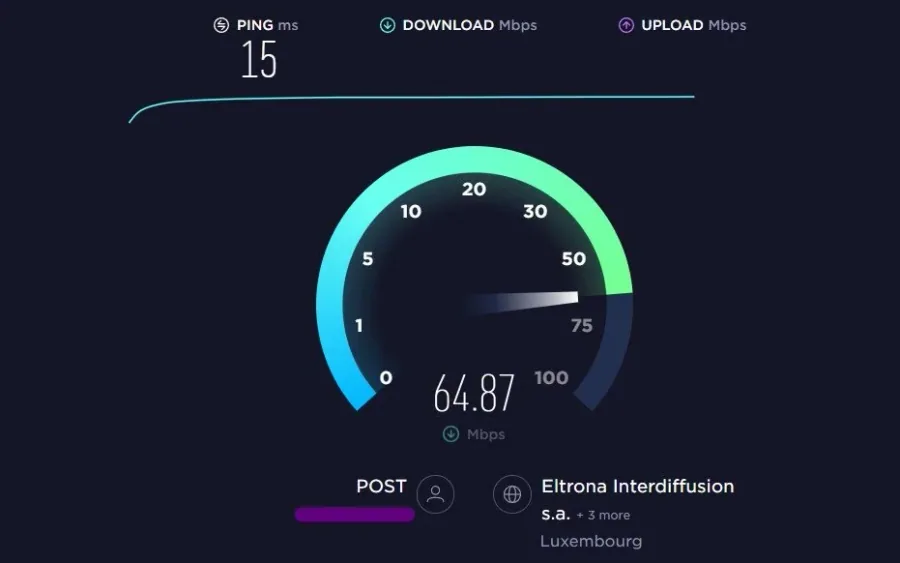
Test your Network Connection
Set the Output or Scaled Resolution option to 1920x1080. Set the Downscale Filter to Lanczos for the sharpest image, but your PC might lag when streaming, as this will cost you a lot of resources. For low to mid-end PCs, we recommend setting this option to Bicubic. Below, set this Common FPS Values option to 60. Next, open up your favorite browser and navigate to Speedtest.net. You can test your network connection upload and download speed on this page. This is important to know, as you must set a bandwidth rate of how much you allow OBS to utilize to stream your content. In case your upload speed is averaging below 4 mb/s, then we suggest setting the FPS option to 30 FPS.
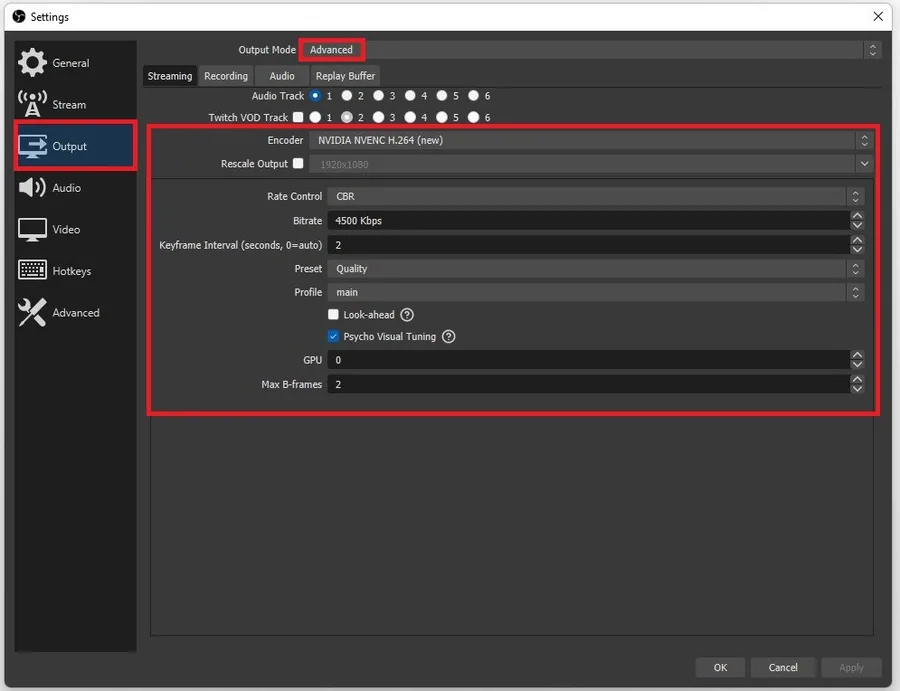
OBS Output Settings
Navigate to your Output settings. Set the Output Mode to Advanced and navigate to the Streaming tab. Set the Encoder to NVIDIA NVENC if you can utilize a powerful enough NVIDIA graphics card. If not, set the option to x264, which will utilize your processor and not your GPU to render your stream. Set the Rate Control to CBR, which stands for Constant Bit Rate, and below, set the Bitrate according to your network connection upload speed. For streams in 1080p and 60 FPS, you should set the bitrate to 4500. If you intend to stream in 30 FPS, a bitrate of 3500 should be more than enough. Below, set the Keyframe Interval to 2 seconds, Preset to Quality, Profile to Main, and the other settings can be left to their default values.
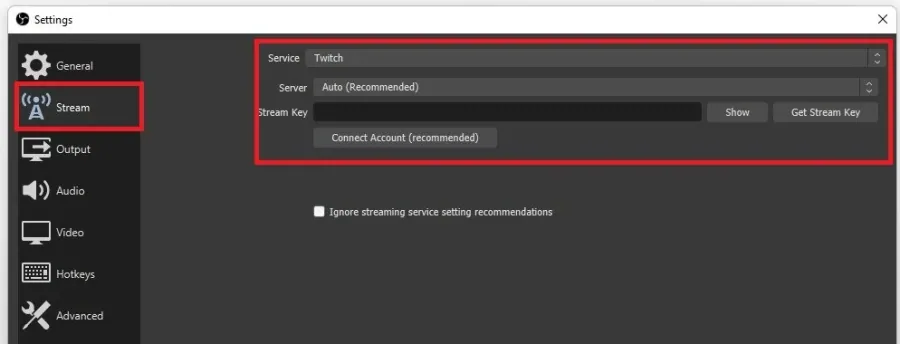
OBS Stream Settings
After applying your changes, navigate to the Stream section of your settings. Set the Service option to the streaming service you wish to use. You can paste your stream key from your streaming dashboard below.
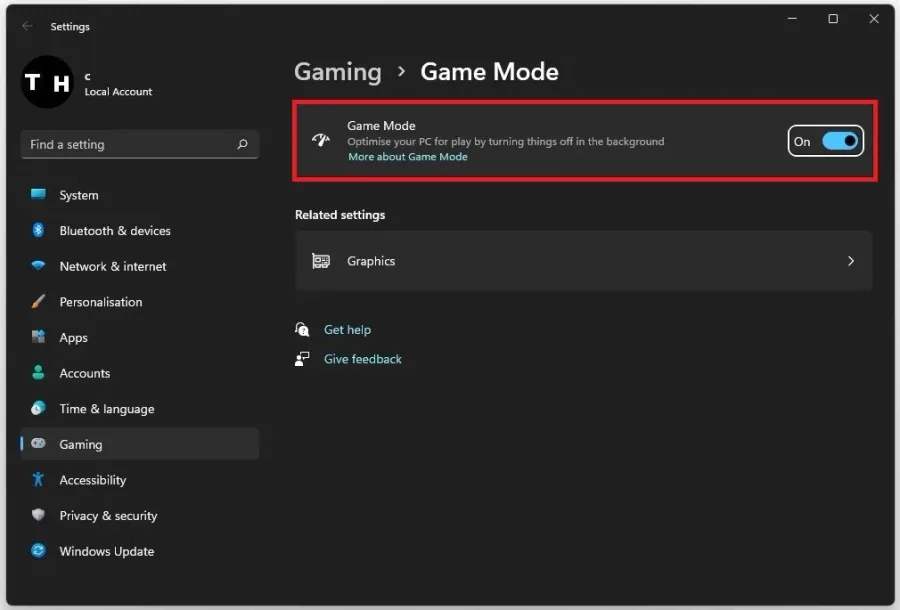
Enable Windows Game Mode
If you experience lag or stuttering while streaming with these settings, enable your game mode. In your start menu search, enter Game Mode and hit enter. You should enable Game Mode, which will improve your performance while streaming gameplay.
Video walkthrough
If it does not work
- If the current interface differs, compare it with the recorded video walkthrough.