

OBS Studio - Advanced Mic Settings (Noise Gate, Noise Removal, Compressor)
If you want to improve your audio quality while streaming or recording, you'll want to use OBS Studio's advanced microphone settings. With features such as a noise gate, noise removal, and compressor, you can ensure that your voice comes through crystal clear without distracting background noise. Optimizing these settings can take your audio quality to the next level and provide your audience with an immersive and professional experience. In this article, we'll walk you through how to use these features effectively and show you how to get the most out of your microphone setup in OBS Studio. Let's get started!
Optimize the Microphone Properties
Select the correct microphone in your Audio Mixer. Click on the gear icon for your Mic/Auxiliary device and select Properties.

OBS Studio > Audio Mixer > Properties
On the window, select the correct device from this drop-down menu and apply your changes.
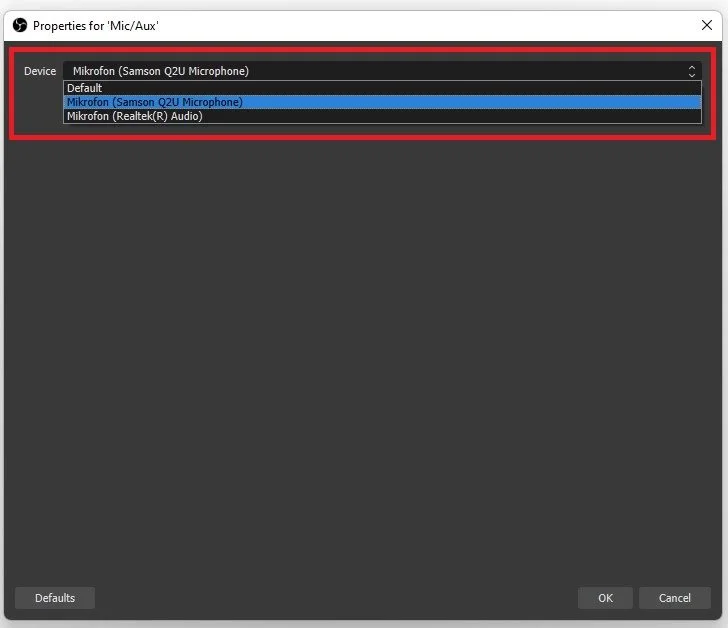
Audio Properties for Mic/Aux
Adjust the Microphone Audio Level
When done, ensure the level slider is adjusted to around -2db. This will prevent the audio from clipping and sounding horrible when you’re too loud.
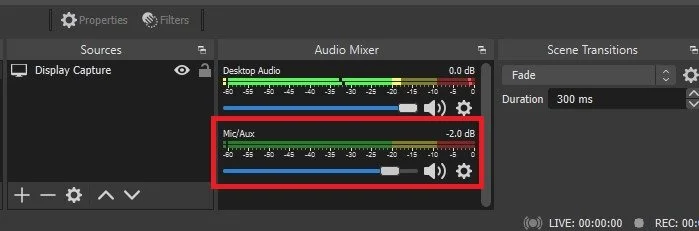
Change the microphone input volume in OBS
Apply Microphone Filters within OBS Studio
Next, we will take a look at your microphone filters. Navigate back to your mic settings and select Filters.
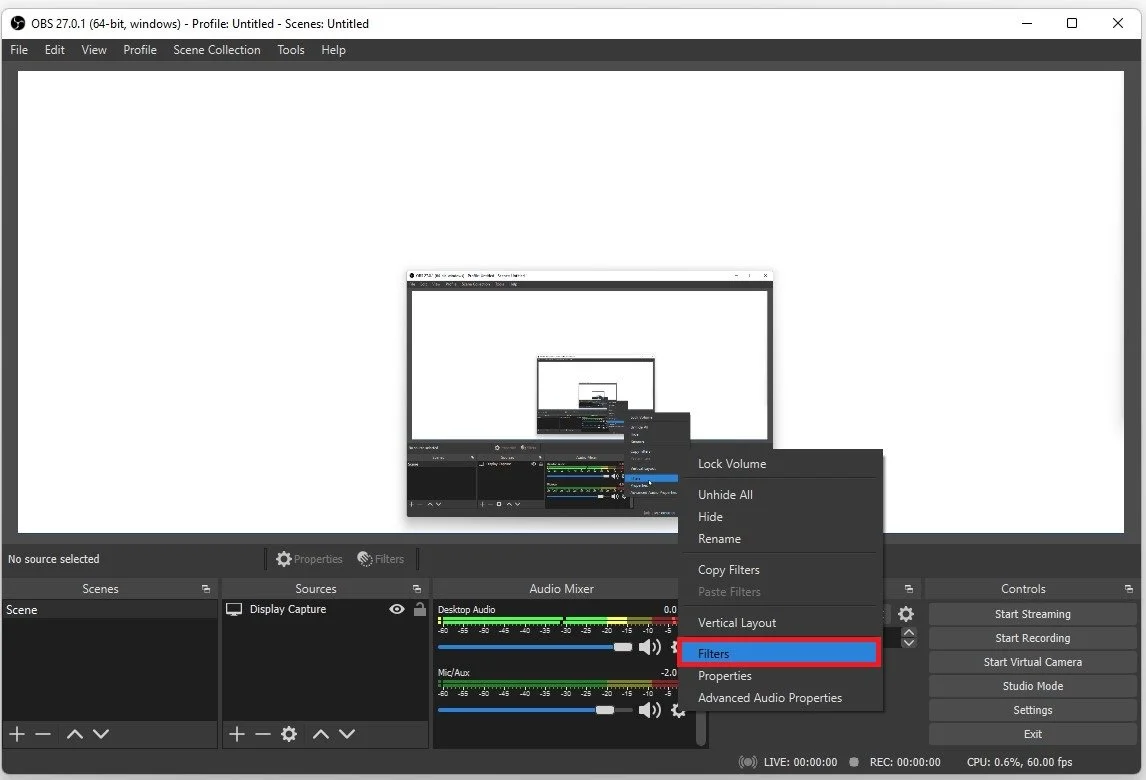
OBS Studio > Audio Mixer > Filters
Noise Suppression
This window should be blank the first time you set this up. To add a filter, click the plus icon on the bottom left. Select Noise Suppression. Specify the name of your filter if you wish to do so, and then click on Ok. This will set the default Noise Suppression to your microphone and should help reduce the background noise from your mic. If the microphone is not correctly picking up your voice, reduce the Noise Suppression to around -18 dB.
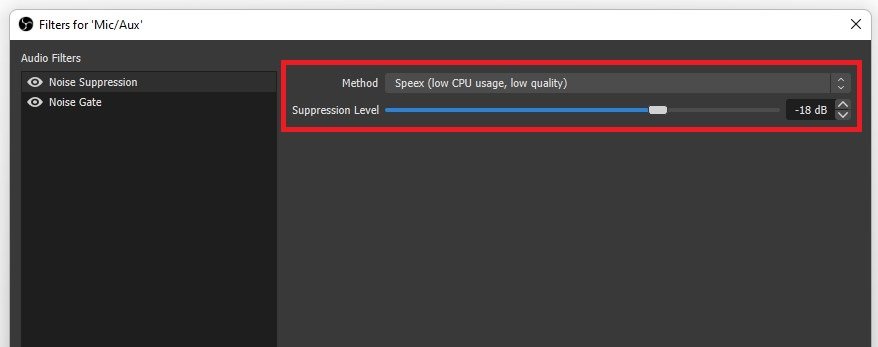
OBS Audio Filters > Noise Suppression
Noise Gate
After tweaking this setting, you can close this window and add the Noise Gate filter. This will make your microphone completely silent when you don’t speak. Again, set the name if you want to, you can set the Close and Open Threshold for your Noise Gate. The close threshold will mute sound once your mic is below that level. You should look at your Audio Mixer, as it will show you which level is needed to set this threshold. Leave the Attack Time, Hold Time, and Release Time options as they are by default.
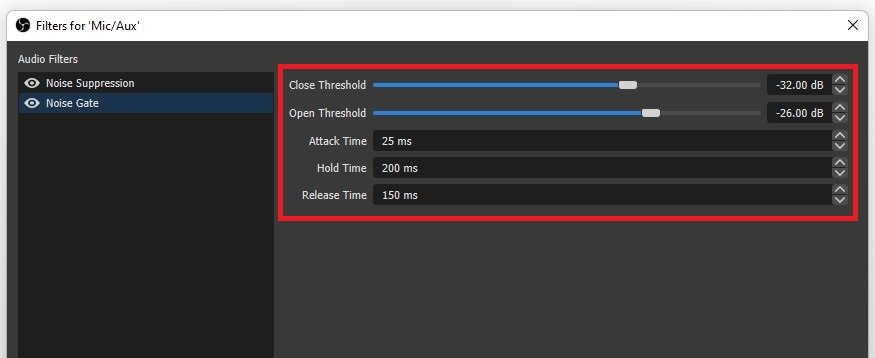
OBS Audio Filters > Noise Gate
Compressor
Add a Compressor Filter to your microphone to level out your audio input level. This filter will automatically turn your audio level up or down, depending on whether it’s too loud or quiet. After adding the filter, set the Compression Ratio to 10. Set the Threshold to -18dB, and leave the other settings as they are. To remove a filter, right-click the filter you wish to remove and select Remove.
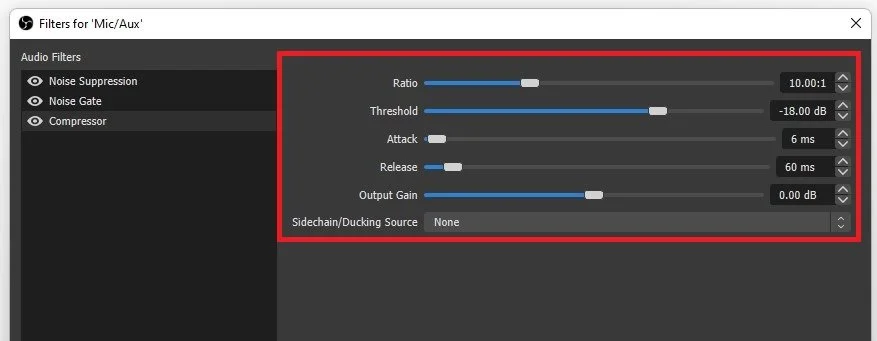
OBS Audio Filters > Compressor


