Windows 11 · Windows
How to Change OBS Output Resolution for Streaming & Recording
Original source date
Answer
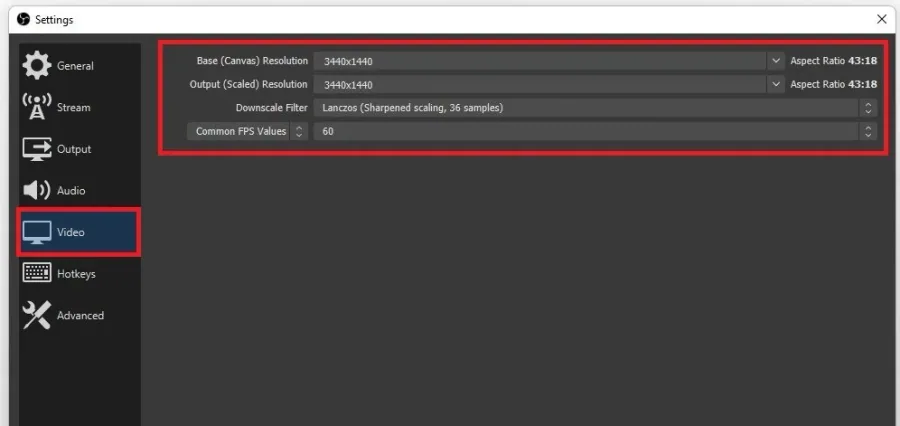
Open up OBS Studio. On the window, navigate to your Settings. In the Video tab, you can change your Base or Canvas Resolution. This option should be set to your native monitor resolution, as this is the resolution OBS will pick up to record. Your Base Resolution should be presented in this drop-down menu, but in case you’re unsure about your native resolution, right-click your desktop and select Display Settings.
Change the OBS Base & Canvas Resolution
Open up OBS Studio. On the window, navigate to your Settings.
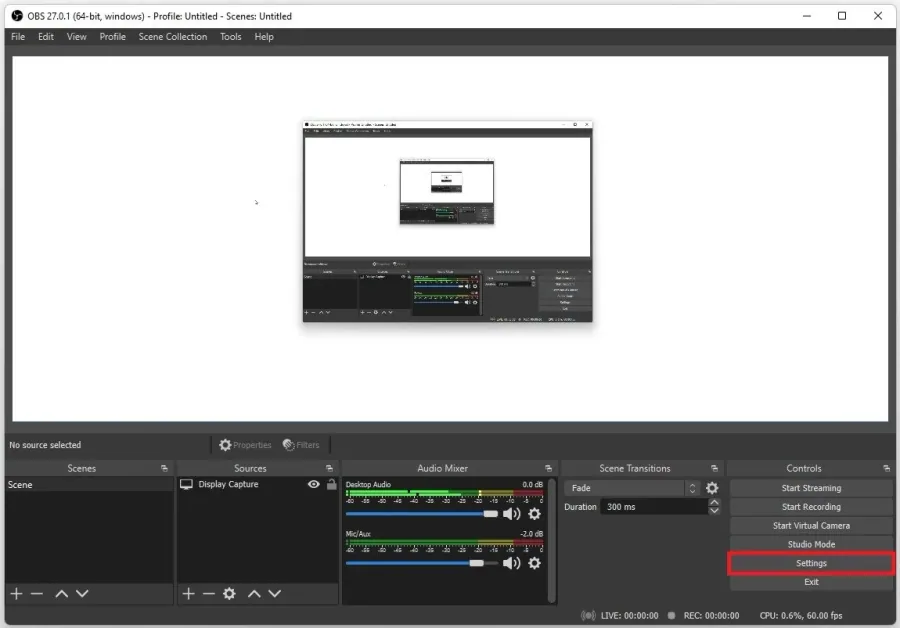
In the Video tab, you can change your Base or Canvas Resolution
In the Video tab, you can change your Base or Canvas Resolution. This option should be set to your native monitor resolution, as this is the resolution OBS will pick up to record. Your Base Resolution should be presented in this drop-down menu, but in case you’re unsure about your native resolution, right-click your desktop and select Display Settings.
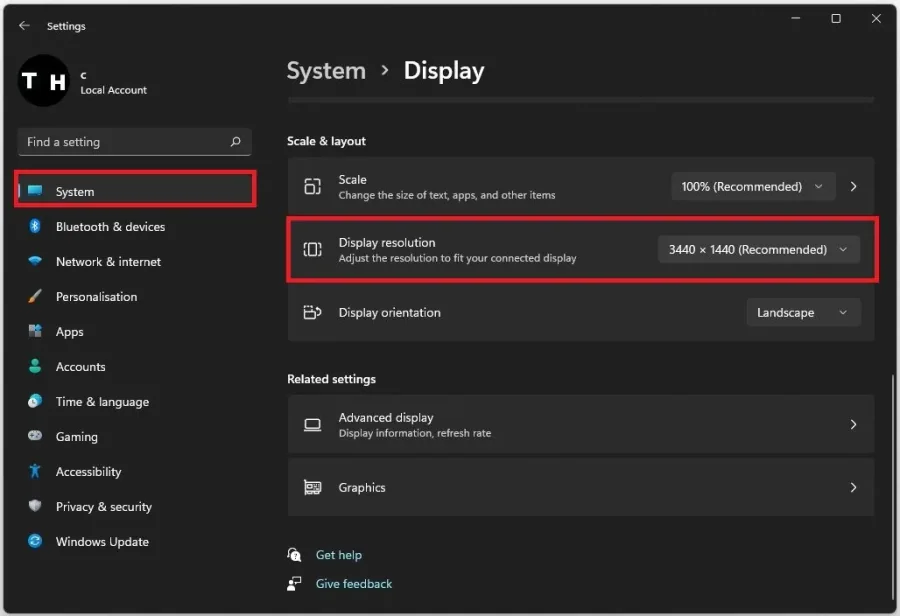
Preview your Native Monitor Resolution
Scroll down to your Scale & Layout options to preview your recommended native monitor resolution.
Set a Scaled Resolution for OBS Studio
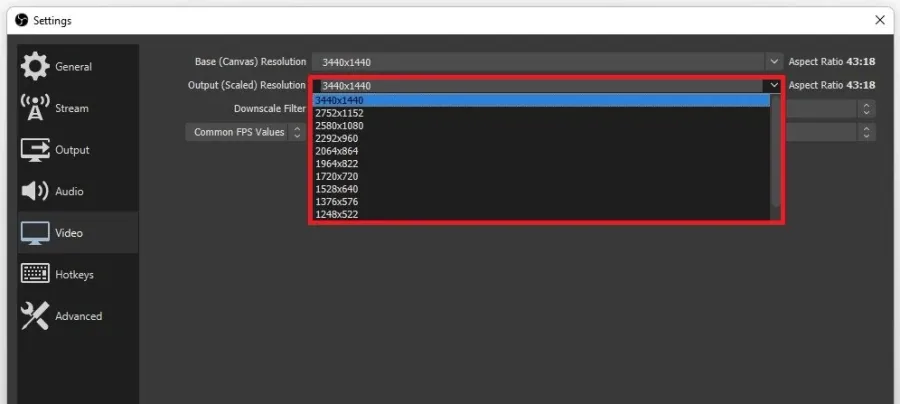
Next, in your OBS Studio video settings, you can change your Output, or Scaled Resolution. This is the resolution you will be recording or streaming in. It’s suggested to keep the same aspect ratio of 16:9 when streaming or recording, as most services use this aspect ratio. You can choose another resolution in this drop-down menu or write out the new one you wish to use.
Video walkthrough
If it does not work
- If the current interface differs, compare it with the recorded video walkthrough.