Gaming · Platform not recorded
Roblox Studio - How To Change Maximum Player Count
Original source date
Answer
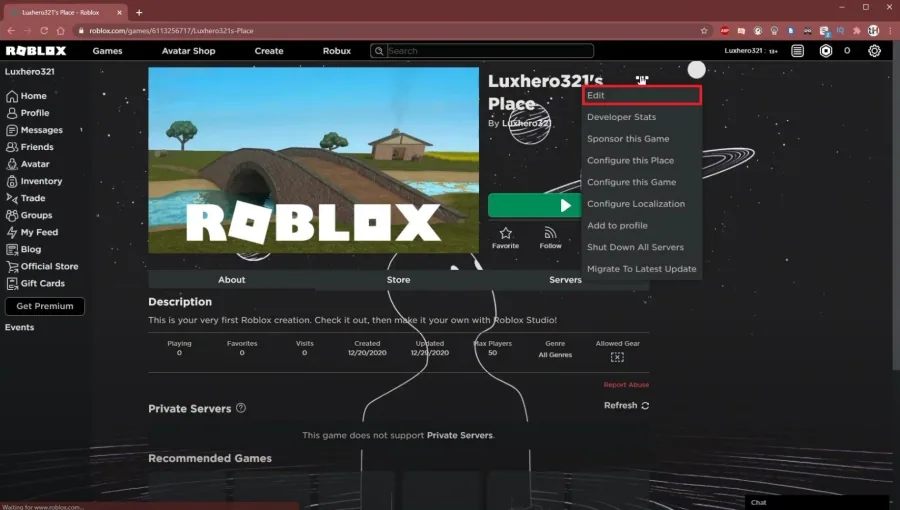
Navigate to your Roblox Profile and select Creations. Click on the creation which you want to edit. For your creation, click on the burger menu on the top right and select Edit. This will open up Roblox Studio, and it will load up your creation. After a second of loading, navigate to the Home tab select Game Settings.
Edit your Roblox Experience in Roblox Studio
Navigate to your Roblox Profile and select Creations. Click on the creation which you want to edit. For your creation, click on the burger menu on the top right and select Edit. This will open up Roblox Studio, and it will load up your creation.
Change the Max Player Count for your Roblox Game
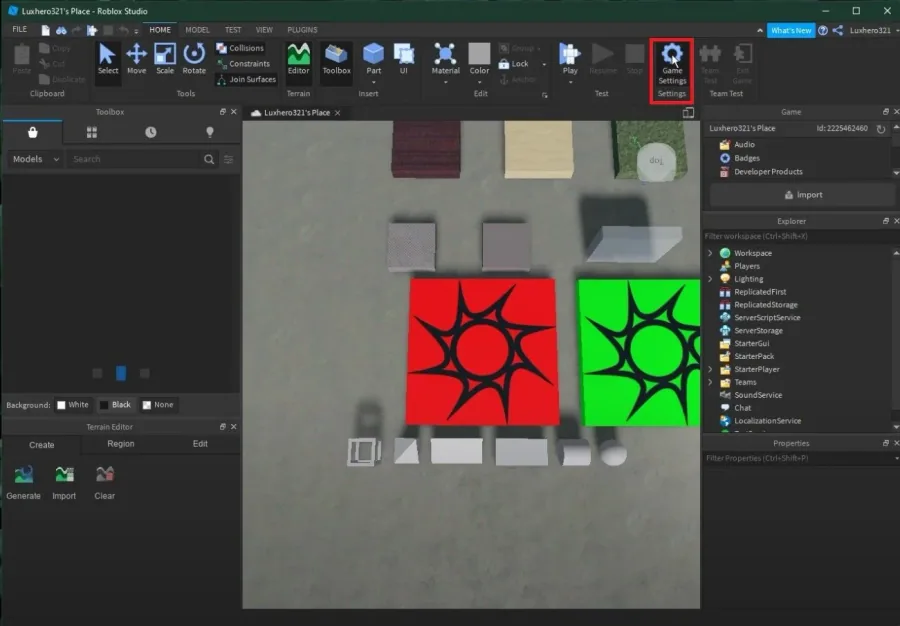
After a second of loading, navigate to the Home tab select Game Settings.
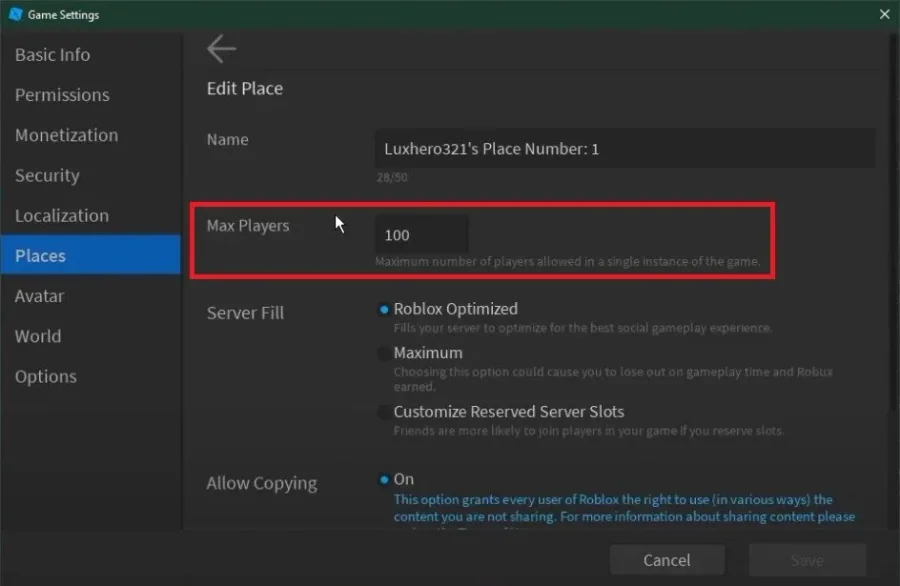
On this window, navigate to Places
On this window, navigate to Places.

You can preview the place version, the maximum player count, and the burger menu…
You can preview the place version, the maximum player count, and the burger menu for each. Select the menu, and under Edit, you will be able to change the maximum player count. This value has to be between 1 and 200.
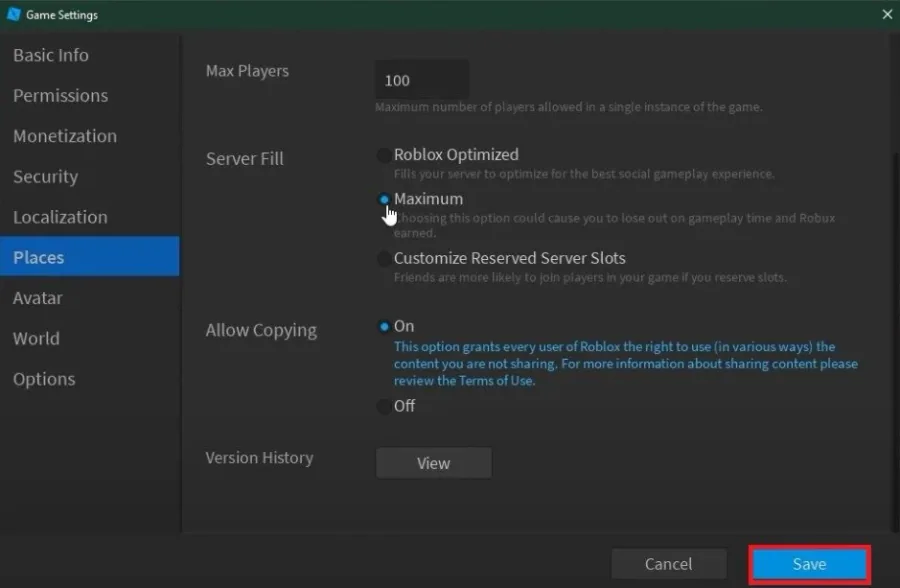
Below, you can change the server fill option from Optimized, which will optimize…
Below, you can change the server fill option from Optimized, which will optimize your place for the best social gameplay experience to Maximum, which will fill up one space rather than all at the same time.
Video walkthrough
If it does not work
- If the current interface differs, compare it with the recorded video walkthrough.