Adobe · Platform not recorded
Create T-Shirt Design in Photoshop - Tutorial & Template
Original source date
Answer
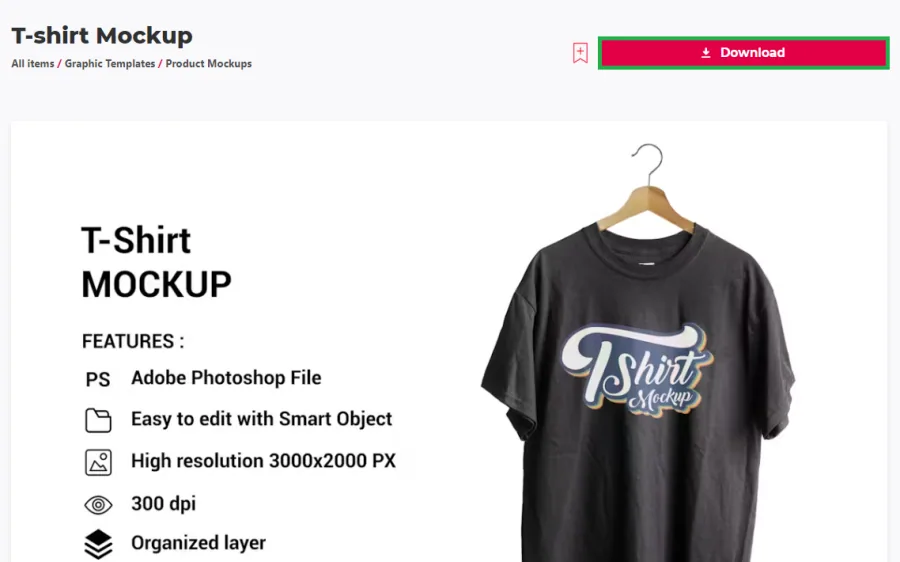
Creating a custom T-shirt design in Photoshop starts with a simple template download. Here’s how: Acquire the Template: Visit this Envato Elements page and sign up. This gives you access to a wide range of resources, including the specific T-shirt design template, as well as other valuable tools and templates suitable for Photoshop.; Download the Template: The downloading step is straightforward and fast. Once you initiate the download, the template file will typically be saved in a compressed format in your computer's downloads folder.
Obtain and Set Up Your T-Shirt Design Template
Creating a custom T-shirt design in Photoshop starts with a simple template download. Here’s how: Acquire the Template: Visit this Envato Elements page and sign up. This gives you access to a wide range of resources, including the specific T-shirt design template, as well as other valuable tools and templates suitable for Photoshop.; Download the Template: The downloading step is straightforward and fast. Once you initiate the download, the template file will typically be saved in a compressed format in your computer's downloads folder.
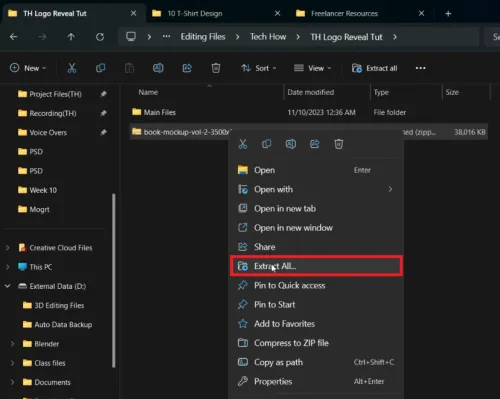
Extract the Template File: On Windows: Right-click on the downloaded .zip file an…
Extract the Template File: On Windows: Right-click on the downloaded .zip file and select the option to extract it in your downloads folder.; On Mac: Double-click the .zip file on macOS to extract it. Open the Template in Photoshop: Once extraction is complete, a new folder containing the Photoshop file (PSD) of the template will appear. Open Photoshop, and simply drag and drop the PSD file into the Photoshop workspace to begin your design project. With these steps, your template is ready to be transformed into a unique T-shirt design!
Customize Your T-Shirt Design in Photoshop
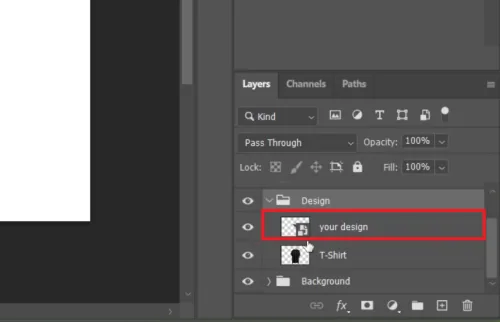
Transforming the default template into your personalized T-shirt design is a straightforward process. Here's how to import your design and make the necessary adjustments: Replace the Default Logo:Initially, you'll notice the default Envato logo on the T-shirt template.To customize, use your own logo or design. Ensure that your logo is in PNG format or any other format supporting a transparent background for best results.; Initially, you'll notice the default Envato logo on the T-shirt template.; To customize, use your own logo or design. Ensure that your logo is in PNG format or any other format supporting a transparent background for best results.; Access the Design Layer:In Photoshop, look toward the lower-right corner and locate the "Design" folder.Expand this folder by clicking the arrow beside it.Find the layer with the default logo and double-click it. This action opens a new tab specifically for customizing your T-shirt design.; In Photoshop, look toward the lower-right corner and locate the "Design" folder.; Expand this folder by clicking the arrow beside it.; Find the layer with the default logo and double-click it. This action opens a new tab specifically for customizing your T-shirt design.
Insert Your Design:Open your file explorer and drag your logo or design file into…
Insert Your Design:Open your file explorer and drag your logo or design file into this new tab.Adjust the size and position of your logo to align with the T-shirt template. Use the shortcut CTRL + T (or CMD + T on Mac) to resize and reposition your design.Once perfectly placed, press the "Enter" key to finalize the placement.; Open your file explorer and drag your logo or design file into this new tab.; Adjust the size and position of your logo to align with the T-shirt template. Use the shortcut CTRL + T (or CMD + T on Mac) to resize and reposition your design.; Once perfectly placed, press the "Enter" key to finalize the placement.; Remove the Original Logo:In the layers panel, locate the original logo layer.Click on the eye icon next to this layer to hide it, making your design the primary feature on the T-shirt.; In the layers panel, locate the original logo layer.; Click on the eye icon next to this layer to hide it, making your design the primary feature on the T-shirt.; Save Your Custom Design:After making all the necessary adjustments and ensuring your design sits perfectly on the T-shirt, save your changes by pressing CTRL + S.; After making all the necessary adjustments and ensuring your design sits perfectly on the T-shirt, save your changes by pressing CTRL + S.

Preview and Save Your Custom T-Shirt Design in Photoshop
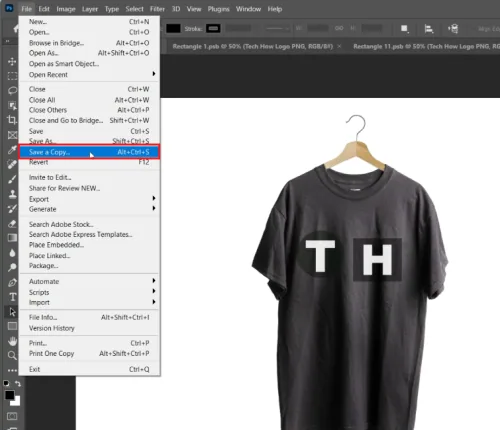
After customizing your T-shirt design, it's essential to preview and save your creation. Follow these easy steps: Preview the Design:Return to the original Photoshop file by clicking on the previous tab.Observe the changes you've made, now automatically applied to the T-shirt design. This step is crucial to ensure your adjustments look just as you intended on the actual template.; Return to the original Photoshop file by clicking on the previous tab.; Observe the changes you've made, now automatically applied to the T-shirt design. This step is crucial to ensure your adjustments look just as you intended on the actual template.; Save the Final Design:Once satisfied with the design, it’s time to save your work.Go to the top menu and click on “File.”Choose “Save a Copy” from the dropdown menu. This option allows you to save a new version without altering the original file.In the save dialog, rename your file to reflect your design or project name.Select the file format. Choose “.PNG” if you require a transparent background for your design, which is ideal for T-shirt printing. If the background is not a concern, you may opt for the “JPEG” format.; Once satisfied with the design, it’s time to save your work.; Go to the top menu and click on “File.”; Choose “Save a Copy” from the dropdown menu. This option allows you to save a new version without altering the original file.; In the save dialog, rename your file to reflect your design or project name.; Select the file format. Choose “.PNG” if you require a transparent background for your design, which is ideal for T-shirt printing. If the background is not a concern, you may opt for the “JPEG” format.; Completion:With these steps completed, you now have a professionally designed, custom T-shirt ready in Photoshop. Whether it's for personal use, a client's request, or your brand's merchandise, your design is now ready to be showcased or sent for printing.; With these steps completed, you now have a professionally designed, custom T-shirt ready in Photoshop. Whether it's for personal use, a client's request, or your brand's merchandise, your design is now ready to be showcased or sent for printing. These simple steps ensure that your T-shirt design not only meets your creative vision but is also ready for practical use or commercial purposes.
Affiliate Disclosure: Some of the links on this page are affiliate links, which m…
Affiliate Disclosure: Some of the links on this page are affiliate links, which means that we may earn a commission if you click through and make a purchase from our recommended template providers. This doesn’t affect the price you pay and helps us maintain this site to continue providing you with the best template recommendations.
Video walkthrough
If it does not work
- Do I need advanced Photoshop skills to follow this tutorial?. Not at all! This tutorial is designed for users of all skill levels. Basic knowledge of navigating through Photoshop and using tools like drag-and-drop and layer adjustments is sufficient.
- Can I use any image format for my T-shirt design?. While you can use various image formats, it's recommended to use PNG files for their transparent background capabilities. This ensures your design integrates seamlessly with the T-shirt template.
- Is it possible to use this template for commercial purposes?. Yes, you can use this template for commercial projects. However, ensure that your Envato Elements subscription covers commercial use and that any additional assets used are also licensed for commercial purposes.
- How can I ensure my design is correctly positioned on the T-shirt?. Use the transform tools in Photoshop (CTRL + T or CMD + T on Mac) to adjust the size and position of your design. It’s crucial to frequently preview your work to ensure accurate placement and sizing.
- What should I do if the final design doesn’t look right on the T-shirt?. If your design doesn’t appear as expected, recheck the layer positioning and scaling in Photoshop. Ensure your design layer is correctly placed within the "Design" folder and properly aligned on the T-shirt template.