Adobe · Platform not recorded
Create Underwater Photo Effect in Photoshop - Tutorial & Template
Original source date
Answer
Create stunning underwater effects in your photos with these easy steps: Visit Envato Elements:Click here to access the underwater photo effect template on Envato Elements.; Click here to access the underwater photo effect template on Envato Elements.; Sign Up for Access:Register on Envato Elements to download the underwater photo effect template. This membership also gives you access to a plethora of additional Photoshop resources like add-ons, plugins, and more templates.; Register on Envato Elements to download the underwater photo effect template. This membership also gives you access to a plethora of additional Photoshop resources like add-ons, plugins, and more templates.
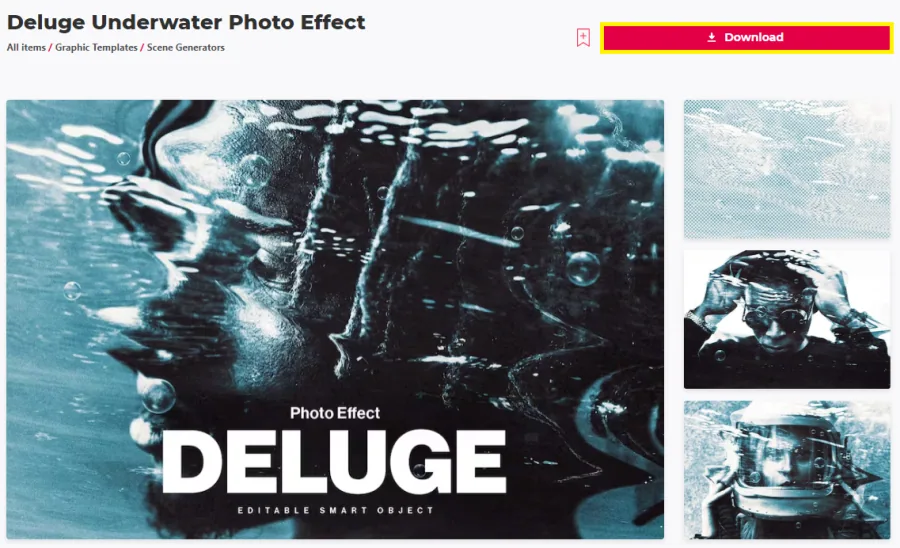
Obtaining the Template from Envato Elements
Create stunning underwater effects in your photos with these easy steps: Visit Envato Elements:Click here to access the underwater photo effect template on Envato Elements.; Click here to access the underwater photo effect template on Envato Elements.; Sign Up for Access:Register on Envato Elements to download the underwater photo effect template. This membership also gives you access to a plethora of additional Photoshop resources like add-ons, plugins, and more templates.; Register on Envato Elements to download the underwater photo effect template. This membership also gives you access to a plethora of additional Photoshop resources like add-ons, plugins, and more templates.
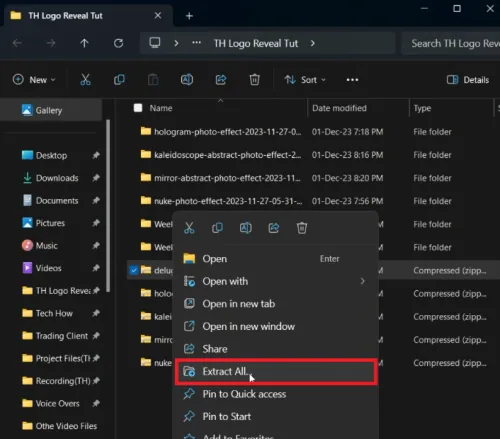
Extracting the Template File
After downloading the template: Locate Your Download:Find the downloaded .zip file in your downloads folder.; Find the downloaded .zip file in your downloads folder.; Extraction Process:For Windows Users: Right-click the .zip file and select 'Extract All'. Choose the downloads folder or your desired location for the extracted files.For Mac Users: Double-click the .zip file. It will automatically extract in the same folder.; For Windows Users: Right-click the .zip file and select 'Extract All'. Choose the downloads folder or your desired location for the extracted files.; For Mac Users: Double-click the .zip file. It will automatically extract in the same folder.; Access the Template:A new folder will be created post-extraction, containing the Photoshop template file.; A new folder will be created post-extraction, containing the Photoshop template file.
Setting Up Your Design for the Underwater Effect
Transform your images with an immersive underwater effect by following these steps: Open the Template in Photoshop:Find the Photoshop file in your extracted folder.Drag and drop this file into your Photoshop workspace. Note that loading times can vary depending on your computer's performance.; Find the Photoshop file in your extracted folder.; Drag and drop this file into your Photoshop workspace. Note that loading times can vary depending on your computer's performance.; Prepare for Editing:Once the template is loaded, you'll see the underwater effect template ready for customization.; Once the template is loaded, you'll see the underwater effect template ready for customization.
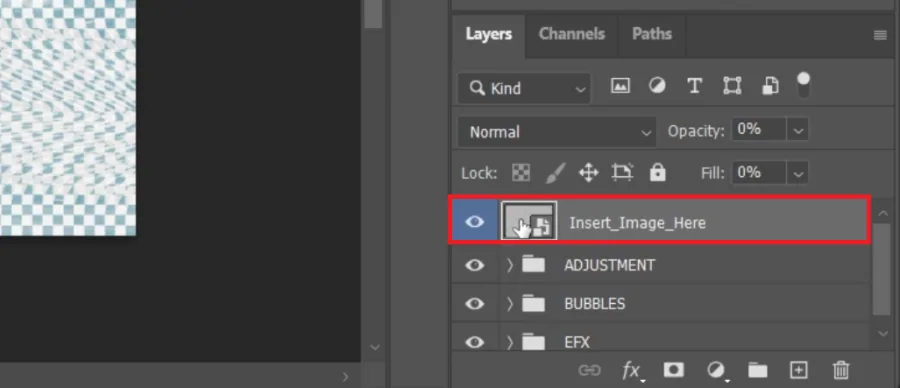
Integrating Your Artwork with the Underwater Template
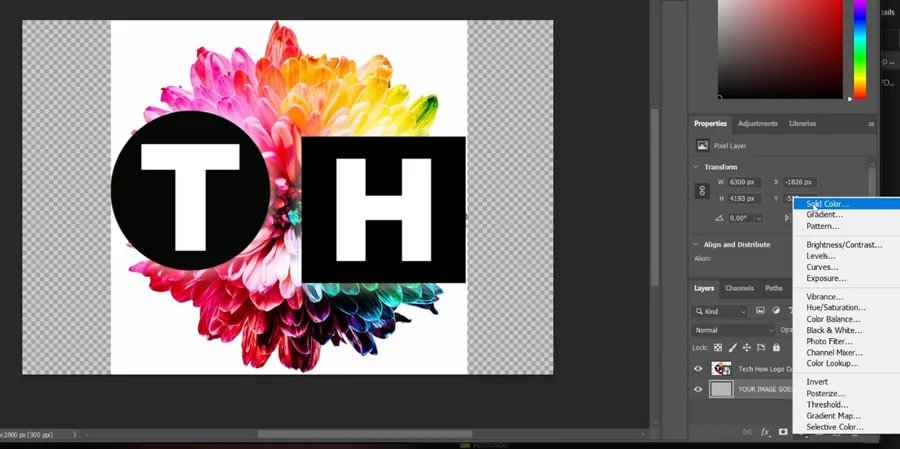
Enhance your artwork with the underwater effect: Access the Smart Object Layer:In the layers panel, locate the smart object layer, typically marked for easy identification, and double-click it. This will open a new tab featuring a canvas with a placeholder image.; In the layers panel, locate the smart object layer, typically marked for easy identification, and double-click it. This will open a new tab featuring a canvas with a placeholder image.; Insert Your Artwork:Ignore the placeholder. Instead, add your own artwork, preferably in PNG format, onto the canvas.Adjust the size and position of your artwork to fit the dimensions of the canvas, ensuring a cohesive underwater effect.; Ignore the placeholder. Instead, add your own artwork, preferably in PNG format, onto the canvas.; Adjust the size and position of your artwork to fit the dimensions of the canvas, ensuring a cohesive underwater effect.; Customize for a Seamless Effect:Once your artwork is correctly placed, press 'Enter' to confirm.In the layers panel, select the existing layer and look for an option to change its color. Choose 'Solid Color'.Use the eyedropper tool to select a color from your artwork that matches the background, enhancing the unity of the effect with your design.; Once your artwork is correctly placed, press 'Enter' to confirm.; In the layers panel, select the existing layer and look for an option to change its color. Choose 'Solid Color'.; Use the eyedropper tool to select a color from your artwork that matches the background, enhancing the unity of the effect with your design.
Finalizing Your Enhanced Image
Once you've applied the underwater effect to your artwork in Photoshop, follow these steps to save and preview your work: Save Your Adjustments:After you've finished editing on the canvas, save your work by pressing 'Ctrl + S' on Windows or 'Cmd + S' on Mac.; After you've finished editing on the canvas, save your work by pressing 'Ctrl + S' on Windows or 'Cmd + S' on Mac.; Preview the Underwater Effect:Switch back to the initial Photoshop tab where you opened the template to preview your artwork now enhanced with the underwater effect.; Switch back to the initial Photoshop tab where you opened the template to preview your artwork now enhanced with the underwater effect.
Saving the Final Image
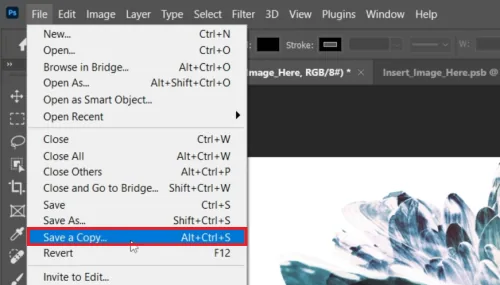
When you're satisfied with your artwork: Prepare to Export:Go to the “File” menu on the Photoshop toolbar.; Go to the “File” menu on the Photoshop toolbar.; Exporting Your Project:Choose “Save a Copy” from the dropdown menu. This step allows you to save the final version of your project while preserving the original file.; Choose “Save a Copy” from the dropdown menu. This step allows you to save the final version of your project while preserving the original file.; Rename and Select File Format:Rename your project for easy identification.Select the file format based on your requirement:Opt for .PNG if you're exporting an image with a transparent background.Choose JPEG for images with a background.; Rename your project for easy identification.; Select the file format based on your requirement:Opt for .PNG if you're exporting an image with a transparent background.Choose JPEG for images with a background.; Opt for .PNG if you're exporting an image with a transparent background.; Choose JPEG for images with a background. These steps will help you effectively save and export your design with the underwater photo effect, ensuring a visually appealing and artistically enriched outcome.
Affiliate Disclosure: Some of the links on this page are affiliate links, which m…
Affiliate Disclosure: Some of the links on this page are affiliate links, which means that we may earn a commission if you click through and make a purchase from our recommended template providers. This doesn’t affect the price you pay and helps us maintain this site to continue providing you with the best template recommendations.
Video walkthrough
If it does not work
- Where can I find the underwater photo effect template for Photoshop?. The template is available on Envato Elements. Access it via the link in the article and sign up to download the template and other creative resources.
- How do I add my artwork to the underwater effect template in Photoshop?. Open the template in Photoshop, locate the smart object layer, double-click it, and replace the placeholder with your artwork in PNG format for optimal results.
- Can I save my Photoshop project with the underwater effect in different file formats?. Yes, you can save your project in various formats. Choose .PNG for a transparent background and JPEG for images with a background.
- Do I need advanced Photoshop skills to use this template?. No, the tutorial is designed to be easy to follow, making it suitable for Photoshop users of all skill levels.
- How can I ensure the best quality for my underwater effect project in Photoshop?. Use high-resolution images for your artwork and follow the tutorial steps carefully. Save the final image in the appropriate file format for the best quality.