Create Nuke Photo Effect in Photoshop - Tutorial & Template
Introduction
Unleash the power of digital art in Photoshop with our tutorial on creating a stunning Nuke photo effect. This guide simplifies the process of adding a dramatic, explosive touch to your images using a readily available template from Envato Elements. Ideal for artists and designers looking to infuse their work with high-impact visual effects, this tutorial provides a step-by-step approach to applying the Nuke effect. Whether you're enhancing personal projects or professional designs, you'll learn how to seamlessly integrate this dynamic effect with your artwork, ensuring a visually captivating result. Let's get ready to make your images explode with creativity!
Downloading and Extracting the Nuke Photo Effect Template
Accessing the Template from Envato Elements
Creating a Nuke effect in Photoshop starts with obtaining the right template:
Visit Envato Elements: Click here to reach the Nuke Photo effect template on the Envato Elements page.
Sign Up for Access: Register on Envato Elements. This gives you access to the Nuke photo effect template, along with a vast array of other Photoshop resources like add-ons, plugins, and more.

Download Nuke Photo Effect Template for Photoshop
Extracting the Template File
Once you have downloaded the template:
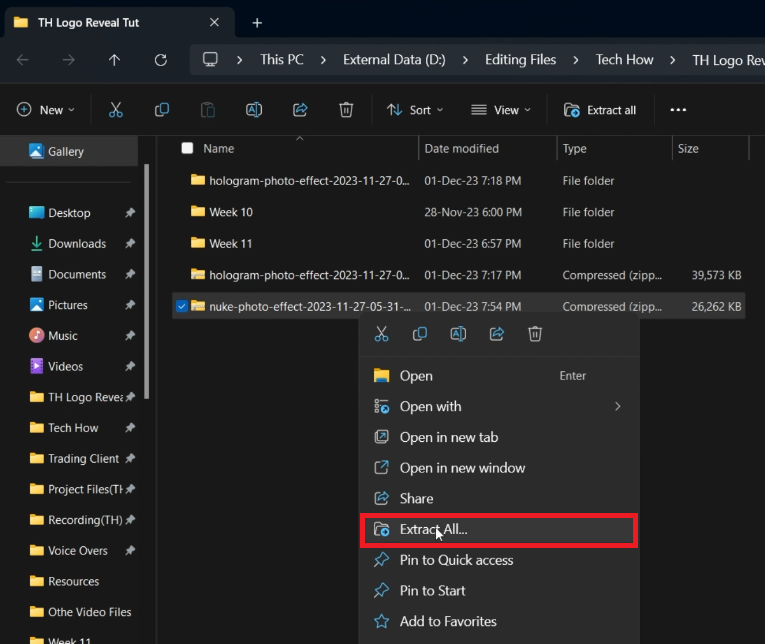
Find the Downloaded File: Look in your downloads folder for the newly downloaded .zip file.
Extracting Process:
For Windows Users: Right-click the .zip file and select 'Extract All'. Choose the downloads folder or another preferred location for extraction.
For Mac Users: Simply double-click the .zip file. MacOS will automatically extract the files to the same folder.
Access the Template: A new folder will appear after extraction, containing the Photoshop template file.
By completing these steps, you’re all set to begin your project in Photoshop, using the Nuke photo effect to add dramatic flair to your images.
Extract the downloaded template file
Editing Image Layer with Your Own Design for Nuke Effect
Importing the Nuke Effect Template into Photoshop
Start by setting up your project with these steps:
Open the Nuke Effect File:
Locate the Photoshop file in the extracted folder.
Drag and drop this file into your Photoshop workspace. The loading time might vary depending on your computer’s capabilities.
Prepare for Editing:
Once the interface loads, you’ll see the pre-set Nuke effect, ready to be customized with your artwork.
Access the editable layers for your nuke image effect template
Applying the Nuke Effect to Your Artwork
Now, integrate your own design with the Nuke effect:
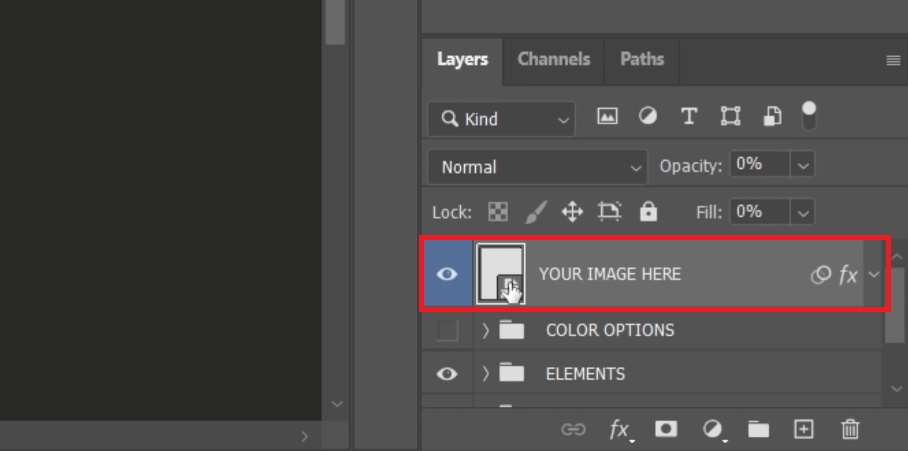
Access the Smart Object Layer:
In the layers panel, find the layer labeled as a smart object and double-click it. This opens a new tab with a placeholder image.
Replace Placeholder with Your Design:
Ignore the placeholder image. Instead, drag and drop your artwork onto the canvas.
Adjust your image to fit the dimensions of the canvas, ensuring the Nuke effect aligns well with your design.
Finalize the Image Placement:
Once your artwork is correctly positioned, hit 'Enter' to confirm.
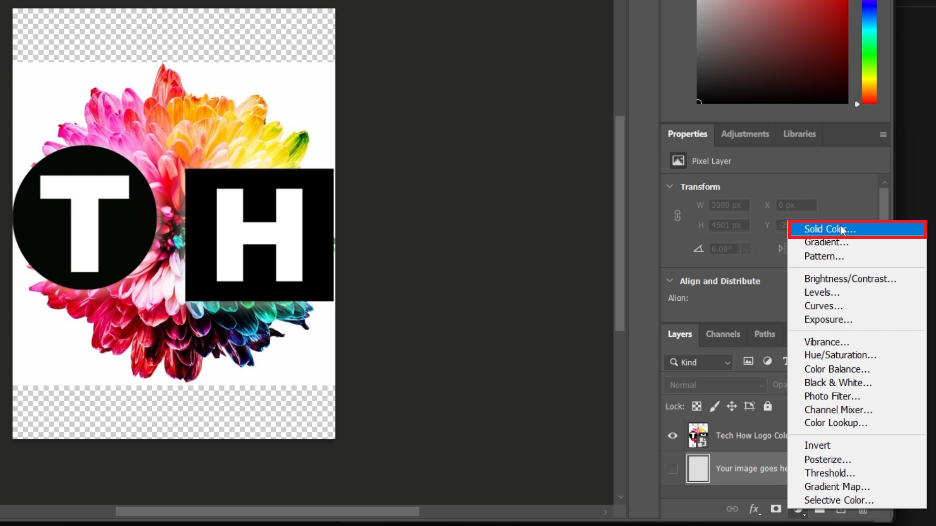
Customize the Layer Color:
Go back to the layers panel in the main file.
Select the relevant layer and click on 'Solid Color' to change its color.
Use the color dropper tool to pick a color from your image that complements the background, enhancing the overall Nuke effect.
Insert the image you want to add the nuke image effect to
Previewing and Saving Your Photoshop Project with Nuke Effect
Saving Adjustments and Previewing the Effect
After you have applied the Nuke effect to your artwork, follow these steps to save and preview your project:
Save Adjustments:
Press 'Ctrl + S' (on Windows) or 'Cmd + S' (on Mac) to save the changes you've made to your design.
Preview the Nuke Effect:
Switch back to the original Photoshop tab where you first opened the Nuke effect template.
Here, you'll see how your artwork has been transformed with the dynamic Nuke effect.
Finalizing and Exporting Your Design
When you are satisfied with the result:
Prepare for Final Save:
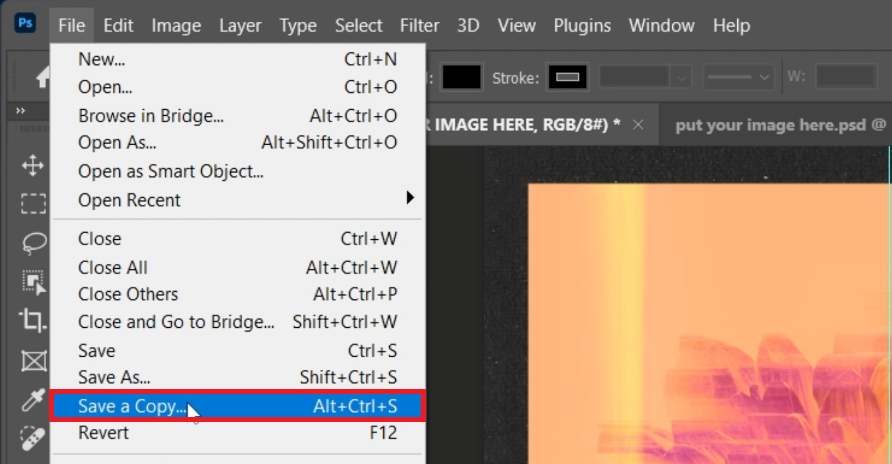
Navigate to the “File” menu in the Photoshop toolbar.
Saving a Copy of Your Project:
Select “Save a Copy” from the dropdown menu. This allows you to save the final version of your project while keeping the original file untouched.
Choose File Format and Rename:
Rename your file to distinguish it from the original template.
Decide on the file format based on your needs:
Choose .PNG for an image with a transparent background.
Opt for JPEG if retaining the background in the image.
By following these steps, you can successfully save and export your artwork with the Nuke photo effect, creating a striking and visually appealing piece.
Photoshop > File > Save A Copy…
-
The Nuke photo effect template is available on Envato Elements. You can download it after signing up, which also gives you access to a wide range of Photoshop resources.
-
Open the template in Photoshop, find the smart object layer, double-click it, and replace the placeholder image with your own design, adjusting it to fit the canvas.
-
Yes, you can save your project in various formats. For images with a transparent background, use .PNG, and for images with a background, use JPEG.
-
No, the template is user-friendly and designed for all skill levels. The tutorial guides you through each step, making it easy to apply the effect.
-
Ensure your original image is of high resolution, and follow the tutorial steps carefully for applying the effect. Save the final image in the appropriate file format for your needs.
Affiliate Disclosure: Some of the links on this page are affiliate links, which means that we may earn a commission if you click through and make a purchase from our recommended template providers. This doesn’t affect the price you pay and helps us maintain this site to continue providing you with the best template recommendations.