Design Minimalistic Can in Photoshop - Tutorial & Template
Introduction
Dive into the world of graphic design with our easy Photoshop tutorial on crafting a sleek, minimalistic can design! Perfect for both beginners and seasoned designers, this guide simplifies the process of transforming a basic template into a stunning piece of artwork. Using the intuitive tools of Photoshop, we'll walk you through customizing a pre-made template, available on Envato Elements, to showcase your creative flair. Learn how to seamlessly integrate your design onto the can's surface, making adjustments for a flawless finish. Whether you're designing for personal projects or professional branding, this tutorial offers valuable insights and straightforward steps to elevate your design skills. Stay tuned for an engaging, artistic journey in Photoshop!
Download & Extract the Can Design Template
Getting Your Template:
Start by obtaining the can design template. Visit the Envato Elements website and sign up. Membership gives you access to a vast array of resources, including the can design template, plus a multitude of other add-ons, plugins, and templates suitable for various Photoshop projects.
Downloading the Template:
Downloading is straightforward. After selecting the template, it will be saved in your computer's downloads folder. Typically, the file is compressed in a .zip format.
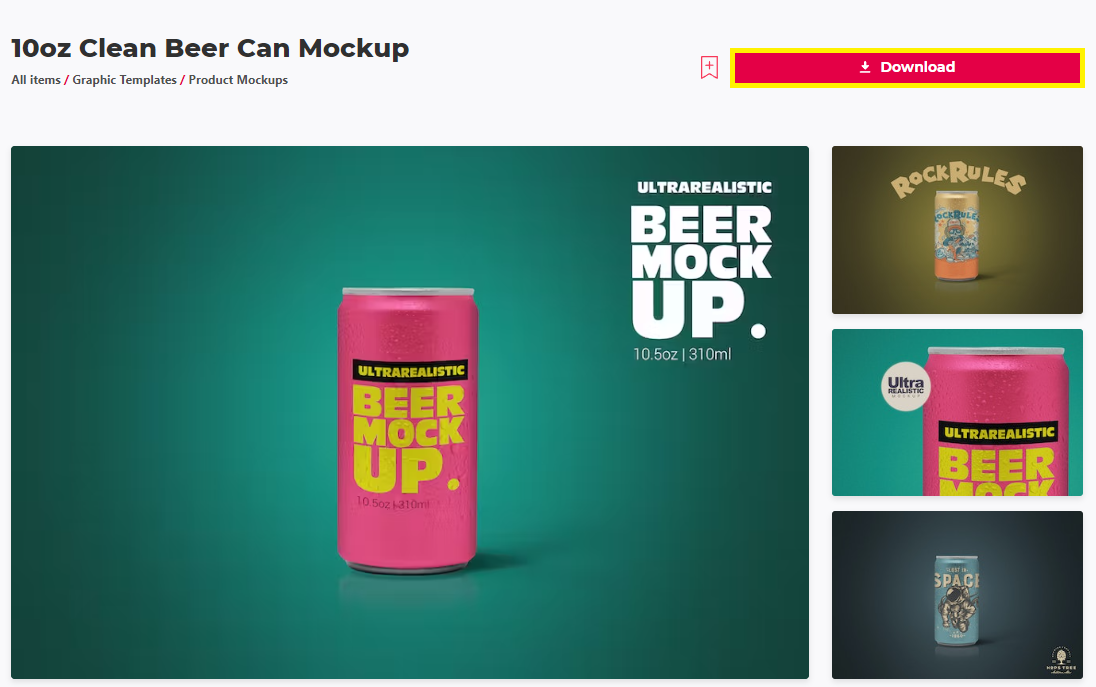
Download Clean Beer Can Mockup Template for Photoshop
Extracting the Template:
To access the template, you need to extract the .zip file:
On a Windows PC: Right-click the .zip file in your downloads folder and select 'Extract All' to begin extraction.
On a Mac: Double-click the .zip file. The extraction process will automatically start and the contents will be saved in the same folder.
Once extracted, the template will be ready for use in Photoshop, allowing you to begin your creative design journey.
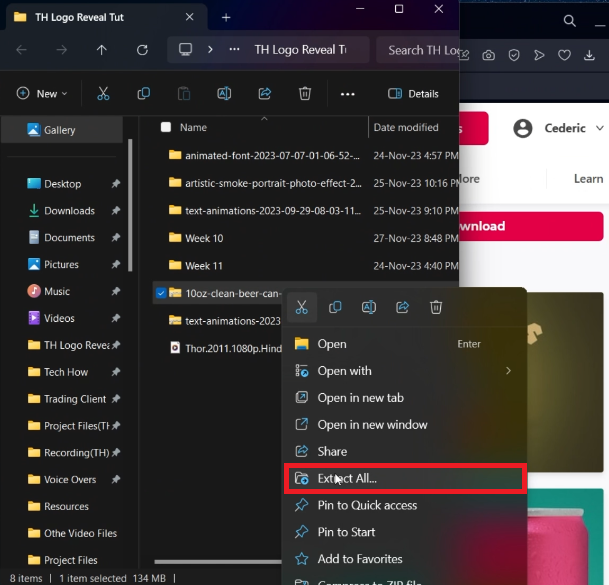
Extract the downloaded template file
Access and Edit the Can Design Template in Photoshop
Accessing the Template:
Locate the Extracted Folder: After extracting the template, you will find a new folder containing the Photoshop (.PSD) file.
Open the PSD File: Double-click the PSD file to open it in Photoshop. Loading time may vary based on your computer's performance.
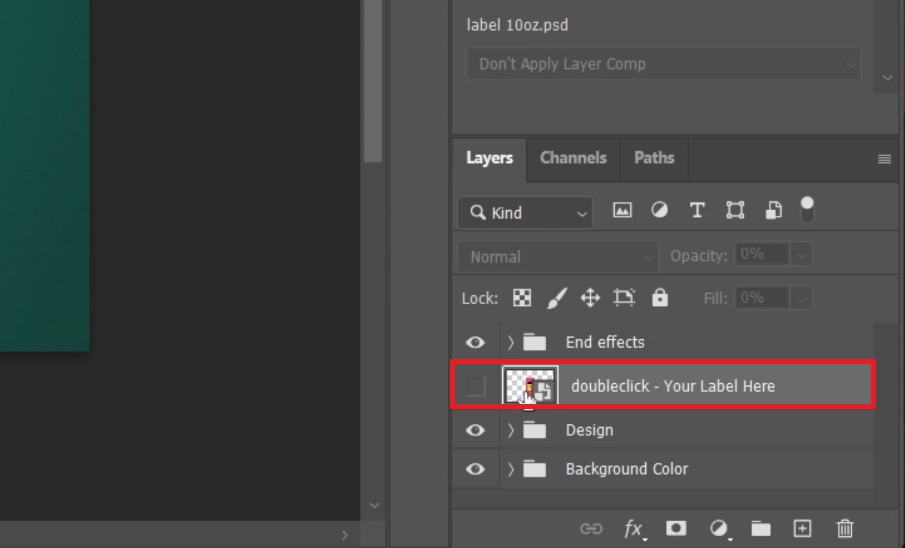
Access the editable layers for your can template
Editing the Template:
Navigating Layers: In Photoshop, go to the layers section located on the right-hand side of the interface.
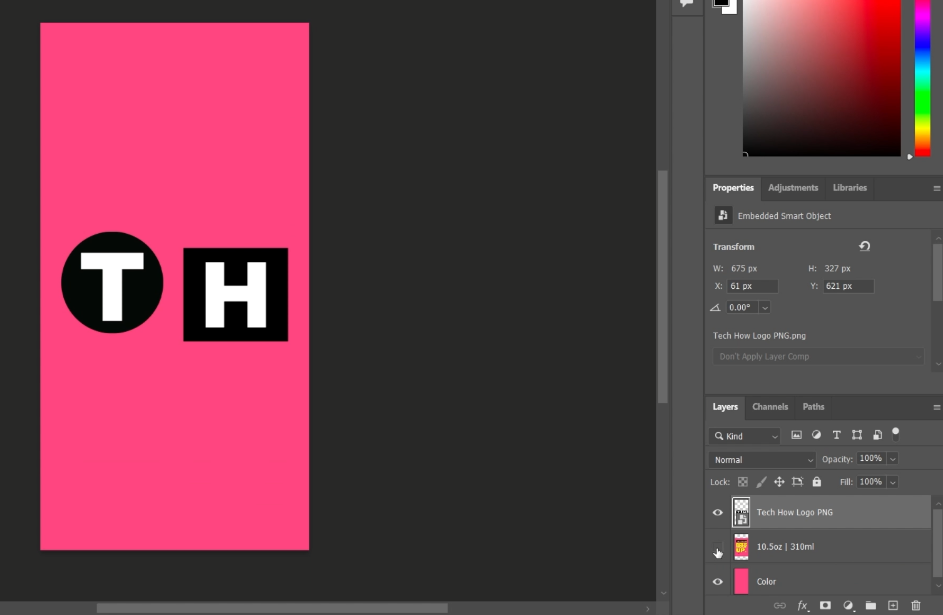
Accessing the Smart Object: Within the layers, locate and double-click on the smart object layer. This action will open a new tab with a canvas displaying a placeholder image.
Customizing with Your Artwork:
Replacing Placeholder: Drag and drop your artwork onto the canvas, replacing the placeholder.
Adjusting Artwork: Ensure your artwork fits well within the canvas dimensions. Adjust the size and positioning of your image for a perfect fit.
Adding Text: Optionally, add text to your design.
File Type Tip: For a seamless design, use artwork with a transparent background, like a .PNG file, for better integration with the can mockup.
Edit the template image layers
Preview and Export Your Customized Can Design in Photoshop
Finalizing and Saving the Design:
Confirm Artwork Placement: After positioning your artwork, press 'Enter' to finalize the placement.
Hide Placeholder Layer: Look for the eye icon in the lower-right corner of the Photoshop window. Click on this to hide the previous placeholder layer, revealing your design.
Save the Changes:
Windows Users: Use the shortcut 'CTRL + S' to save your edits.
Mac Users: Use 'CMD + S' for saving.
Previewing the Edited Design:
Switch to Original File: Navigate back to the original tab in Photoshop to preview how your design has been integrated with the can mockup.
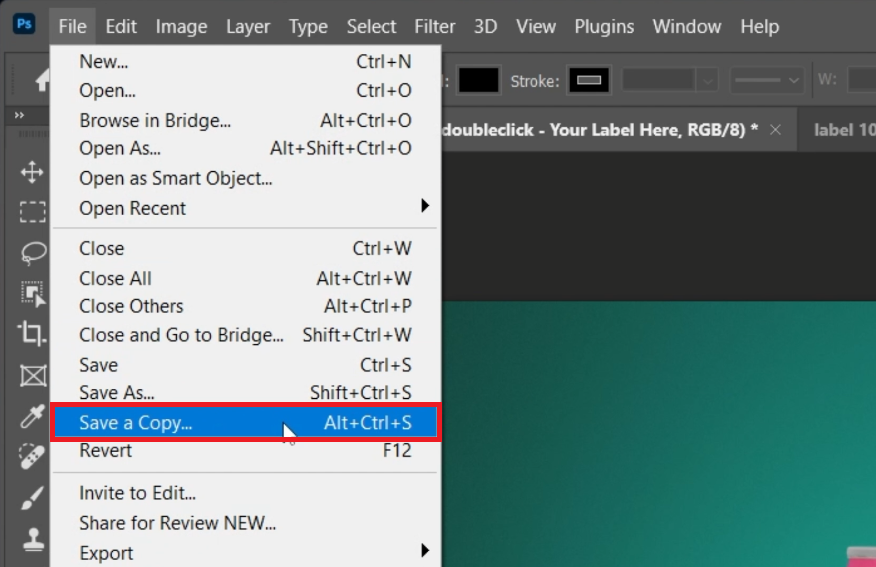
Exporting the Final Design:
Go to 'File': On the Photoshop toolbar, select 'File'.
Saving Options:
Save a Copy: Choose 'Save a Copy' to create a final version of your design.
Renaming: Rename the file appropriately to reflect the content or project.
Select File Format:
Transparent Background: Choose '.PNG' if your design requires a transparent background.
Standard Background: Select 'JPEG' for a regular background.
By following these steps, you ensure that your custom can design is saved and exported correctly, ready for use in presentations, marketing materials, or any other desired applications.
Photoshop > File > Save A Copy…
-
Yes, the template is generally compatible with most recent versions of Photoshop. However, for the best experience, using the latest version is recommended for full feature accessibility.
-
Focus on adjusting your artwork within the smart object canvas. Make sure the dimensions match the canvas size for a seamless fit. Using the transform tool (CTRL + T) can help in resizing your design appropriately.
-
Absolutely! You can add text layers to your design in the smart object canvas. Use the text tool (T) and experiment with different fonts and sizes to complement your design.
-
Use PNG format for designs requiring a transparent background, and JPEG for standard backgrounds. PNG is ideal for maintaining the quality of your design with transparency.
-
This depends on your subscription with Envato Elements. Ensure your usage complies with their licensing terms, especially for commercial projects.
Affiliate Disclosure: Some of the links on this page are affiliate links, which means that we may earn a commission if you click through and make a purchase from our recommended template providers. This doesn’t affect the price you pay and helps us maintain this site to continue providing you with the best template recommendations.