osu! - Best Settings to Improve & Reduce Input Lag

osu!, the popular rhythm game, has been enjoyed by players around the world for its challenging gameplay and unique music selection. However, one common issue that players face while playing osu! is input lag. Input lag can lead to inaccurate movements and missed beats, resulting in a frustrating gameplay experience. Fortunately, there are ways to improve and reduce input lag in osu! In this article, we will explore the best settings that can help you enhance your osu! gameplay and minimize input lag. Whether you're a new player or a seasoned veteran, these tips will help you achieve a smoother and more enjoyable osu! experience.
Optimize your osu! Settings
Open up your in-game options, and set the Select language option to your preferred language. Below, check the Prefer metadata in original language and Use alternative font for chat display options. Under Updates, we prefer to set the Release stream option to Stable, reducing lag on our end. Some players prefer to play on Cutting Edge (Experimental).
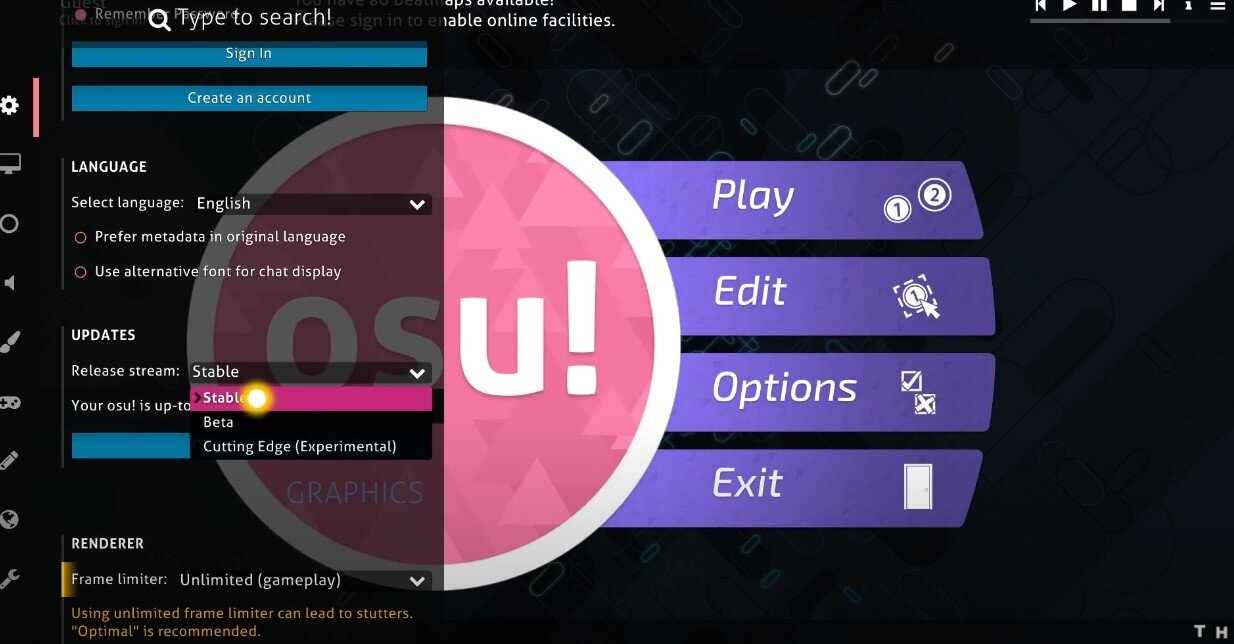
osu! Options > Release Stream > Stable
We recommend playing around with both to see what works best for you. Set your frame limiter to Unlimited, which will reduce input lag. When enabling the FPS counter, you will see how many ms your input lag will reduce. Turn off Compatibility Mode. In case you experience lag or stutter, then enable the Reduce Dropped Frames option and keep the Detect Performance issues options enabled.

osu! Options > Renderer
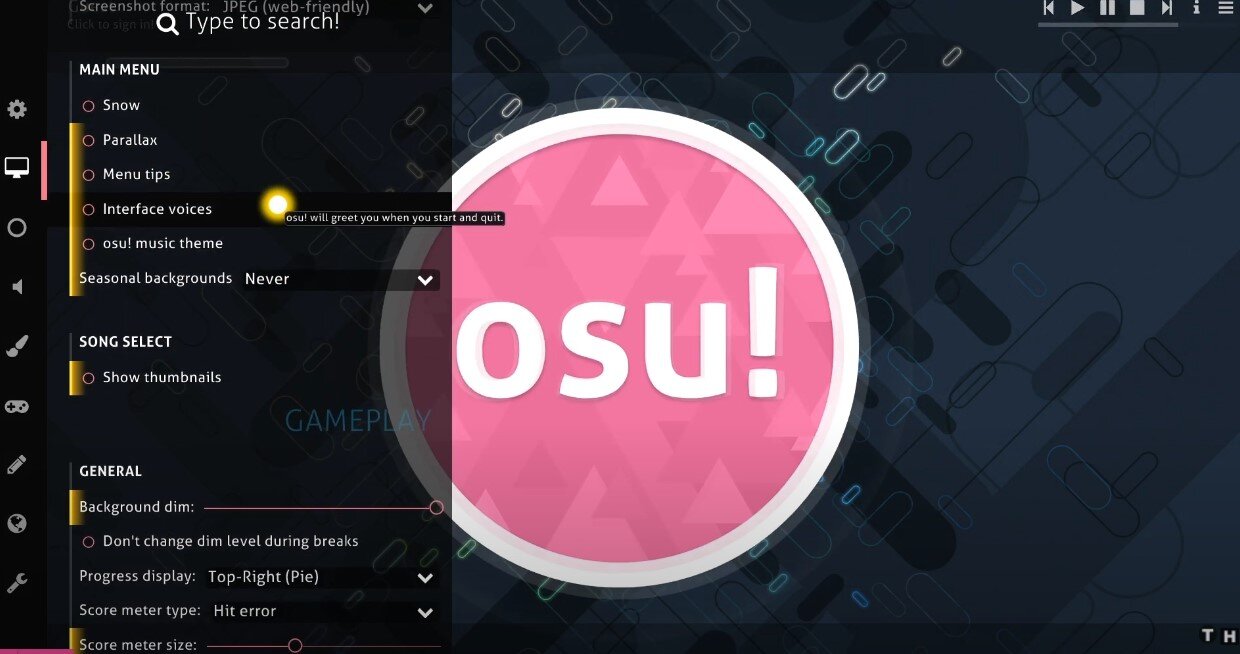
Set the Resolution to your native monitor resolution, which in our case is 1080p. It would be best if you also played in full-screen mode. Setting it to full-screen mode will decrease input lag. Under Detail settings, we suggest enabling the Sneaking sliders and Storyboards options. All of the other options can increase lag if you are playing on a low-end PC and can also be distracting for some users. Your main menu options can all be set to your personal preference. If you want to see your custom background, we suggest setting the Seasonal backgrounds option to Never. Disable the Show backgrounds option.
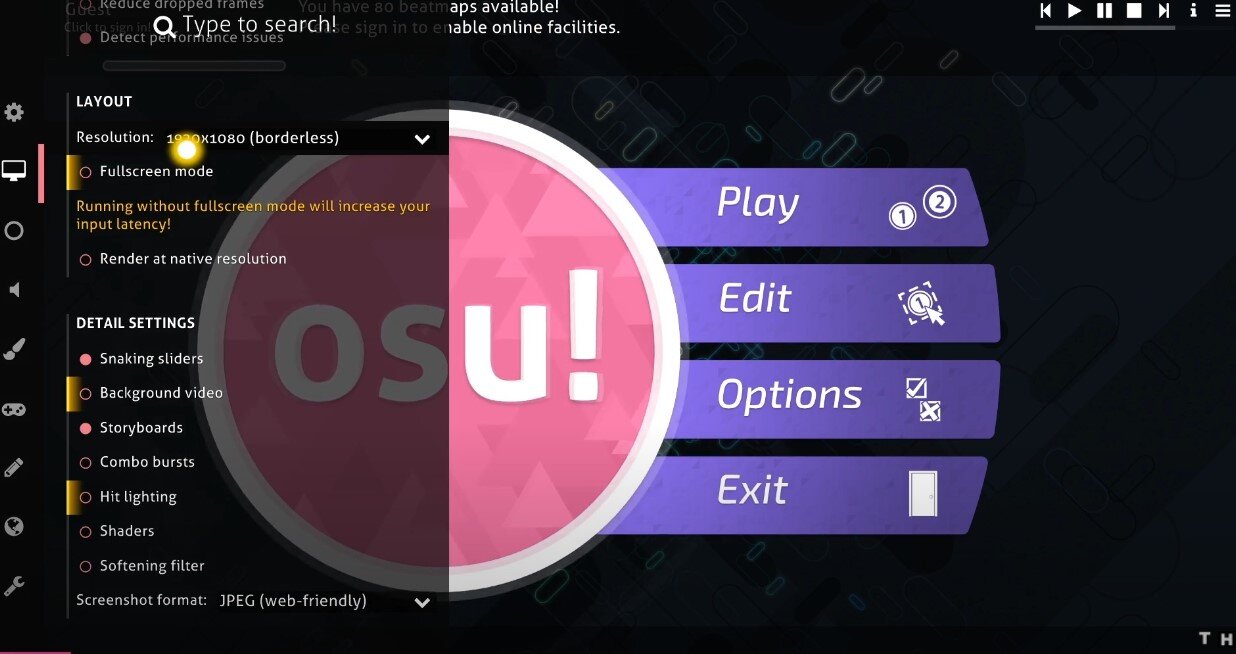
osu! Options > Resolution
Set the background dim to 100%, or set it lower, but it can be distracting for many players. The other General settings can be set to your personal preference. We like to increase the Score meter size to about twice the size. (2x)
osu! Options > General
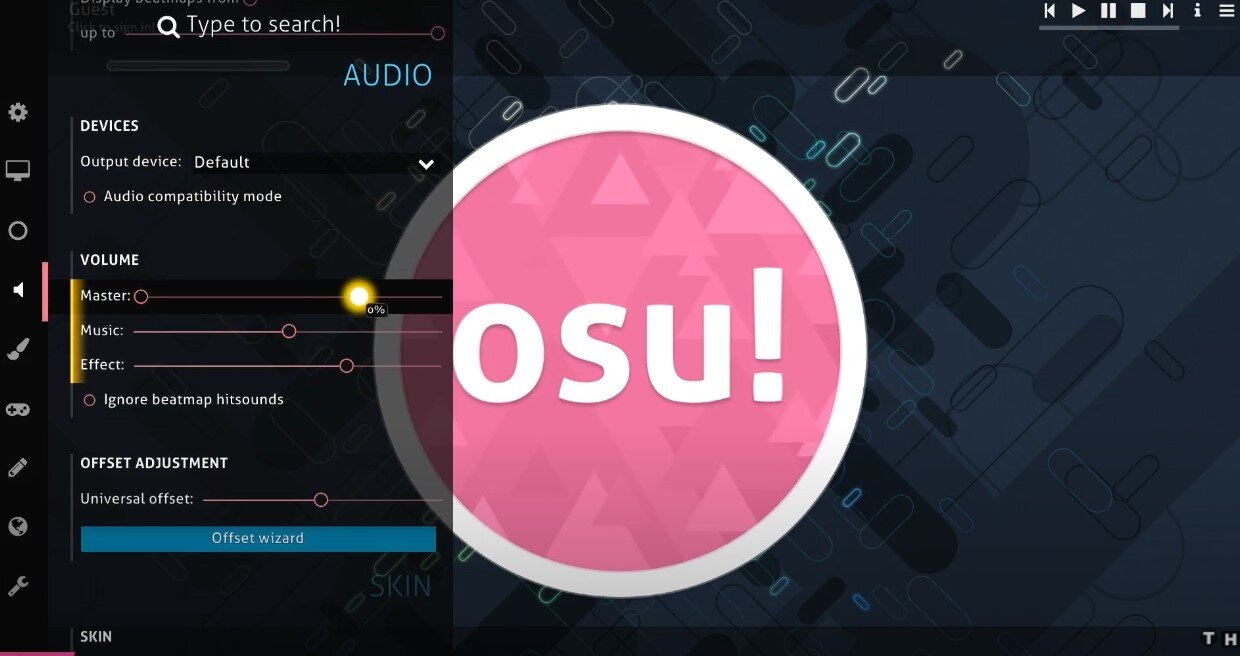
Under Volume, we usually set the Master volume to around 80%. The Music volume is set to around 50%, and the effect volume to around 80%. Also, disable the beatmaps hitsounds option when there are annoying custom hitsounds. We suggest setting the Universal offset option to 0 ms. This will compensate for your delays. If you know what your actual offset is, you can tweak this option to your liking.
osu! Options > Volume
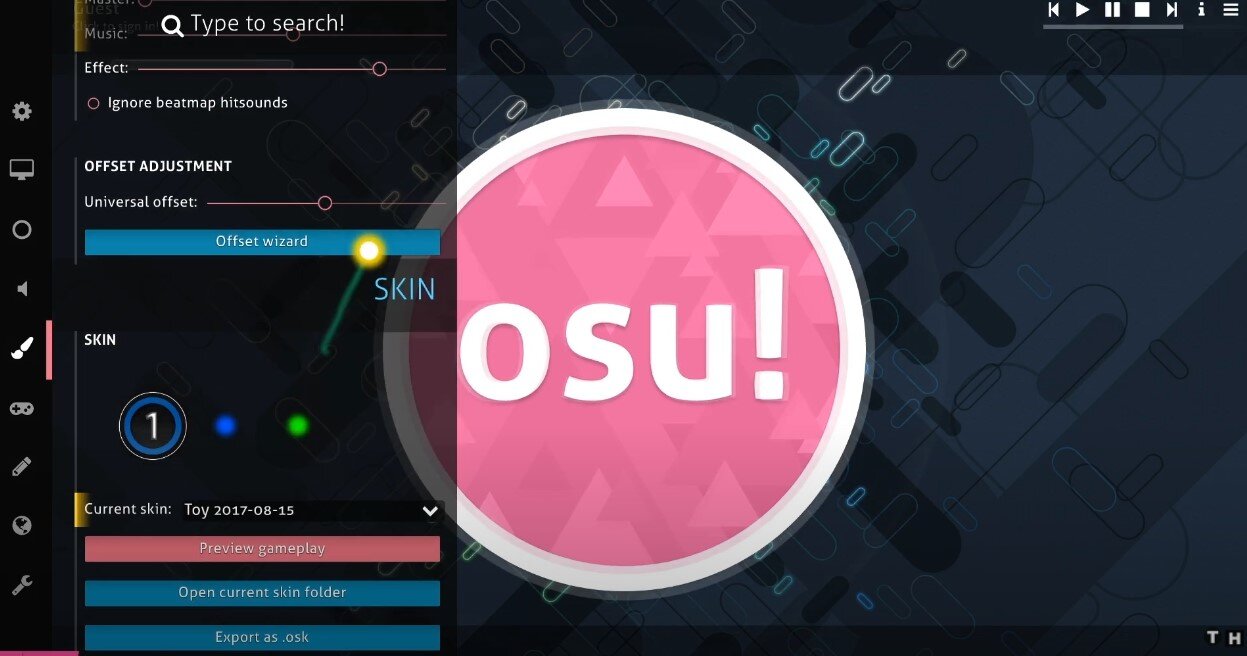
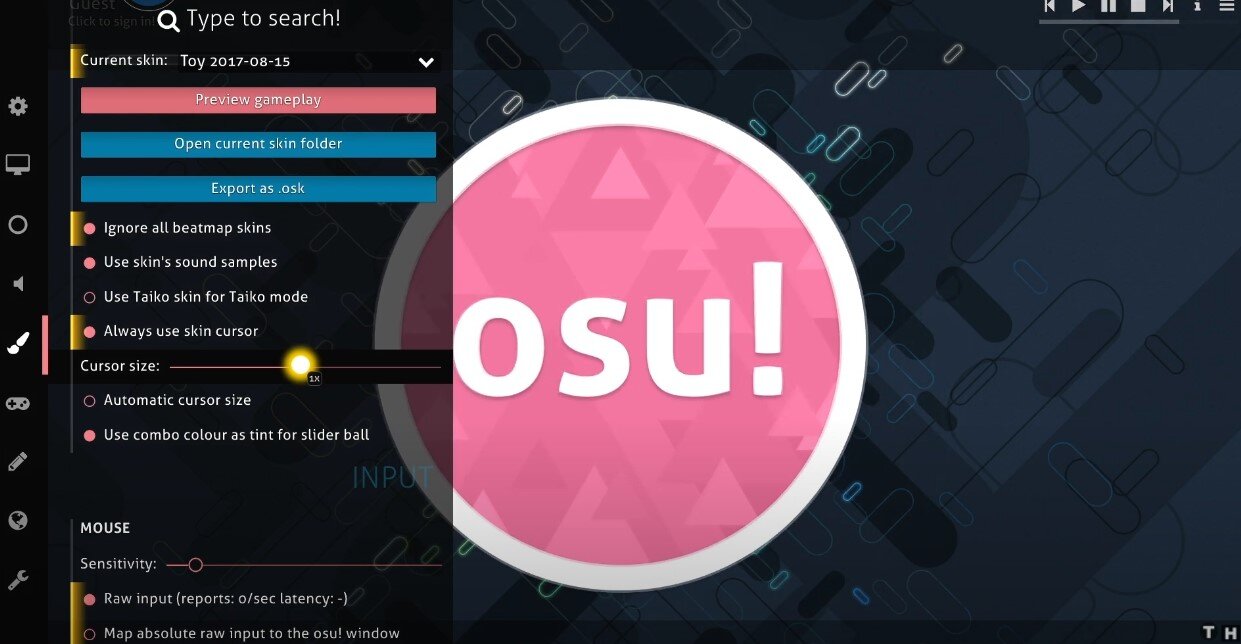
Set the skin to your preferred skin, and select to ignore beatmap skins if you prefer not to see those. Use Skin’s sound samples, as this can be a big part of why you might use a skin. Use a skin cursor, again if you prefer to use it, otherwise, you can use the same custom cursor if you like. I like using the regular cursor size, and enabling the Use combo color as tint for slider ball option.
osu! Options > Skin Cursor
As to your sensitivity, we suggest getting used to a value that works best for you and your setup. This can be adjusted when starting.
When using a tablet, then stick to 1x, which should be the best option for you.
Enable the raw input option, reduce mouse acceleration, which you do not cause.
Set Confine mouse cursor to Never and Enable Mouse buttons in play mode.
For your keyboard bindings, I suggest taking your time once to bind your keys and sticking to your changes. Lastly, I suggest disabling the Show notification popups instantly during gameplay option.
osu! Options > Raw Input