osu! - How To Download & Install Skins on Mac OS

osu! is a rhythm game that's taken the world by storm. It's a game that's both challenging and fun, and with its various skins, you can make the game look as cool as you want it to. This guide will show you how to download and install skins on Mac OS so that you can customize your game experience.
Download osu! Skin
First, you should download an osu! skin you’d like to use. There are a lot of great websites, Reddit threads, and other sources for skins. Here is a collection of osu! skins:

Rename Downloaded osu! Skin
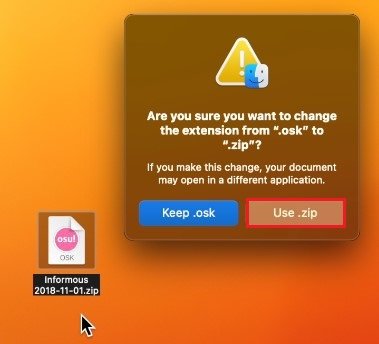
Your browser can help you locate the downloaded files, I will drag and drop the skin file to my desktop. Select to rename the .osk file to .zip.You will be asked if you are sure to change the file extension. Select Use. zip.
Unzip osu! Skin File
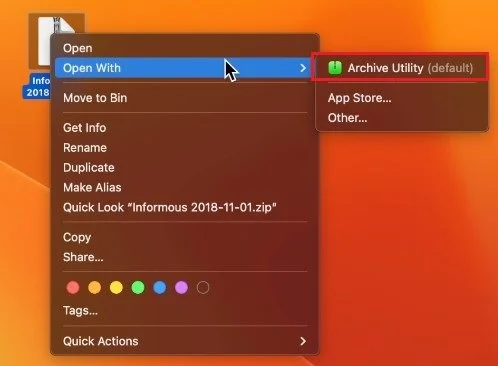
Next, we will unzip this file using any unarchiving application. In my case, the app is called Archive Utility.
Download & Install Unzip App
To download this or a similar application, open your App Store and look up “archive” or ZIP.

App Store > Archive
Copy Skin Folder into osu! Game Files
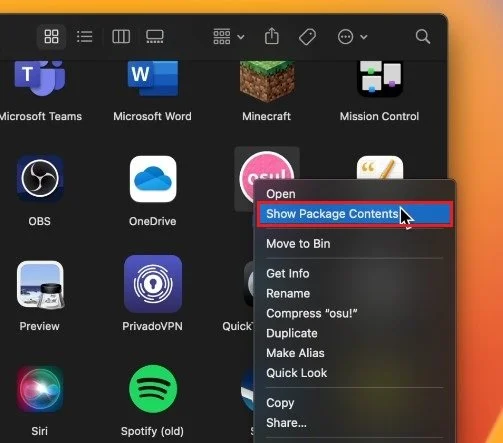
After selecting to unzip the osu! skin file, you should see a newly created folder. Next, locate your osu! application. In my case, it’s in my applications folder. Here, right-click the osu! app and select Show Package Contents.
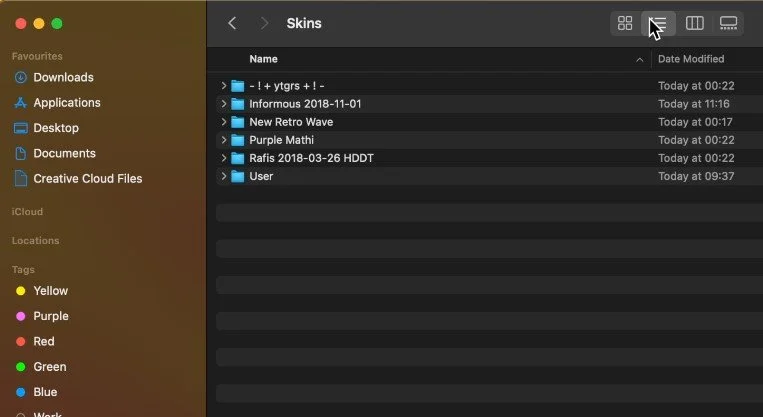
Navigate to drive_c > osu! > Skins.
You can drag and drop the unarchived skin folder into this Skins folder. The next time you launch osu!, you should be able to switch skins in your skins settings.
-
Skins in osu! are custom skins that change the look and feel of the game. They can change the game's colors, cursors, and other elements.
-
Yes, you can make your own skins for osu! on Mac OS using image editing software like Photoshop or GIMP.
-
No, you can only have one skin installed at a time in osu! on Mac OS. But, you can easily switch between skins by changing the skin in the osu! options menu.