Mac OS · macOS
How To Install & Setup Steam on Mac OS
Original source date
Answer
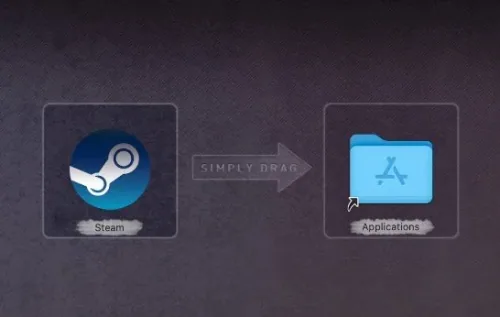
While using your Mac, open up your favorite browser and navigate to store.steampowered.com On this page, click on Install Steam, and on the next page, click on Install Steam again. This will start the Steam installer download. Your browser can help you find your downloaded files and double-click the Steam installer file, where you must drag and drop the Steam application into your applications folder.
Install Steam Launcher on macOS
While using your Mac, open up your favorite browser and navigate to store.steampowered.com On this page, click on Install Steam, and on the next page, click on Install Steam again.

This will start the Steam installer download
This will start the Steam installer download. Your browser can help you find your downloaded files and double-click the Steam installer file, where you must drag and drop the Steam application into your applications folder.
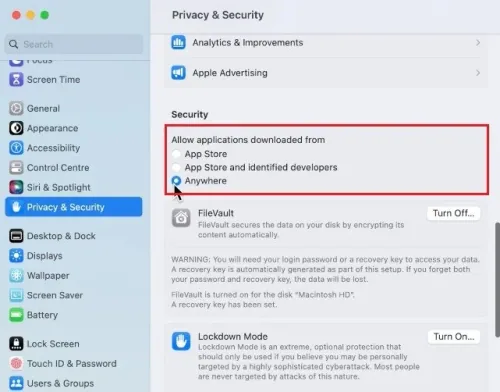
Allow Applications Downloaded from Anywhere
If you cannot open apps and files downloaded from the internet, open up your System Settings. In the Privacy & Security section, set the Allow applications downloaded from option to Anywhere. You may have to re-launch the application to open it up.
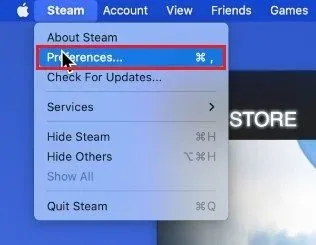
Steam Preferences
Now that Steam is installed, I suggest looking at your Steam settings to prevent any issues in the future. Click on Steam in your menu bar and select Preferences.
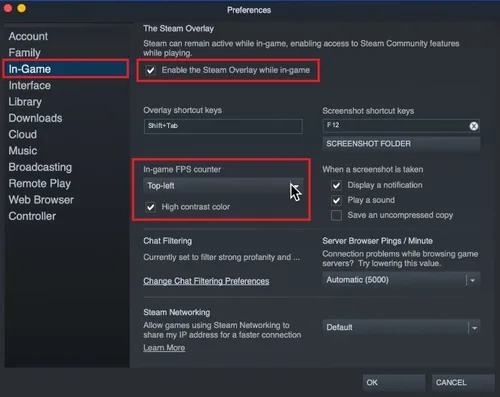
In-Game Steam Settings
In the In-Game section of your settings, enable the Steam Overlay while in-game if you intend to use it. Below, set the correct Overlay shortcut keys. I like to use the Steam in-game FPS counter, as I’m not required to use another application or the game itself to display my frame rate. This can help troubleshoot performance issues for games on your Mac.
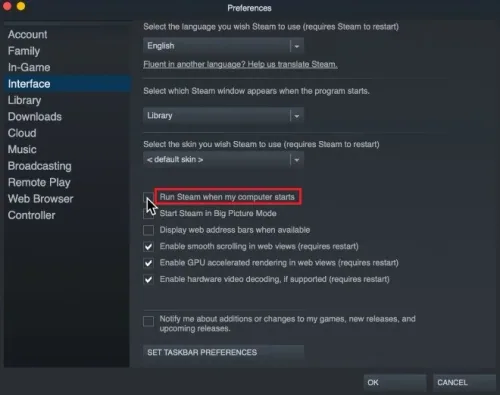
Interface Settings
Next, navigate to the Interface section of your settings. Here, please choose the correct language, and below, disable the Run Steam when my computer starts option, which will otherwise always start up Steam and use up your network connection and resources.
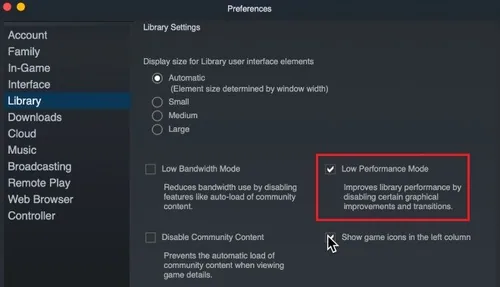
Library Settings
Under Library, enable the Low-Performance Mode option if you encounter performance issues, such as lag, while using Steam and browsing your Steam library.
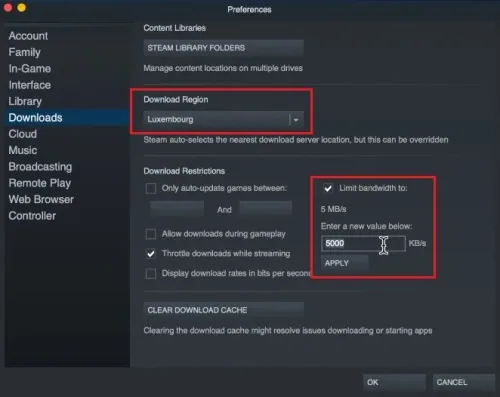
Downloads Settings
Next, in the Downloads section, set the Download Region to your closest server. I like to set the bandwidth limit of the Steam downloads to around 5000 to 8000 KB/s and disable downloads while in-game.
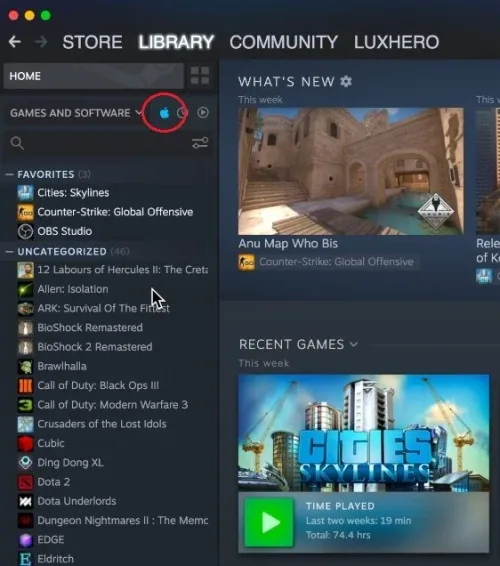
Mac Games in Steam Library
After applying your settings changes, head to your Steam library and click on this Apple icon to only show games that run on macOS.
Video walkthrough
If it does not work
- What is Steam?. Steam is a digital distribution platform for video games, developed by Valve Corporation. It allows users to purchase, download, and play games on their computer.
- Is Steam available for Mac OS?. Yes, Steam is available for Mac OS and it's free to download and use.
- What are the system requirements for Steam on Mac OS?. The minimum system requirements for Steam on Mac OS are:Mac OS X 10.10 (Yosemite) or laterAn Intel or Apple silicon processor1GB of RAM