Video Editing · Windows
How To Download & Install CapCut on Windows
Original source date
Answer
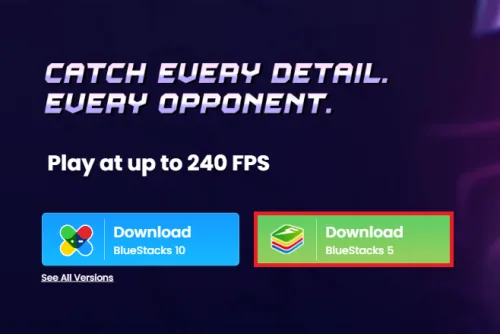
Utilizing Android apps on your PC, like CapCut, requires a tool called an Android emulator, and BlueStacks is an excellent choice in this regard. Not only is BlueStacks free, but it also boasts an array of handy features that can significantly enhance your experience. Here's how to get started: Download the BlueStacks installer from the official website. It's designed to be user-friendly, making it a breeze even for beginners.; Launch the downloaded file to initiate the installation process. The install wizard will guide you through the steps, ensuring a hassle-free setup.; Once the installation is finished, BlueStacks will automatically open, marking the successful completion of the process and opening up the world of Android apps right on your Windows PC.
Installing BlueStacks to Run CapCut on Your PC
Utilizing Android apps on your PC, like CapCut, requires a tool called an Android emulator, and BlueStacks is an excellent choice in this regard. Not only is BlueStacks free, but it also boasts an array of handy features that can significantly enhance your experience. Here's how to get started: Download the BlueStacks installer from the official website. It's designed to be user-friendly, making it a breeze even for beginners.; Launch the downloaded file to initiate the installation process. The install wizard will guide you through the steps, ensuring a hassle-free setup.; Once the installation is finished, BlueStacks will automatically open, marking the successful completion of the process and opening up the world of Android apps right on your Windows PC.
How to Install CapCut via BlueStacks
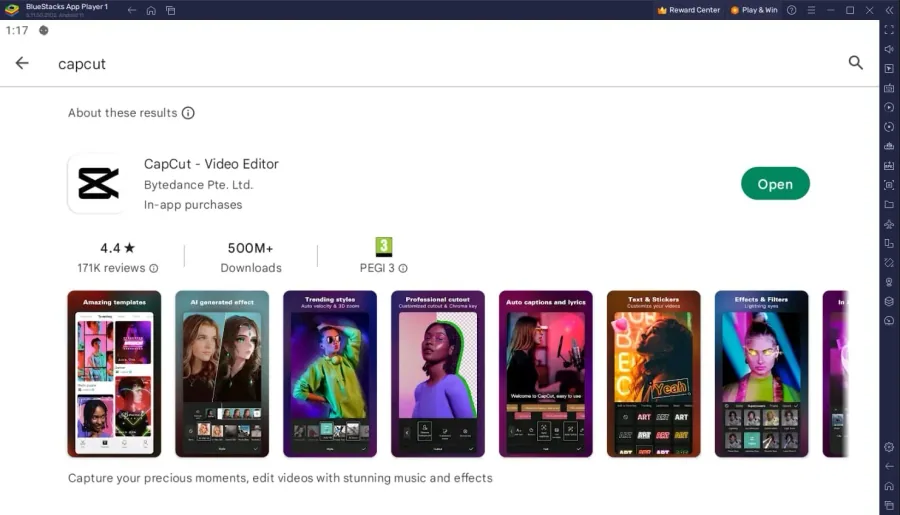
After successfully installing BlueStacks, the next step involves downloading CapCut to enjoy video editing on your PC. Here's the process: Open the Google Play Store within your BlueStacks emulator.; Ensure you're signed in using your Google account. If not, log in using your credentials.; In the search bar, type 'CapCut' and hit the search button.; Click on 'Install' to download CapCut onto your BlueStacks platform. The duration of this process depends on the speed of your internet connection.
Optimizing BlueStacks for CapCut Performance
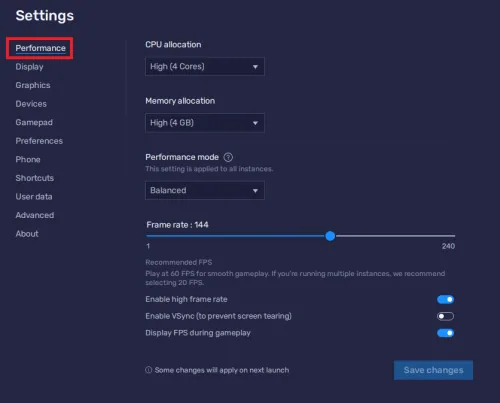
Before diving into the CapCut app, it's vital to fine-tune your BlueStacks settings for optimal performance. Here's a step-by-step guide: Access the settings by clicking on the gear icon located within the BlueStacks emulator.; Navigate to the Performance tab.; Adjust the CPU cores to a higher amount if your PC isn't running other demanding applications.; For PCs with 4GB RAM or less, lower the memory allocation setting to optimize performance.; Set the Performance Mode to 'Balanced'. This will regulate CPU and memory usage, keeping your PC smooth and lag-free.; If you plan to edit in 60FPS, enable the high FPS option, matching your screen's refresh rate.
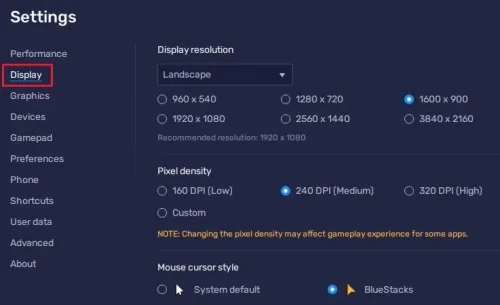
In the Display settings, adjust the orientation to landscape and select a resolut…
In the Display settings, adjust the orientation to landscape and select a resolution that aligns with your monitor size for a seamless CapCut editing experience.; Adjust the window size by dragging its corners to suit your preferences.; With these changes, you're ready to open CapCut and assess its performance on your PC.
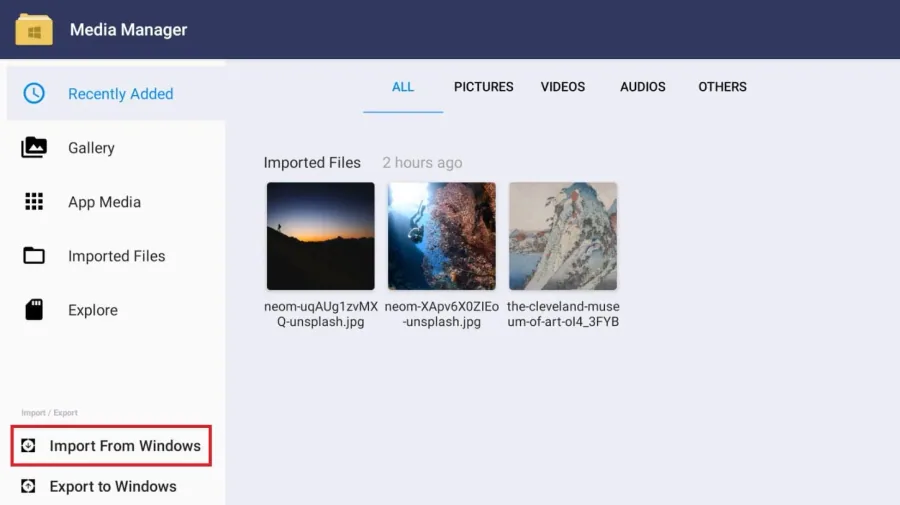
Uploading Media to CapCut on BlueStacks
After setting up CapCut on BlueStacks, the next step involves importing your media files. Follow these straightforward steps: Close the CapCut app and open the "Media Manager" application within the BlueStacks emulator.; Click on "Import From Windows". This will open your file explorer.; Choose the files you want to use in your CapCut edits and upload them. These can be videos, photos, or audio files.; Once uploaded, return to CapCut and select a template. This can be any template as we are focusing on importing media.; Click on “Use Template”. This action will display your uploaded media files, ready for use. By using BlueStacks' intuitive interface, you can seamlessly upload and access your media files in CapCut, all while using your standard keyboard and mouse controls.
How to troubleshoot common problems with BlueStacks on Windows
How To Fix “Device Isn’t Compatible With Bluestacks” Error; Best BlueStacks Settings for Low-End PC - Fix Lag & Boost FPS; How To Fix BlueStacks 5 Not Launching or Loading on Windows; How To Run Android 11 Apps & Games on Windows 11
Video walkthrough
If it does not work
- Is CapCut compatible with the BlueStacks emulator on Windows?. Yes, CapCut is completely compatible with BlueStacks, a popular Android emulator used to run mobile apps on Windows PCs. Once BlueStacks is installed, CapCut can be downloaded and used like on any Android device.
- Does BlueStacks allow keyboard and mouse controls for CapCut?. Absolutely. BlueStacks allows users to control CapCut using the standard keyboard and mouse setup. This makes the video editing process with CapCut on Windows seamless and efficient.
- Can I import files from my Windows PC to CapCut via BlueStacks?. Yes, you can. BlueStacks has a "Media Manager" application that lets you import files from Windows to use in CapCut. After importing, you can locate and use these files in your CapCut video edits.
- How can I optimize BlueStacks' performance for CapCut?. BlueStacks offers various performance settings. You can adjust CPU cores allocation, memory allocation, and the performance mode based on your PC's capabilities. For smoother operation, enable the high FPS option and adjust the emulator's frame rate according to your screen refresh rate.
- How do I download CapCut on BlueStacks?. CapCut can be downloaded from the Google Play Store on the BlueStacks emulator. Just ensure you're logged into your Google account, search for CapCut, and click download. This process might take a few minutes depending on your internet connection speed.