How To Create a Shirt on Roblox Mobile
Introduction
Unlocking your creativity and personalizing your gaming experience has never been so accessible. In the realm of Roblox (mobile), your avatar is an extension of you, and what better way to showcase your individuality than by creating a unique shirt design? With just a mobile device and the free app “CustomUSE”, you can dive into an easy and engaging process that transforms your artistic vision into a wearable masterpiece for your Roblox character. Whether you're looking to add a personal touch to an existing template or craft something entirely new, this guide will lead you step-by-step to ensure your virtual wardrobe truly stands out.
Creating a Roblox Shirt on Mobile
Creating a unique shirt for your Roblox avatar is an engaging way to express your creativity. Here's a simple guide to craft your design using a 3rd-party application:
1. Download the CustomUSE Application
Navigate to Google Play or the App Store on your mobile device.
Search for “CustomUSE” and download this free application.
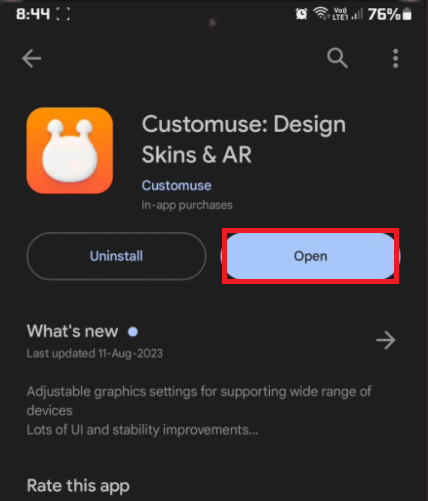
Download “Customuse: Design Skins & AR”
2. Choose a Design Template
Open the CustomUSE app and browse through various design templates suitable for your Roblox character.
Select your favorite and tap on 'Remix' to start the shirt design process.
3. Customize Your Design
As the creation space loads, you can either modify the existing template or use it as is.
Examples of personal touches include adding text, changing colors, or incorporating unique elements.
4. Save and Publish Your Design
Once satisfied with your masterpiece, tap on the 'Save' option at the top of the screen.
This action prompts you to save and publish your design, which will be stored in your device's gallery.
With these straightforward steps, you can craft an exclusive shirt design for your Roblox avatar. Whether you're an artist or a beginner, this process offers an accessible path to bring your vision to life.
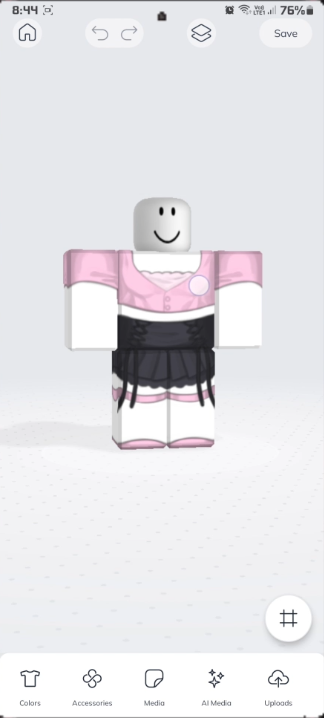
Design the Roblox shirt
Uploading Your Roblox Shirt on Mobile
Successfully creating your Roblox shirt is half the battle; the next step is uploading it to your avatar's wardrobe. Here's a concise guide to uploading your shirt design from a mobile device:
1. Access Roblox via Desktop Site Mode
Open the Chrome browser on your mobile device.
Switch to 'Desktop Site' mode to access the full range of Roblox settings.
Use the desktop version of Roblox.com on your mobile device
2. Log in to Your Roblox Account
Log in to your Roblox account, and click on the three lines icon to access the dashboard.
Navigate to the 'Avatar' section, and then select 'Avatar Items.'
3. Upload Your Shirt Design
Inside the 'Avatar Items' section, find the 'Upload' option.
Click on it and select the shirt design you saved in your device's gallery.
Example: If you've designed a superhero-themed shirt, simply navigate to where you saved this specific design.
Wait for the upload to complete, and your design will become part of the Roblox world.
Congratulations!
Your unique shirt design is now officially part of your Roblox avatar's wardrobe. Wear it with pride!
This simple guide makes uploading your custom Roblox shirt on mobile seamless and effortless. Whether it's your first design or one of many, these steps will ensure that your creative work finds its rightful place in the Roblox universe.
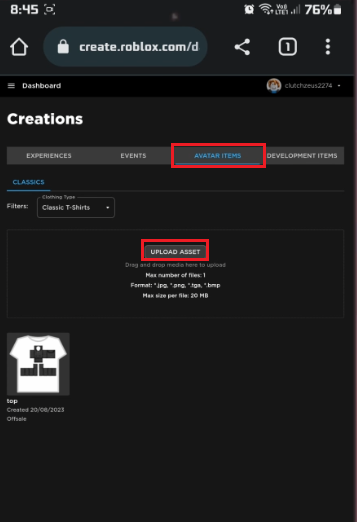
Roblox Creations > Avatar Items > Upload Asset
-
To upload a custom shirt design, open Chrome on your mobile device, switch to 'Desktop Site' mode, log in to your Roblox account, navigate to 'Avatar Items', and click 'Upload' to select your design.
-
As of now, accessing the required Roblox settings to upload a shirt necessitates switching to 'Desktop Site' mode on your mobile browser.
-
The shirt design should be saved in a format supported by Roblox, such as PNG or JPEG. The upload process will guide you if any specific requirements are needed.
-
While the example used Chrome, most modern browsers with a 'Desktop Site' mode option should work for uploading your Roblox shirt.
-
If the upload fails, make sure your design meets Roblox's guidelines, the file format is correct, and try the upload process again.


