How To Allow Friends to Join Private Roblox Server - Tutorial
Introduction
Get ready to dive into the world of Roblox with friends on your own terms! This easy tutorial will guide you through the process of allowing friends to join your private Roblox server, turning your gaming experience into a personalized adventure. Learn how to configure your server settings on Roblox.com, enabling the 'Friends Allowed' option to share the fun with your circle. Whether you're looking to collaborate on creative builds or explore games together, this guide makes setting up your private server a breeze, ensuring you and your friends enjoy Roblox in your private digital playground.
Configuring Your Private Roblox Server for Friends
Inviting Friends for a Personalized Gaming Experience
Creating a private server on Roblox and inviting friends is simple:
Accessing Roblox
Opening Roblox: Launch your preferred web browser and visit Roblox.com.
Logging In: Sign in to your Roblox account.
Setting Up Your Private Server
Navigating to Your Server: Go to an experience you have created a private server for. On the Experience page, find the 'Servers' tab.
Configuring the Server: Under 'Private Servers', locate your server. Click the three dots to reveal a menu, then choose 'Configure'.
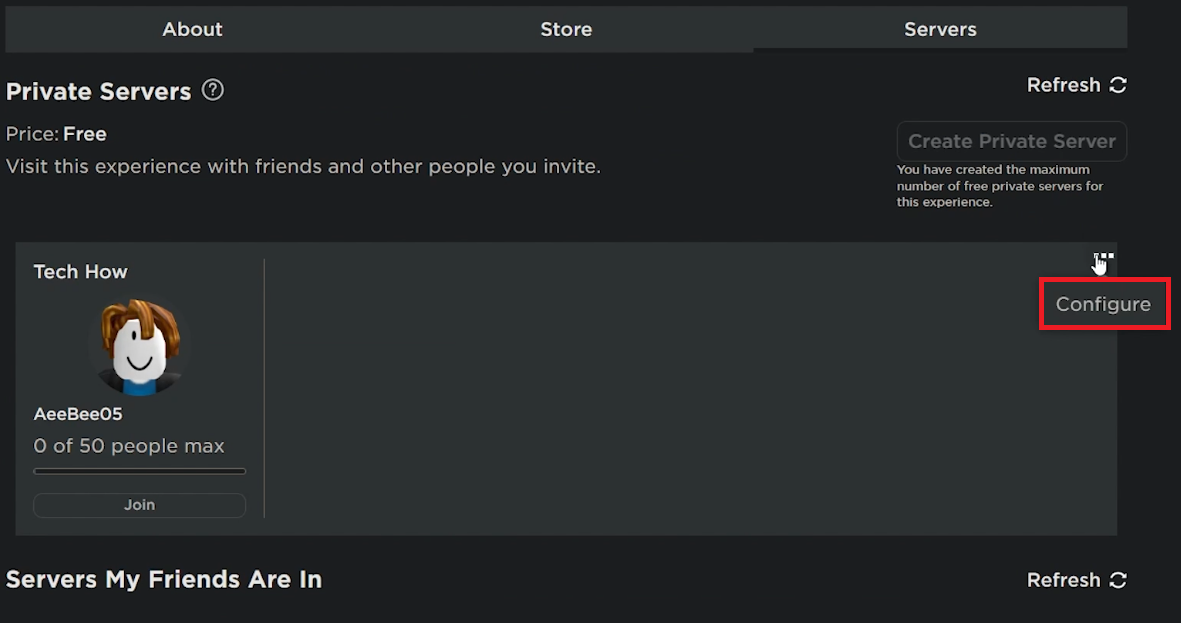
Configure private Roblox server options
Enabling Friend Access: In 'Configuration Settings', turn on the “Friends Allowed” option.
Inviting Friends: Once enabled, you can share the private server link with friends, allowing them to join effortlessly.
Enabling the "Allow Joining" Option
Essential Step for Sharing Your Private Server
To successfully invite friends to your private Roblox server:
Activating Allow Joining
Prerequisite Setting: Ensure the “Allow Joining” option is enabled in your server settings. This is crucial for the next steps.
Effect of Disabling: If this option is disabled, you can't turn on “Friends Allowed” or share a link to your server.
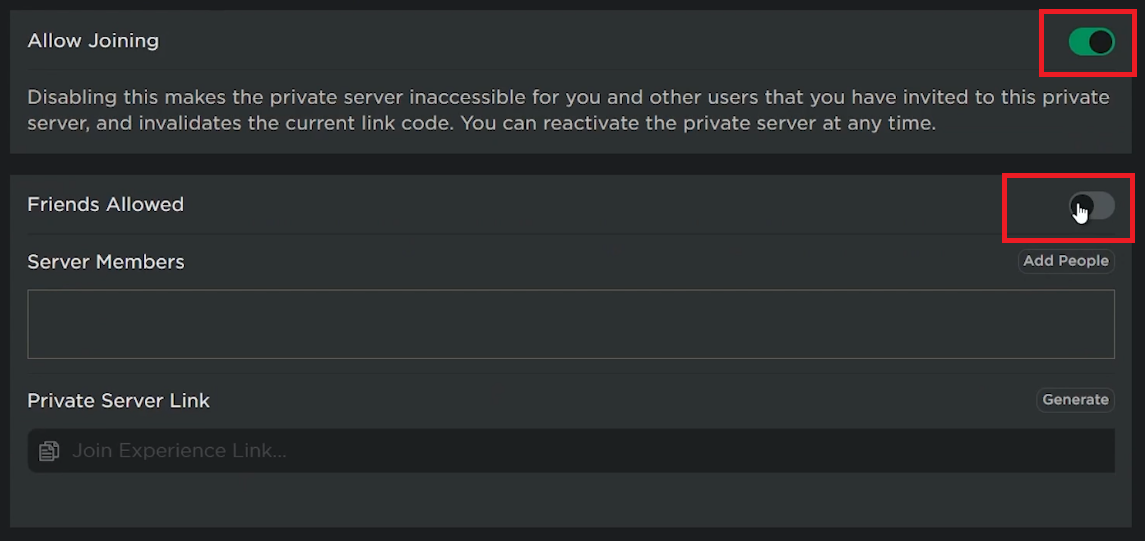
Enable the “Allow Joining” and “Friends Allowed” options
Inviting Friends to Your Personalized Roblox Experience
Creating a Private Gaming Session
If you want a more exclusive gaming environment:
Navigating to Your Creations
Accessing Your Profile: Click your username in the top navigation bar on Roblox.com to go to your profile.
Selecting Your Creation: Go to the “Creations” section and choose the experience you wish to host on a private server.
Applying Server Settings: Follow the same steps as above to enable friends to join your private server.
This approach allows you to create a private and controlled environment in your custom Roblox experience, perfect for playing with friends without external interruptions.

Roblox Profile > Creations
-
Log in to Roblox, go to your private server under 'Servers', click 'Configure', and enable the 'Friends Allowed' option.
-
Yes, the 'Allow Joining' option must be enabled to activate 'Friends Allowed' and share your private server link.
-
Absolutely! Go to 'Creations' in your profile, select your experience, and use the same steps to invite friends.
-
Yes, after setting up your server, you can share a unique link with your friends for them to join.
-
You can disable the 'Friends Allowed' option at any time to stop others from joining your server.