Adobe · Platform not recorded
Adobe CC - How To Disable Automatic Updates
Original source date
Answer
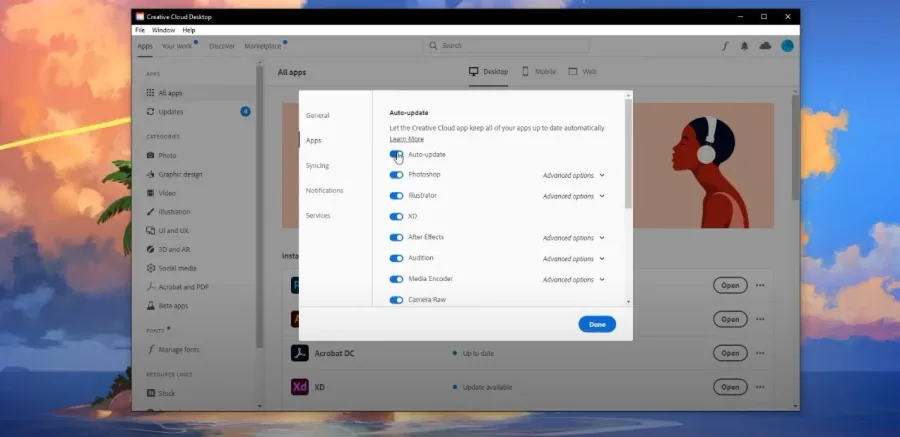
Open up the Creative Cloud application. Navigate to File > Preferences. In the General settings, you can prevent the Creative Cloud from automatically updating. Under Apps, you have the same option for installed Adobe applications. You can also change the install location for future downloads and updates in case your hard drive is getting full.
Disable Updates in your Creative Cloud Preferences
Open up the Creative Cloud application. Navigate to File > Preferences.
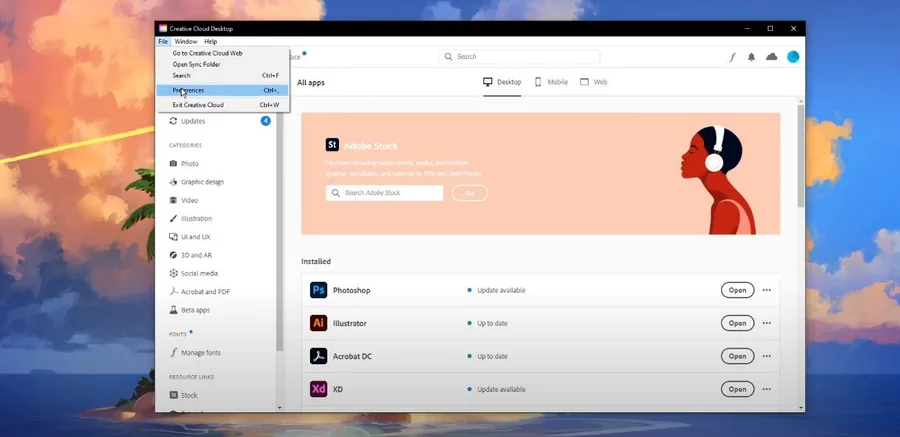
In the General settings, you can prevent the Creative Cloud from automatically up…
In the General settings, you can prevent the Creative Cloud from automatically updating. Under Apps, you have the same option for installed Adobe applications. You can also change the install location for future downloads and updates in case your hard drive is getting full.
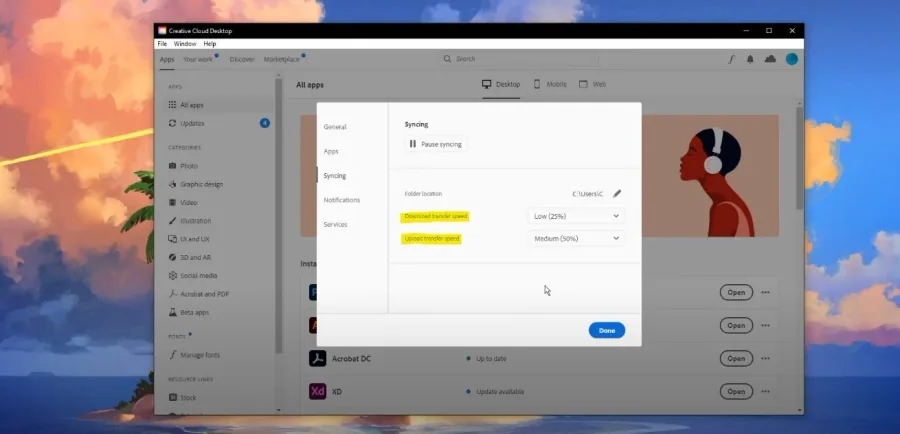
Change the Adobe CC Syncing Settings
In your Syncing settings, you can change your download and upload speed. We prefer to enable automatic updates, and throttle the download speed of the application. If this makes sense, set the Download Transfer Speed option to Low, and Upload speed to Medium.
Video walkthrough
If it does not work
- If the current interface differs, compare it with the recorded video walkthrough.