Adobe · Platform not recorded
Create Professional Flyer in Photoshop - Tutorial & Template
Original source date
Answer
Start by accessing a wide range of creative resources on the Envato Elements website, as mentioned in our video guide. Here's how: Sign Up: Create an account on Envato Elements to access the template we used in the tutorial.; Explore More: Along with this specific template, discover thousands of other tools like add-ons, plugins, and various Photoshop templates.
Getting Your Template from Envato Elements
Start by accessing a wide range of creative resources on the Envato Elements website, as mentioned in our video guide. Here's how: Sign Up: Create an account on Envato Elements to access the template we used in the tutorial.; Explore More: Along with this specific template, discover thousands of other tools like add-ons, plugins, and various Photoshop templates.
Easy Download and Setup Process
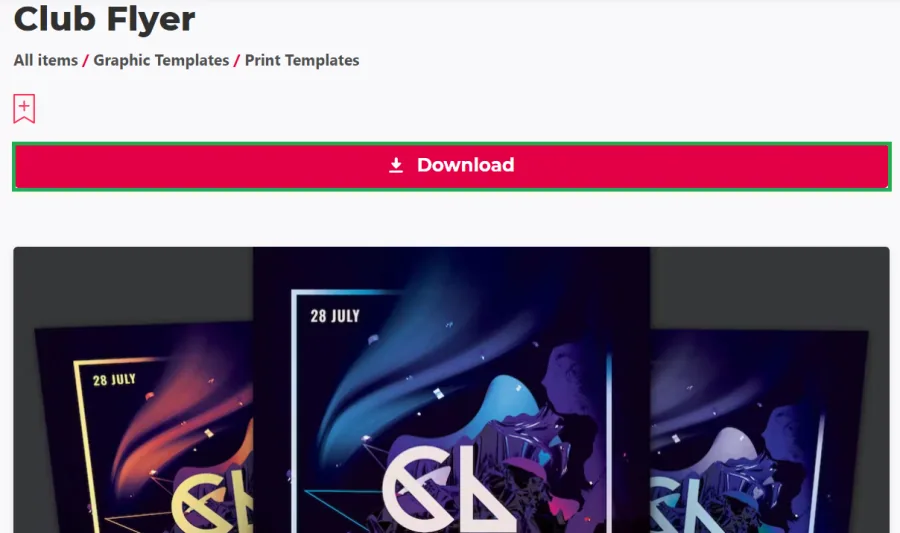
Downloading and setting up your template is a breeze: Download: After choosing your template, download it. The file will typically be in a compressed format (.zip) and saved in your download folder.
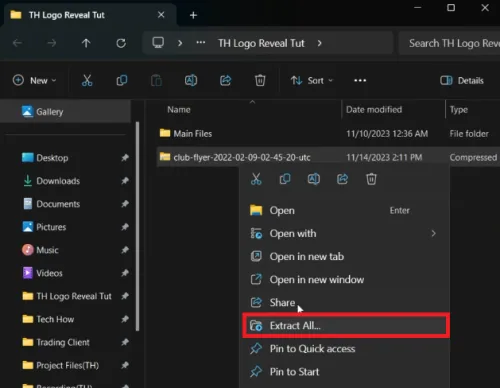
Extract Files:Windows PC: Right-click the .zip file and select 'Extract All' to y…
Extract Files:Windows PC: Right-click the .zip file and select 'Extract All' to your desired location.Mac: Similar steps apply. Double-click the .zip file to automatically extract it.; Windows PC: Right-click the .zip file and select 'Extract All' to your desired location.; Mac: Similar steps apply. Double-click the .zip file to automatically extract it.; Open in Photoshop: Once extracted, open the Photoshop file. Depending on your computer’s performance, this might take a moment. This simple process ensures you have everything ready to start customizing your flyer in Photoshop!
Introduction to Flyer Editing
When you open the Photoshop project, you'll find a pre-designed flyer, perfect for club parties. This flyer serves as your creative platform, enabling you to modify every detail to suit your needs. In this guide, we'll focus primarily on editing the text.
Steps to Edit the Text
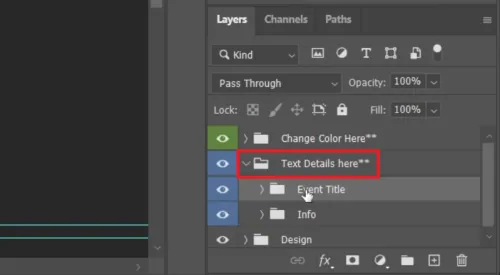
Here's how you can update the flyer's text to make it your own: Find the Text Layers:Navigate to the 'Layers' panel in Photoshop.Look for a folder named "Event Title" which contains all the text elements of the flyer.; Navigate to the 'Layers' panel in Photoshop.; Look for a folder named "Event Title" which contains all the text elements of the flyer.; Editing the Main and Secondary Text:Within this folder, you'll find two key text layers.Primary Text Layer: This is for the main title or headline of your flyer.Secondary Text Layer: Used for additional details like date, time, or venue.To edit, simply click on the layer you want to change. The text will be highlighted, indicating it's ready for editing.Type in your custom text. For example, change "Club Night" to "Summer Beats Bash" or "Friday Fiesta."; Within this folder, you'll find two key text layers.Primary Text Layer: This is for the main title or headline of your flyer.Secondary Text Layer: Used for additional details like date, time, or venue.; Primary Text Layer: This is for the main title or headline of your flyer.; Secondary Text Layer: Used for additional details like date, time, or venue.; To edit, simply click on the layer you want to change. The text will be highlighted, indicating it's ready for editing.; Type in your custom text. For example, change "Club Night" to "Summer Beats Bash" or "Friday Fiesta."; Personalize Your Message:Continue this process with all text layers, adjusting them to convey your specific message or information.; Continue this process with all text layers, adjusting them to convey your specific message or information. By following these steps, you can easily tailor the flyer to reflect your event's unique style and details.
Preview Your Flyer
After updating the text, it's essential to preview your flyer to ensure everything looks perfect. This step is crucial whether you're creating an invitation for an event or a flyer for promotional purposes.
How to Preview:
Take a moment to review all the elements on your flyer.; Zoom in and out to check for any alignment issues or text errors.; Visualize how the flyer will appear in its final form.
Exporting Your Flyer
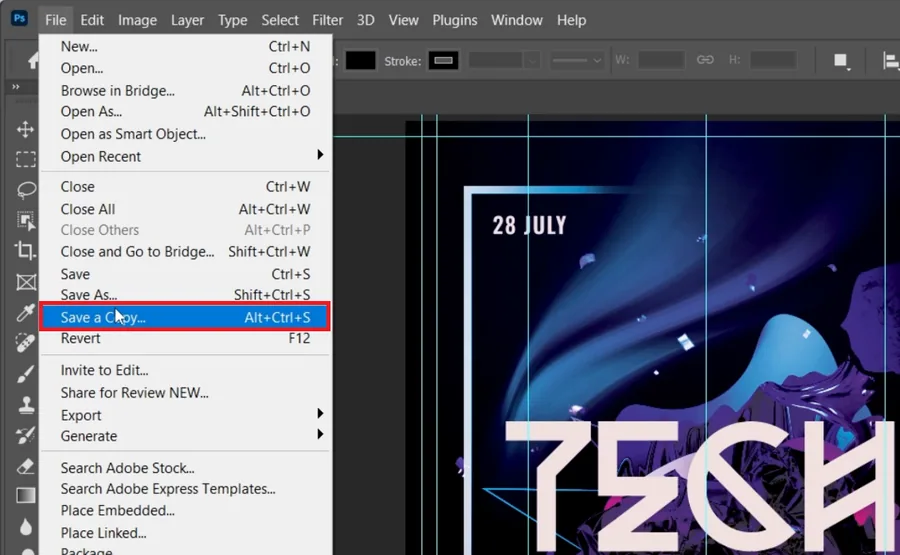
Once you're satisfied with your design, follow these steps to save and export your flyer: Saving Your Project:Go to the "File" menu in Photoshop's toolbar.Select "Save a Copy" to create a final version of your flyer.; Go to the "File" menu in Photoshop's toolbar.; Select "Save a Copy" to create a final version of your flyer.; Choosing the Right Format:For Transparent Background:Choose .PNG format if your flyer has a transparent background. This option is ideal for digital displays where you want to overlay the flyer on different backgrounds.For Standard Background:Select JPEG if your flyer has a standard, non-transparent background. This format is suitable for print materials or standard digital use.; For Transparent Background:Choose .PNG format if your flyer has a transparent background. This option is ideal for digital displays where you want to overlay the flyer on different backgrounds.; Choose .PNG format if your flyer has a transparent background. This option is ideal for digital displays where you want to overlay the flyer on different backgrounds.; For Standard Background:Select JPEG if your flyer has a standard, non-transparent background. This format is suitable for print materials or standard digital use.; Select JPEG if your flyer has a standard, non-transparent background. This format is suitable for print materials or standard digital use.
Completion
Congratulations! You've now successfully designed and exported a professional flyer using Photoshop. This flyer is ready for distribution, whether for print or digital platforms.
Affiliate Disclosure: Some of the links on this page are affiliate links, which m…
Affiliate Disclosure: Some of the links on this page are affiliate links, which means that we may earn a commission if you click through and make a purchase from our recommended template providers. This doesn’t affect the price you pay and helps us maintain this site to continue providing you with the best template recommendations.
Video walkthrough
If it does not work
- Can I use the Photoshop flyer template for commercial purposes?. Yes, the flyer template from Envato Elements can be used for commercial purposes. Ensure you have the proper license from Envato Elements for commercial use.
- Is the Photoshop flyer template suitable for beginners?. Absolutely! The template is designed to be user-friendly, making it ideal for beginners. The tutorial provides step-by-step guidance, ensuring ease of use.
- How can I customize the flyer template to fit my brand?. You can customize the template by changing text, colors, and images. Use the layer panel in Photoshop to easily modify elements to align with your brand identity.
- What file format should I save my flyer in for printing?. For printing, save your flyer as a JPEG. This format is widely accepted by printers and ensures good quality for printed materials.
- Can I change the size of the flyer template in Photoshop?. Yes, you can adjust the size of the flyer by going to Image > Canvas Size in Photoshop. Be mindful of the resolution to maintain image quality.