OBS · Platform not recorded
OBS Studio - How To Record in 1080p 60FPS Without Lag
Original source date
Answer
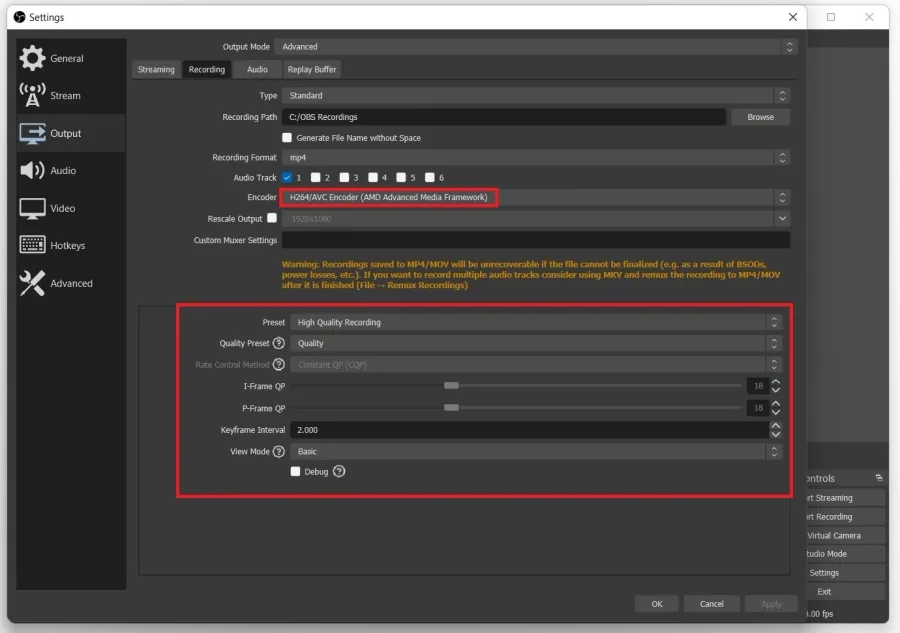
After opening up OBS Studio, reduce the number of sources per scene to a minimum. Depending on which sources you use, they can greatly impact your system’s performance. Next, navigate to your OBS Studio settings. In the Output tab, set the Output Mode to Advanced, and in the Recording section, set the Type to Standard, set the Recording Path to where you want your recordings to be saved. In case you plan on making a lot of recordings, we suggest using a file path in your storage partition with the most space available. We use.mp4 as my Recording Format, as the file size remains low compared to other formats, and it’s usable in every video editing software. Set your encoder to NVENC, in case you’re using a powerful enough NVIDIA Graphics card, otherwise use x264 to utilize your processor to encode your recordings. This option will come down to your hardware, and we strongly advise you to make a test recording using both options while in-game. Your NVENC recording might look great, but your GPU might lag when trying it out in-game. When using an abnormal native screen resolution, rescale your output to 1920x1080. If your low-end system or laptop is incapable of recording in 1080p, consider lowering the resolution to 720p.
Optimize your OBS Studio Output Settings
After opening up OBS Studio, reduce the number of sources per scene to a minimum. Depending on which sources you use, they can greatly impact your system’s performance. Next, navigate to your OBS Studio settings. In the Output tab, set the Output Mode to Advanced, and in the Recording section, set the Type to Standard, set the Recording Path to where you want your recordings to be saved. In case you plan on making a lot of recordings, we suggest using a file path in your storage partition with the most space available. We use .mp4 as my Recording Format, as the file size remains low compared to other formats, and it’s usable in every video editing software. Set your encoder to NVENC, in case you’re using a powerful enough NVIDIA Graphics card, otherwise use x264 to utilize your processor to encode your recordings. This option will come down to your hardware, and we strongly advise you to make a test recording using both options while in-game. Your NVENC recording might look great, but your GPU might lag when trying it out in-game. When using an abnormal native screen resolution, rescale your output to 1920x1080. If your low-end system or laptop is incapable of recording in 1080p, consider lowering the resolution to 720p.
Set the Rate Control to CBR, which stands for constant bit rate
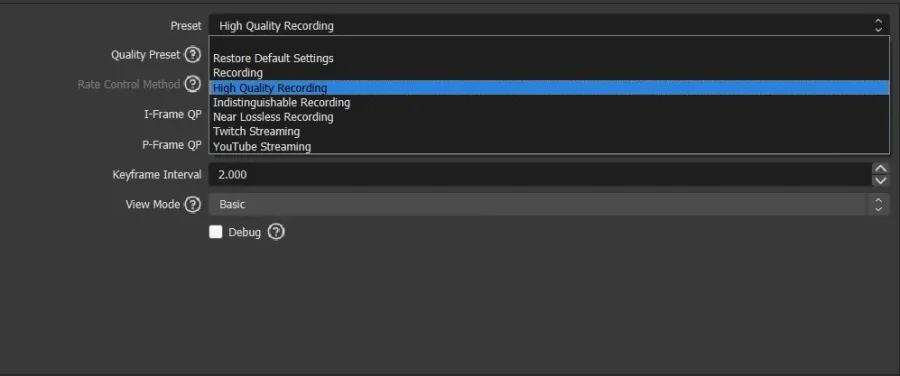
Set the Rate Control to CBR, which stands for constant bit rate. Set the Bitrate to around 10’000 when recording in 1080p. This means that OBS will use up ten mb of storage for every second you record. This will result in high-quality recordings. If you experience lag, then reduce your bitrate as well. When reducing this option to, let’s say, 5000, then your recording will look washed out with less details, but when setting it too high, your file size will be a lot larger, and your system will have issues recording. We like to use 20’000 to get a slightly better image. When recording in 720p, set the bitrate to 3000. Set your Keyframe Interval to 2, Preset to Quality, and Profile to Main. For low-end PCs, we suggest using Performance as your preset. Lastly, set the GPU option to 0 and Max B-Frames to 2. You should now be able to record your screen in 1080p with a mic using OBS Studio.
Video walkthrough
If it does not work
- If the current interface differs, compare it with the recorded video walkthrough.