Gaming · Platform not recorded
Cyberpunk 2077 - How To Boost FPS & Overall Performance
Original source date
Answer
Optimizing your Cyberpunk 2077 settings can make a significant difference in the game's performance, especially for low to mid-end systems. By opening up your settings and making changes according to your system's specifications, you can significantly enhance the gameplay experience. The good news is that most of the setting changes showcased in this article are applicable for low-end PCs. However, if you're still experiencing performance issues while using the recommended system requirements, don't worry – there are additional steps you can take.
Optimize the Cyberpunk 2077 In-Game Settings
Optimizing your Cyberpunk 2077 settings can make a significant difference in the game's performance, especially for low to mid-end systems. By opening up your settings and making changes according to your system's specifications, you can significantly enhance the gameplay experience. The good news is that most of the setting changes showcased in this article are applicable for low-end PCs. However, if you're still experiencing performance issues while using the recommended system requirements, don't worry – there are additional steps you can take.
Video Settings
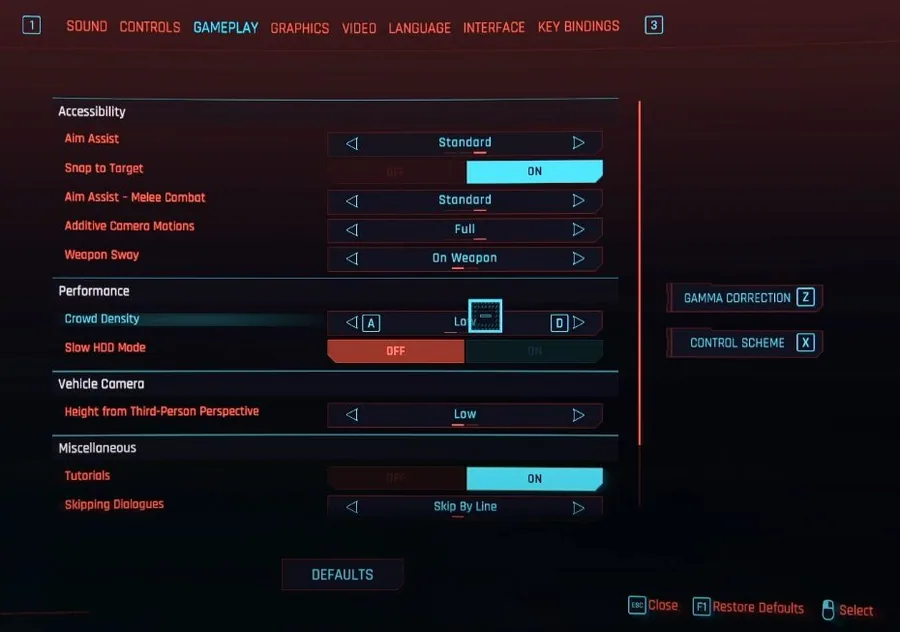
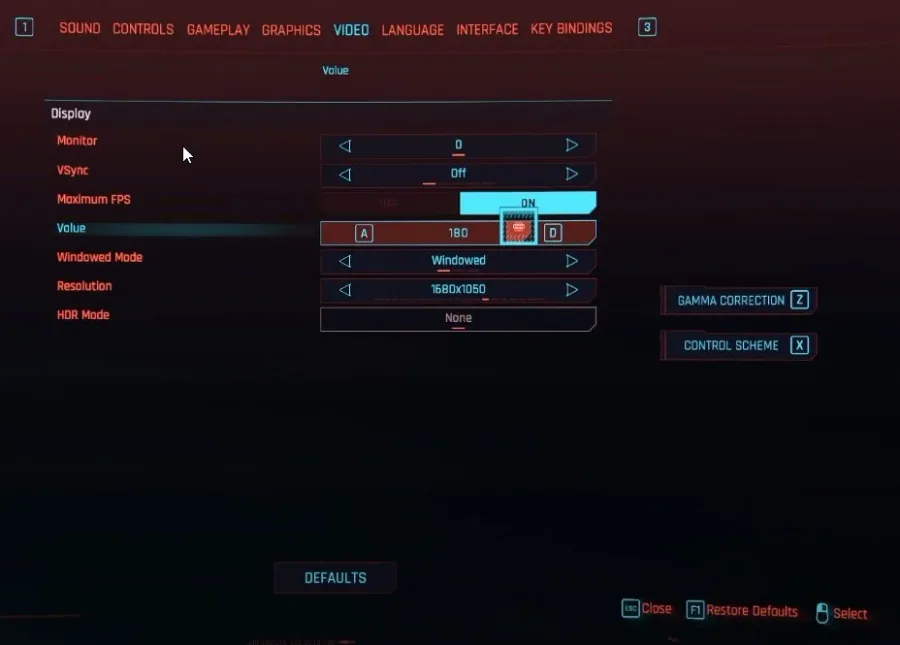
Navigate to the Video settings and set the resolution to match your native monitor resolution. If you're using a low-end system incapable of running Cyberpunk 2077 with these settings, you may need to lower the resolution to around 1600x900. Next, navigate to the Gameplay tab, and under Performance, set the crowd density to Low and turn off Slow HDD mode. However, if you have saved Cyberpunk 2077 to your hard-disk drive, enable the Slow HDD mode option. First, disable VSync and enable an FPS cap to optimize your video settings. Your FPS cap should be set to a value higher than your monitor's refresh rate, but below the maximum FPS, you can achieve. For example, if your monitor's refresh rate is 60Hz, you may want to cap your FPS at around 120FPS. Next, ensure your window mode is full-screen to optimize your gaming experience. Set your resolution to your native monitor resolution. If you're using an abnormal screen resolution, it's recommended to set it to 1920x1080 to save system resources. However, for low-end systems incapable of running Cyberpunk 2077 with these settings, you may need to consider lowering the resolution even further to around 1600x900. Please note that doing so may reduce the game's visual quality. Lastly, disable HDR mode for optimal performance. In this article, we'll guide you through adjusting your video settings in Cyberpunk 2077 to improve your performance and gameplay experience.
Graphics Settings
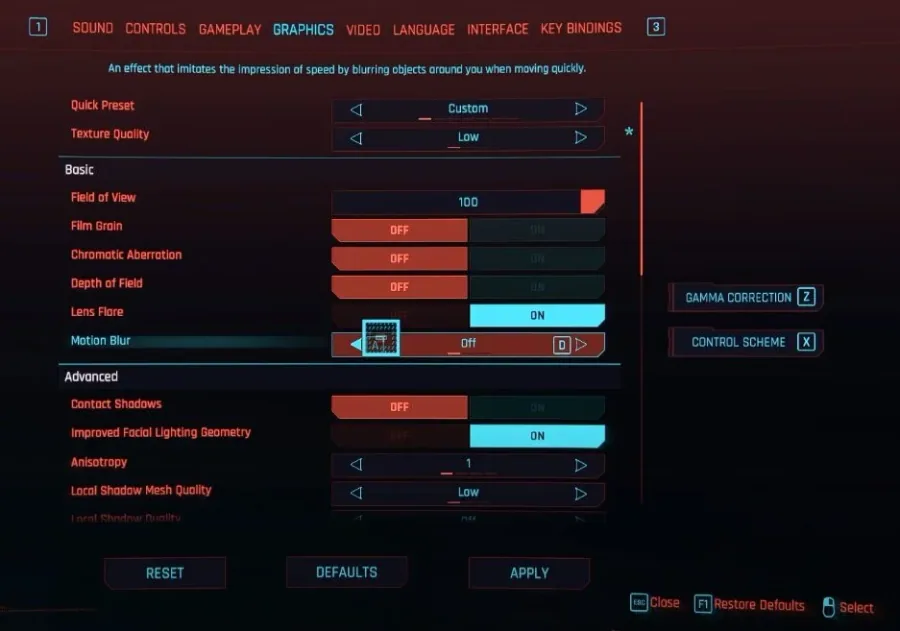
Optimizing your graphics settings is crucial for achieving the best possible visual quality and performance in Cyberpunk 2077. In the Basic section of the graphics settings, you can increase the FOV if you wish, but note that doing so may slightly reduce performance if your CPU is a bottleneck. It's recommended to disable film grain, chromatic aberration, and depth of field. However, whether to enable lens flare and motion blur comes down to personal preference. In the Advanced section, some settings can significantly improve performance, but at the cost of visual quality. For example, it's recommended to disable Contact Shadows and Local Shadows and set the Cascaded Shadows Range and Resolution to Medium and Low, respectively. Additionally, it's suggested to set Volumetric Fog Resolution and Volumetric Cloud Quality to Low and disable Ambient Occlusion. Setting LOD to Medium can also help optimize performance. If you're using a low-end GPU, it's recommended to disable the ray tracing options. Set the DLSS Resolution scaling option to Auto and disable any unnecessary settings below.
Change the Cyberpunk 2077 Process Priority
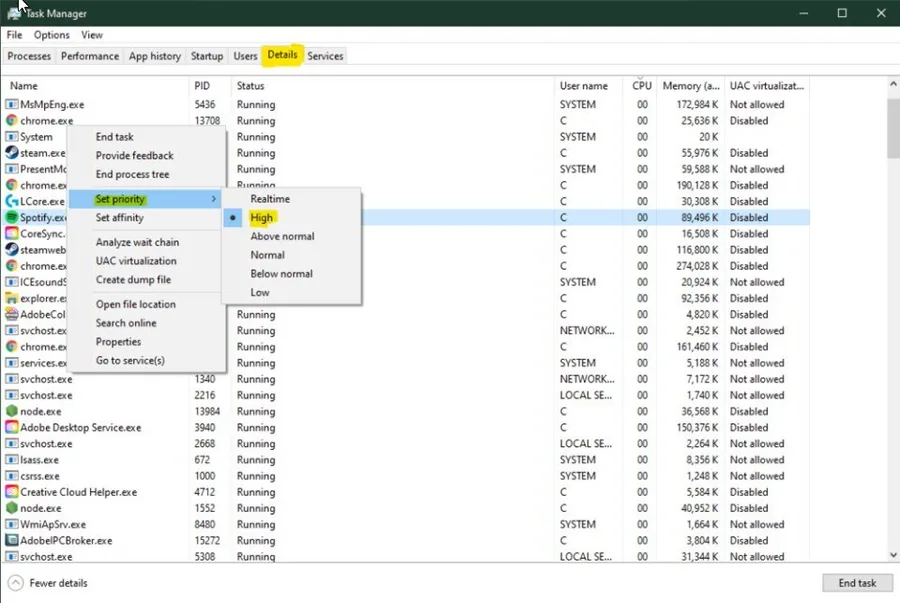
Maximizing your Cyberpunk 2077 performance on your PC requires optimizing the game's priority compared to other programs running in the background. To achieve this, first, right-click your taskbar to open up your Task Manager. Then, locate the Cyberpunk 2077 process in the Processes tab and right-click on it. Next, select Go to details to access the Details tab where the application should be highlighted. Finally, right-click the game process and set the priority to high. Allocating more resources to playing Cyberpunk 2077 can significantly improve your performance, particularly if you have other programs running in the background. To achieve this, it's recommended to end some programs from running in the background that you don't need when playing Cyberpunk 2077. However, make sure to only end programs that you know won't break your operating system. In the Startup tab of the Task Manager, you can also prevent programs from starting up on system boot, which can further reduce CPU utilization from other programs. This can free up more resources for playing Cyberpunk 2077 and improve overall performance.
Update Graphics Card Driver
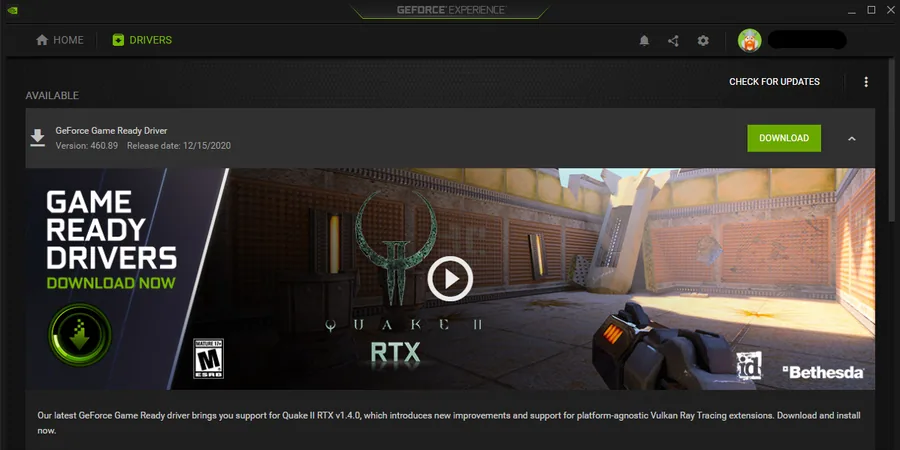
NVIDIA graphics cards can utilize the GeForce Experience application. Click here to download the application to your system. When the download is completed, open up the application, and in the Drivers tab, select Download. This will download and install the latest GPU update and should take a few minutes to complete.
Update Operating System
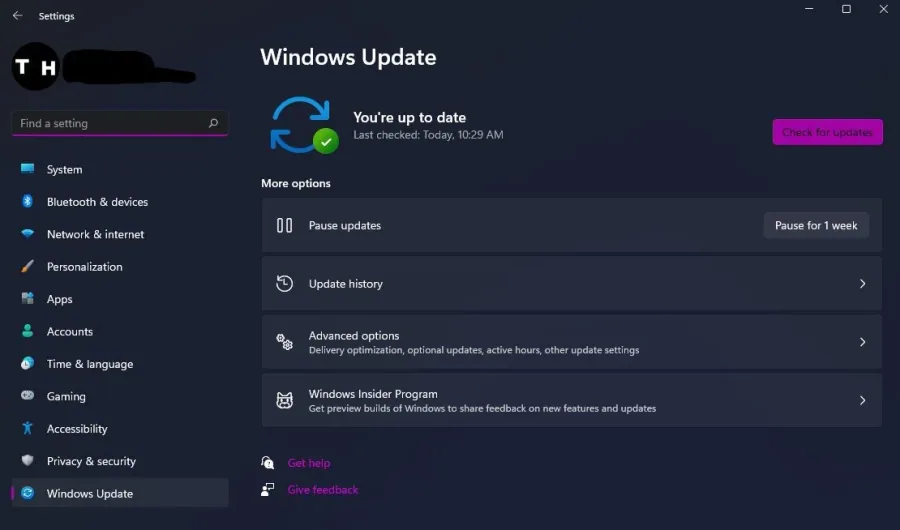
To optimize your system for performance, you should ensure your operating system is up to date. Search for Update in your taskbar search. In your Check for updates system settings window, make sure to download the latest update and make sure to restart your PC after that the download is completed. This will in any case help you with performance issues.
Disable Xbox Game Bar Recording
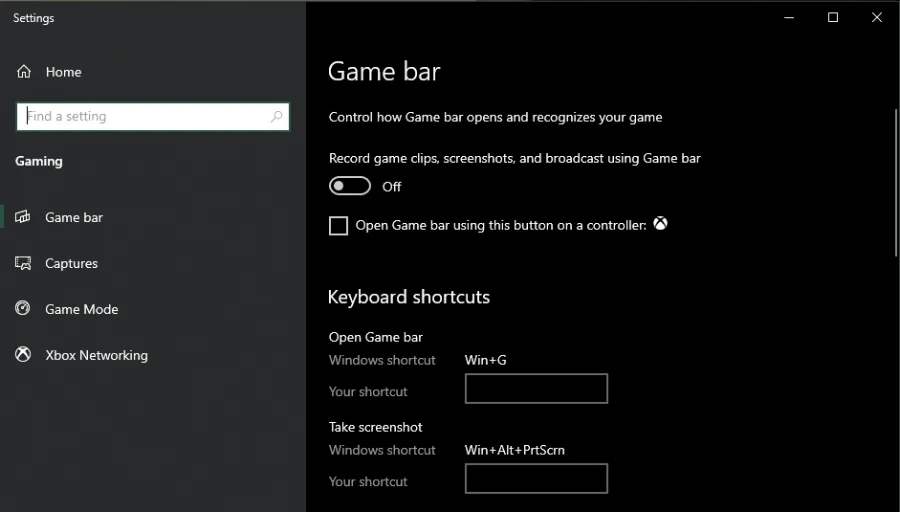
Optimizing your native Windows 10 settings is crucial for achieving the best possible performance in Cyberpunk 2077. One setting that can impact your gameplay experience is the Game Bar recording option, which continuously records your gameplay and audio. Disabling this option can free up system resources and improve your performance. To disable the Game Bar recording option, search for "Game Bar" in your taskbar search to open up the game bar system settings. Then, uncheck the recording option in the settings. Disable the background recording option in the Captures tab, as it can also reduce your performance. If you want to record your gameplay, we recommend using OBS Studio or an external capture card if your system lacks performance.
NVIDIA Control Panel
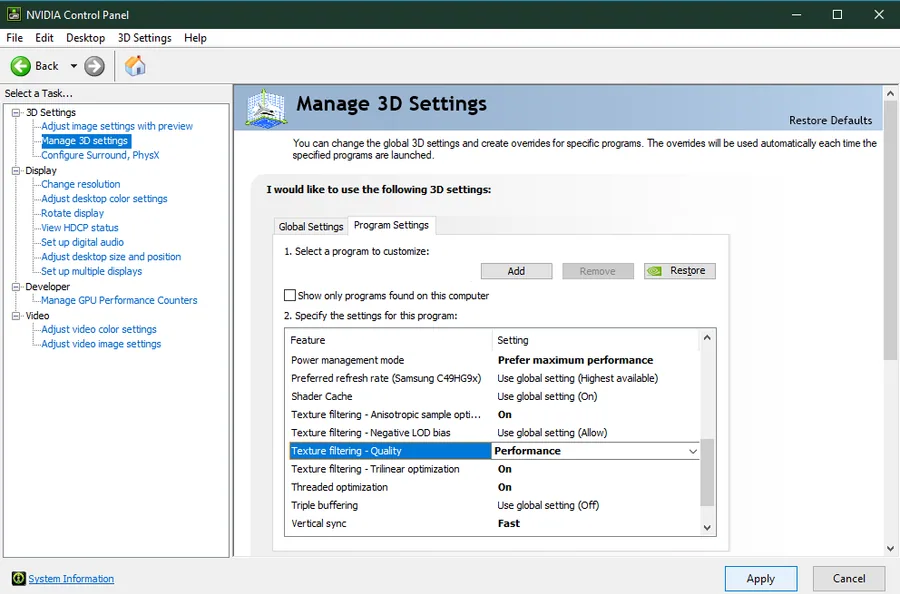
Making changes to your NVIDIA control panel can be essential. Change a few options in your NVIDIA control panel to improve the Cyberpunk 2077 performance on your system. To open your NVIDIA control panel, right-click your desktop and select NVIDIA Control Panel. In your control panel, navigate to Manage 3D Settings > Program Settings. Customizing your graphics settings in the NVIDIA Control Panel can help optimize performance in Cyberpunk 2077. To do so, select "Add a program to customize" and add Cyberpunk 2077 from the program list. If you can't find the game in the program list, click on "Browse" and locate the drive and path where you installed Cyberpunk 2077. Once you've added the game to the program list, it's recommended to adjust certain settings for optimal performance. First, ensure the CUDA setting is set to your main GPU. Then, set the Power management mode to "Prefer maximum performance" and the texture filtering quality to "Performance."
Troubleshoot Performance Problems
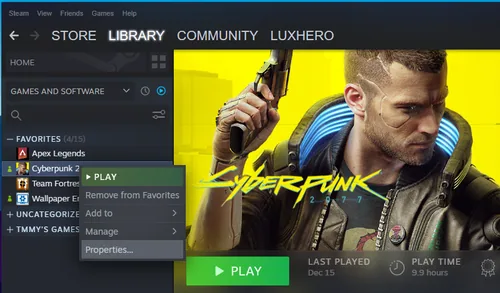
Make sure that your Cyberpunk 2077 files are up-to-date and complete. In your Steam library, right-click the application and select Properties. A new window will open, where you must select Verify integrity of game files in the Local Files tab. Redownloading and replacing any missing or corrupted Cyberpunk 2077 files will take a minute.
Change the Cyberpunk 2077 Graphics Preference
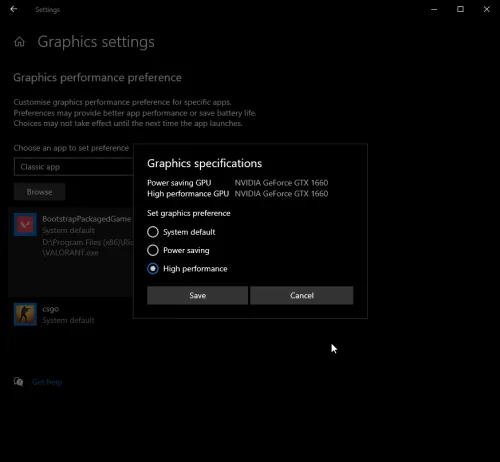
Windows 10 allows you to utilize power user settings, such as your graphics settings. To change your graphics settings, enter Graphics Settings in your taskbar search to open up your native settings. When selecting Browse your file explorer will open up, where you will have to navigate to the drive and path where Cyberpunk 2077 is saved. After adding the program to your graphics settings list, the operating system lets you choose between the following: Let Windows choose; Power Saving (Usually Intel HD Graphics); High Performance (Usually, your graphics card(s); Specific GPU (Choose which GPU to use) For the most system performance, use the High-Performance option. If your GPU is bottlenecking your performance, you should set it to Let Windows Decide. Don't forget to apply your changes.
Delete the Windows Temporary Files
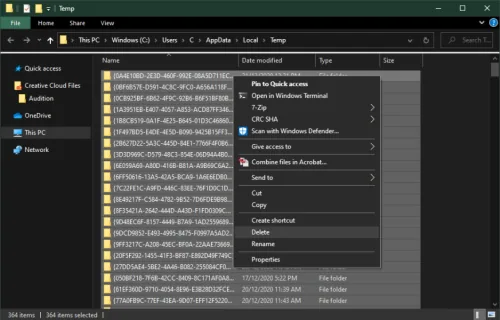
Clearing unwanted files from your hard drive is crucial for maintaining optimal Cyberpunk 2077 performance. These files can induce lag if not removed properly. To remove temporary files from your system, you can either delete them manually or use PC cleanup programs like CCleaner. Using cleanup programs is usually the best choice, as they automatically keep your hard drive clean. To manually delete temporary files, start by entering "%temp%" in your taskbar search and hitting enter. This will open up a new folder. Make sure to delete the contents of your temporary files folder. Remember that this may take a few minutes if you haven't done this before. Some files may still remain in your temp folder, as they are still in use by your programs. To completely delete these files, you should also empty your recycle bin.
Video walkthrough
If it does not work
- If the current interface differs, compare it with the recorded video walkthrough.