How To Fix Voice Chat Not Working in Valorant
Valorant is a popular first-person shooter game that relies heavily on team coordination and communication. Voice chat is an essential feature in the game that allows players to strategize, give callouts, and improve their overall gameplay experience. However, it can be frustrating when the voice chat feature suddenly stops working, hindering team communication and causing you to lose matches. In this tutorial, we will discuss the common reasons why voice chat stops working in Valorant and provide you with effective solutions to fix the issue. So, if you are experiencing voice chat problems in Valorant, keep reading to learn how to troubleshoot and resolve them.
Adjust the Valorant Voice Chat Settings
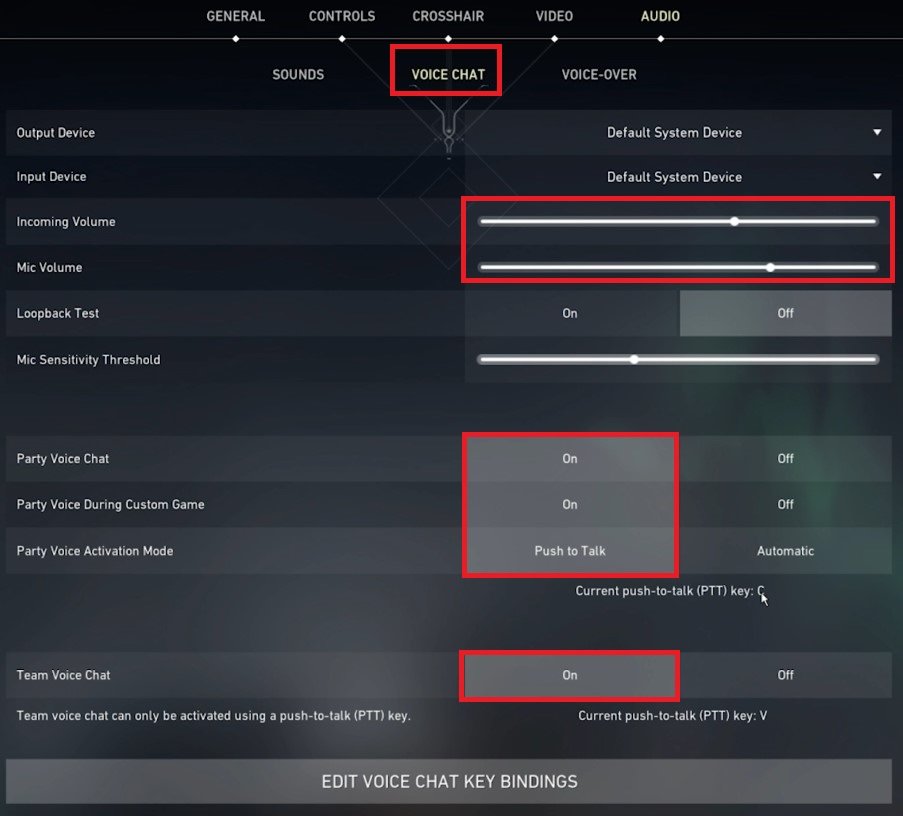
We will first take a look at your Valorant audio settings. In the Voice Chat section, make sure that the Output Device and Input Device are set to the correct device you wish to use. The Incoming Volume as well as the Mic Volume should be set to at least 50%. Disable Loopback Test, and reduce the Mic Sensitivity Threshold if you don’t have a lot of unwanted background noise. The Threshold can prevent your mic from sending any input if the volume is too low or similar to the volume of the background noise.
Enable Party Voice Chat and Party Voice During Custom Game if you wish to enable voice chat for custom games. Consider using Push to Talk as your Voice Activation Mode. When using Automatic, your voice will be heard when triggering the Sensitivity Threshold. You can always change the push-to-talk key bindings below, it’s set to C by default.
Valorant Audio Settings > Voice Chat
Windows Sound Settings
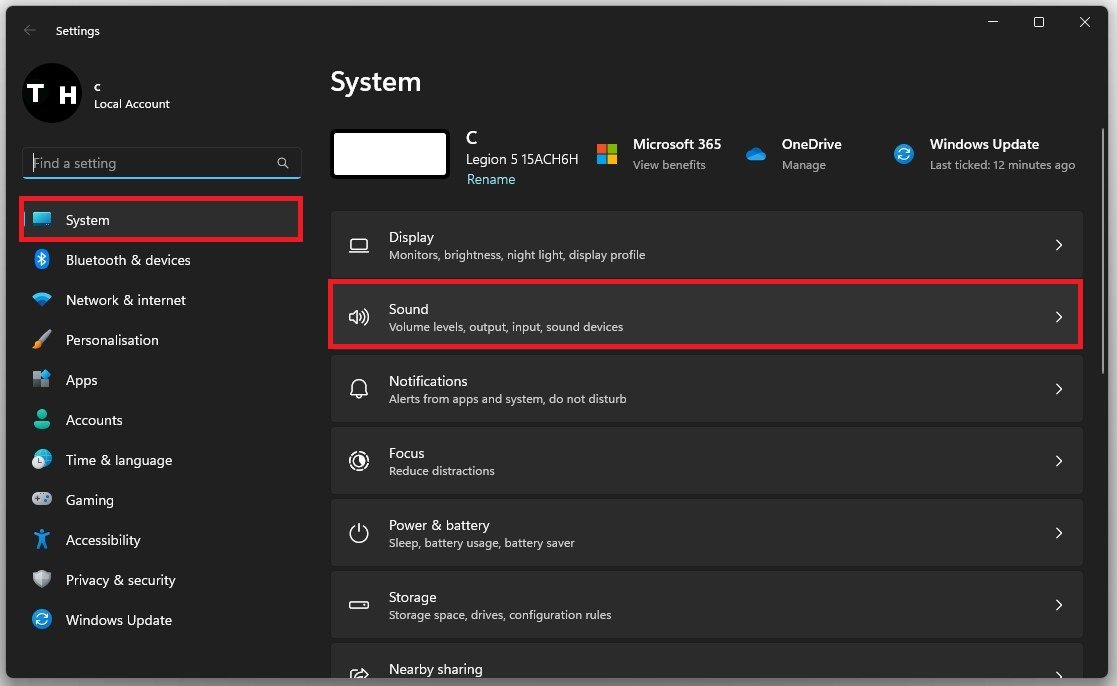
After verifying your audio settings, close Valorant and open up your Windows settings. Under System, navigate to Sound.
Windows Settings > System > Sound
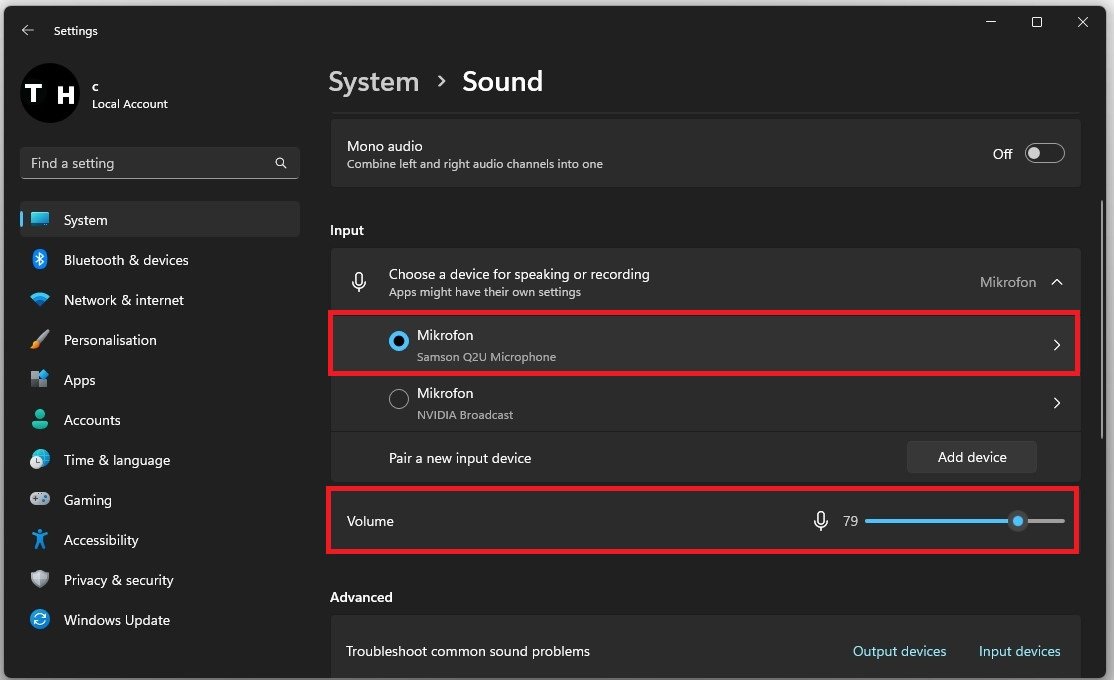
The the microphone (Audio input device) volume to 100.
Audio Input Volume level
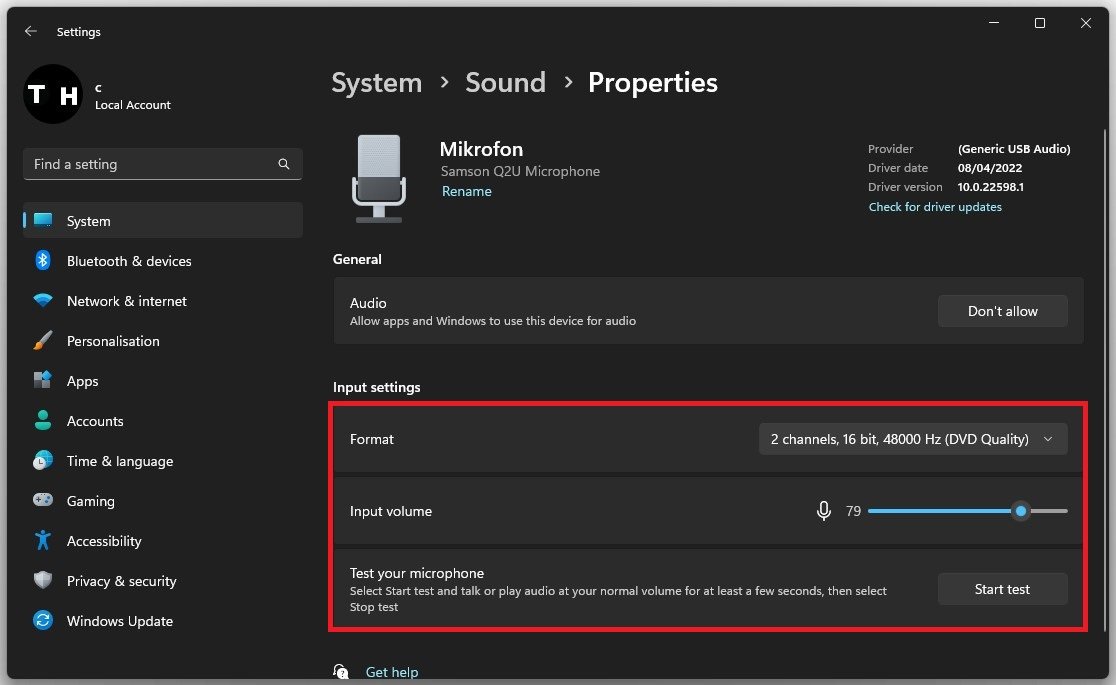
In your microphone properties, select 2 channels 48’000 or 44’100 Hz, whichever is available to you.
System Settings > Sound > Audio Input Properties
Test your microphone to see if your mic works at all on your Windows PC. If you don’t have any audio input, ensure your device is not faulty. Try plugging it in using a different USB slot.
Input Settings > Test your microphone
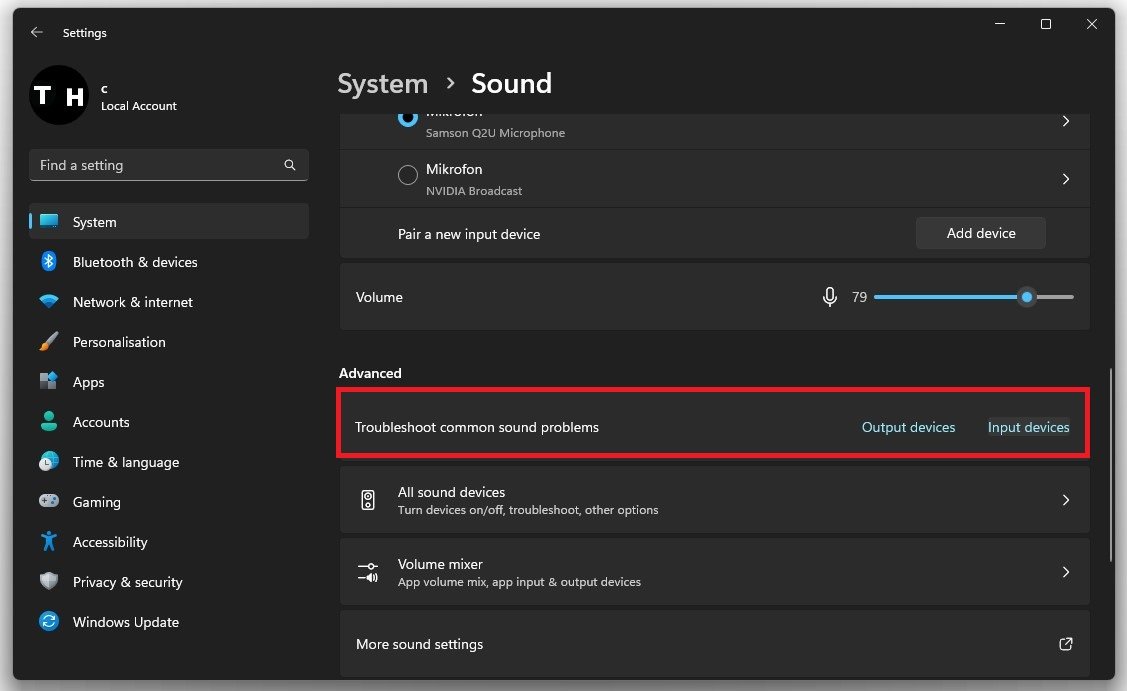
Troubleshoot common sound problems for input devices. Back in your Sound settings, click on Input devices in your advanced sound settings. After a second or two, make sure to select the mic in question and you can then proceed to let Windows fix the sound input problem.
Advanced Sound Settings > Troubleshoot common sound problems
Verify your Microphone Properties
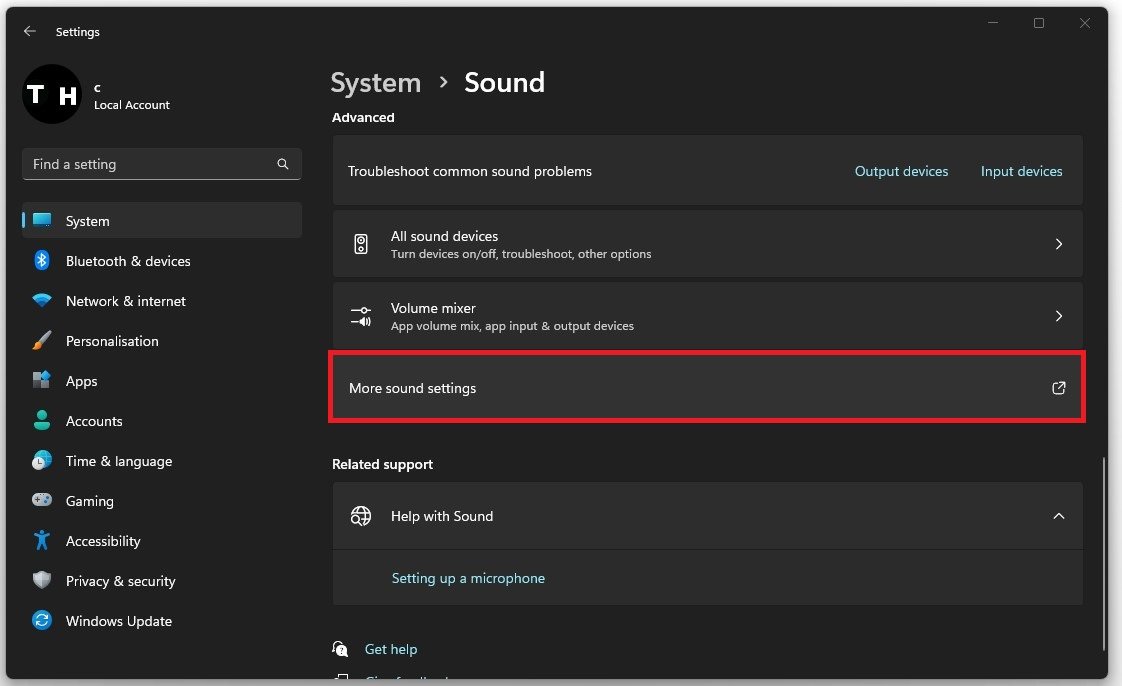
If nothing helps you, select More sound settings to open up your Sound Control Panel.
More sound settings / Sound control panel
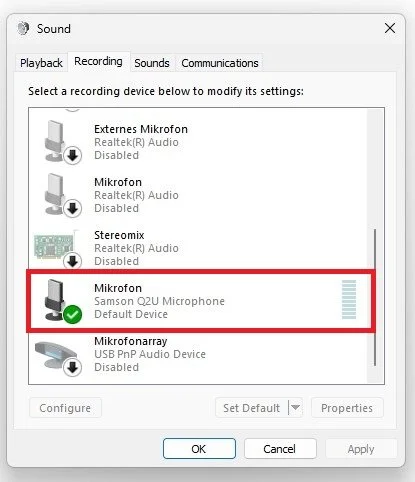
In the Recording section, ensure your preferred mic is set to the default device and disable all other microphones in this list of devices.
Enable your microphone in the sound control panel
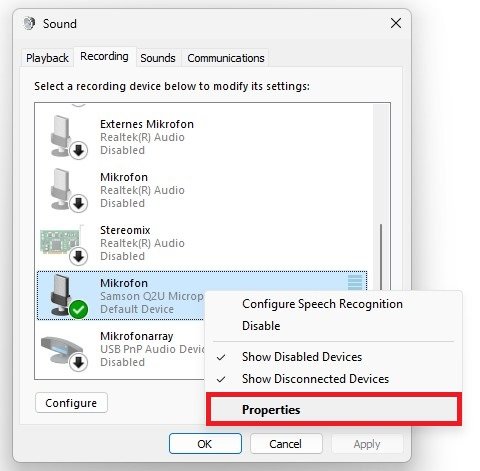
Right-click the mic you wish to use and navigate to its properties.
Microphone Properties
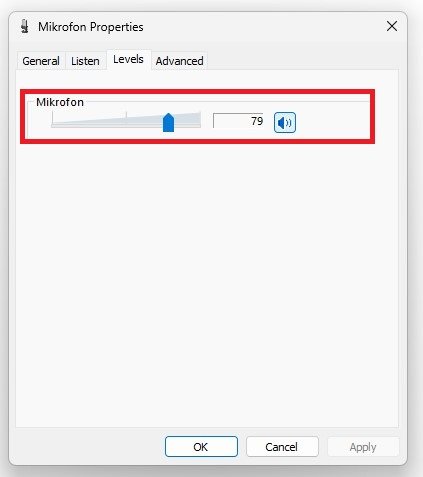
In the Levels tab, make sure that your mic is not muted.
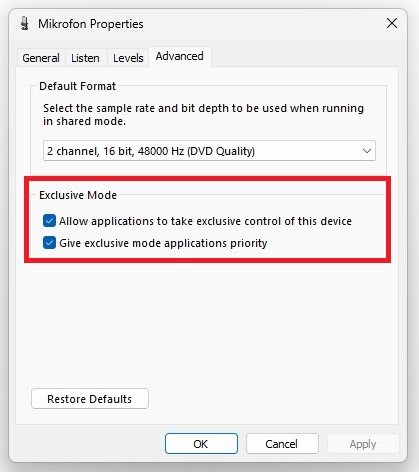
In the Advanced section, allow the two exclusive mode options, which will allow Valorant to make changes, such as increasing the mic volume.
Enable Exclusive Mode for your mic
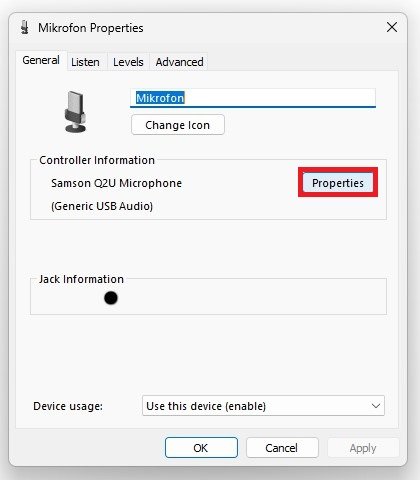
In the General tab, click on Properties, and lastly, in this panel, ensure that the device’s driver is up to date in the Driver section.
Update Mircophone Driver
Allow Apps to Use your Mic
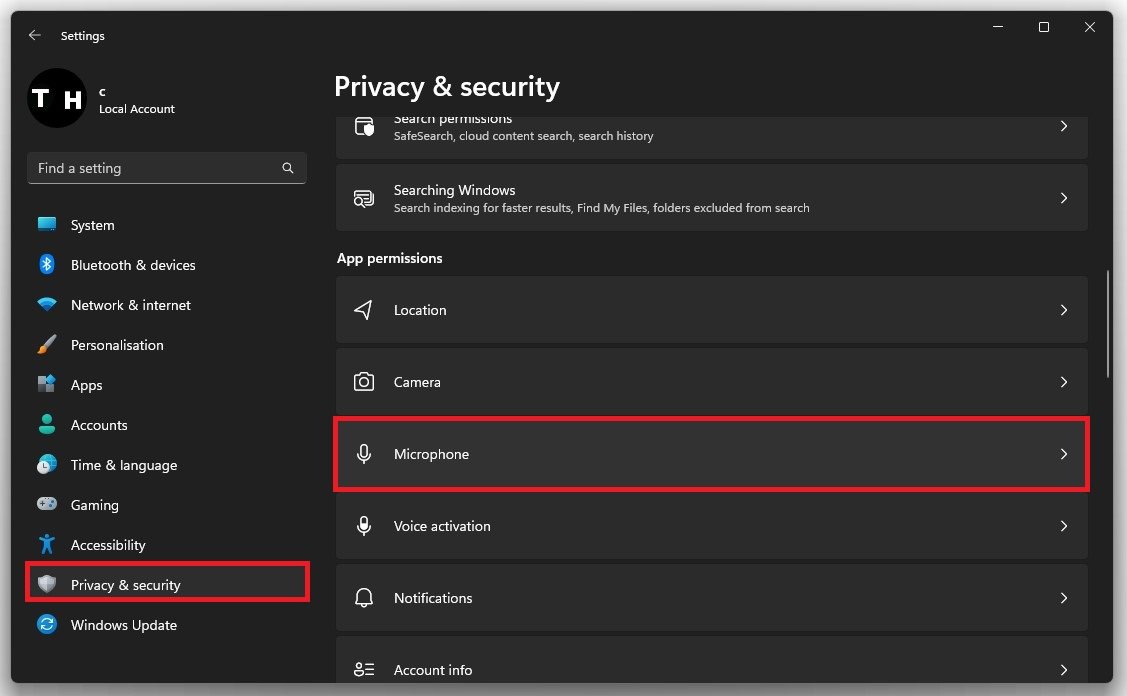
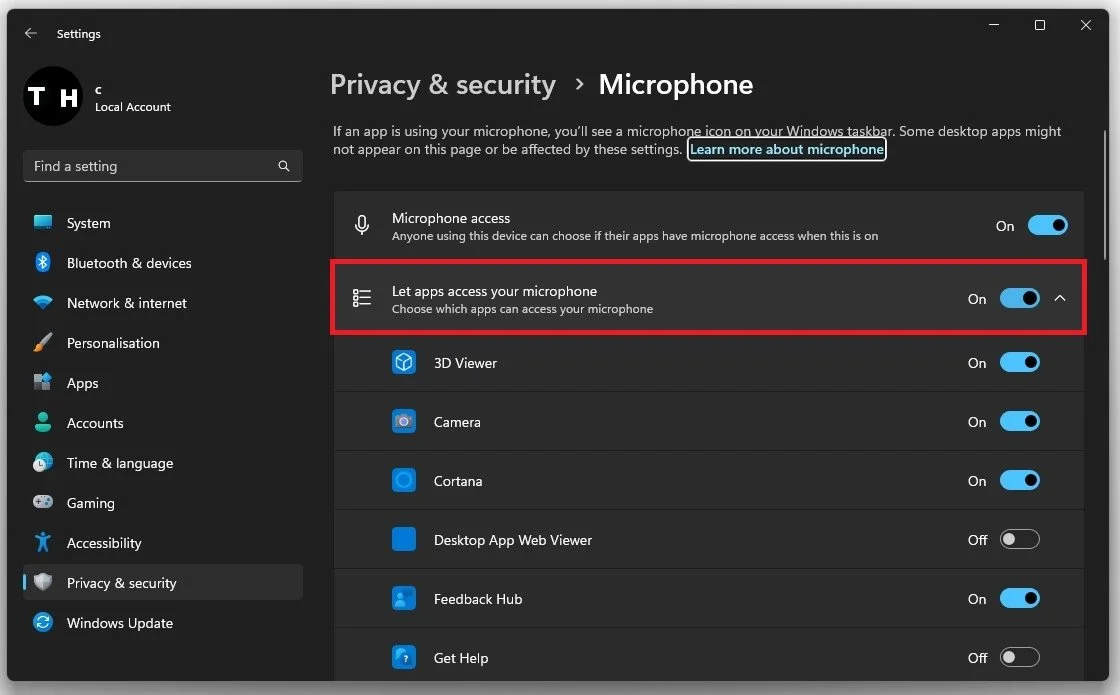
If the problem persists, then navigate back to your Windows settings. Under Privacy & Security click on Microphone under App Permissions.
Windows Settings > Privacy & Security > Microphone
Enable the “Let desktop apps access your microphone” option.
Microphone Access > Let apps access your microphone


