Discord · Windows
How To Fix: Discord Not Installing on Windows
Original source date
Answer
Open up your Task Manager by searching for it in your start menu search. On the window, in the Processes tab, make sure to end all Discord processes from running. This could be the installer or the actual application. Search for %AppData%. After hitting enter, a new folder will open up. Ensure you’re in the AppData, and then Roaming section of the folder. You should then proceed to delete the existing Discord folder.
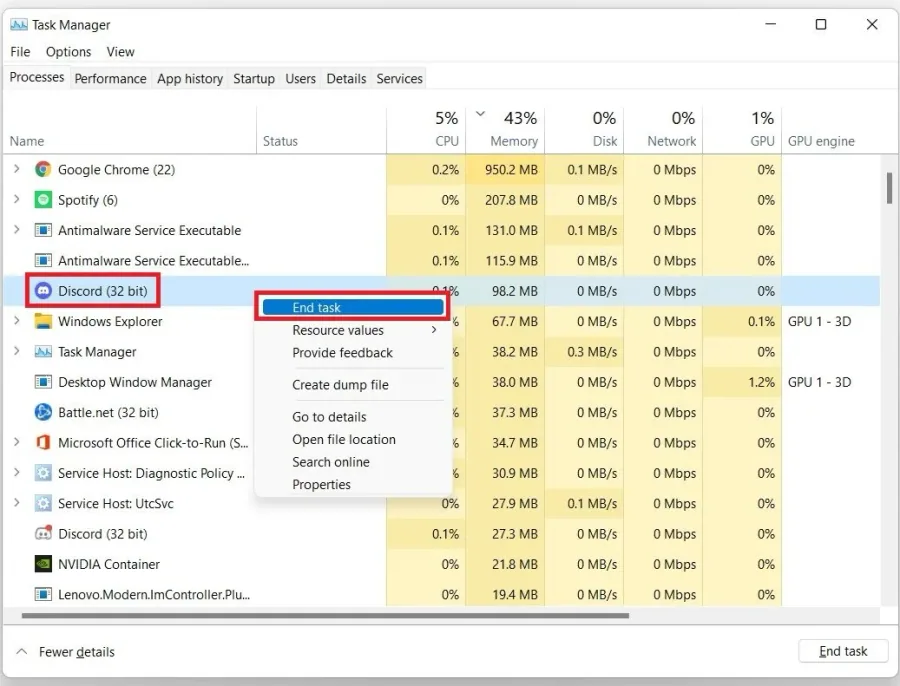
Close all Discord Processes
Open up your Task Manager by searching for it in your start menu search. On the window, in the Processes tab, make sure to end all Discord processes from running. This could be the installer or the actual application.
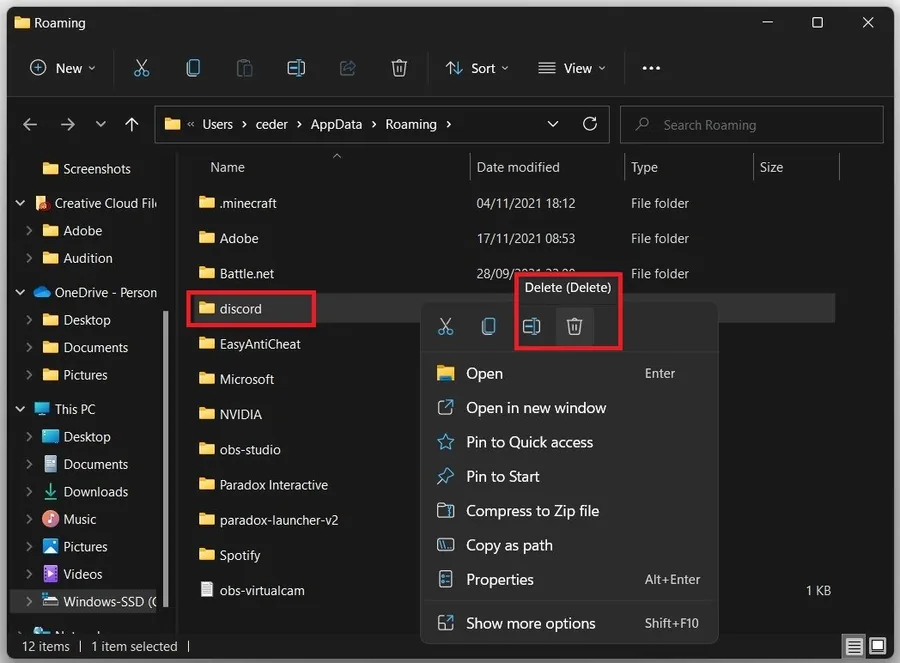
Delete the Discord Application Data Folder
Search for %AppData%. After hitting enter, a new folder will open up. Ensure you’re in the AppData, and then Roaming section of the folder. You should then proceed to delete the existing Discord folder.
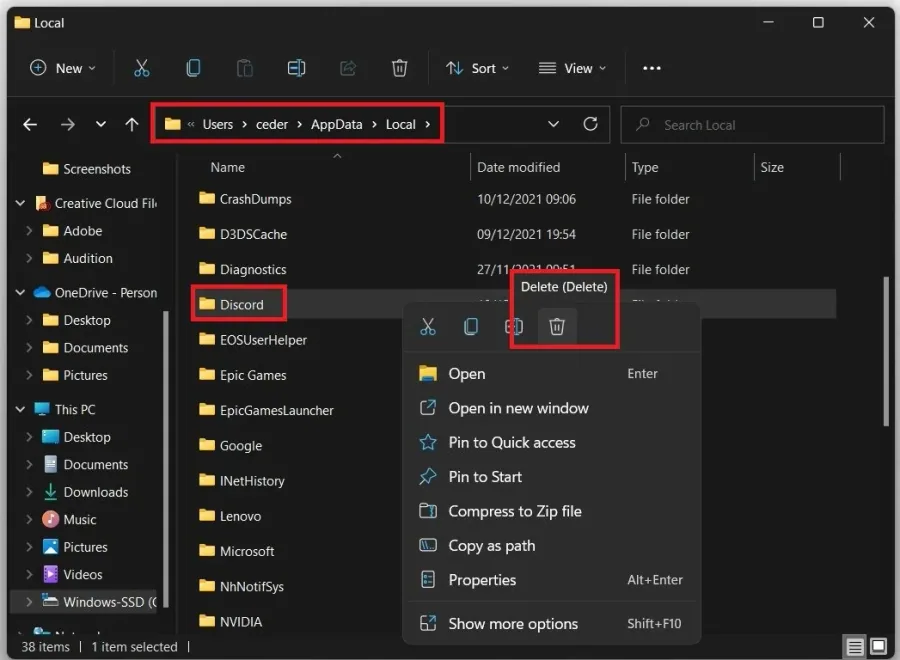
Navigate back to AppData > Local
Navigate back to AppData > Local. You will find another Discord folder which you will have to delete.
Reinstall Discord
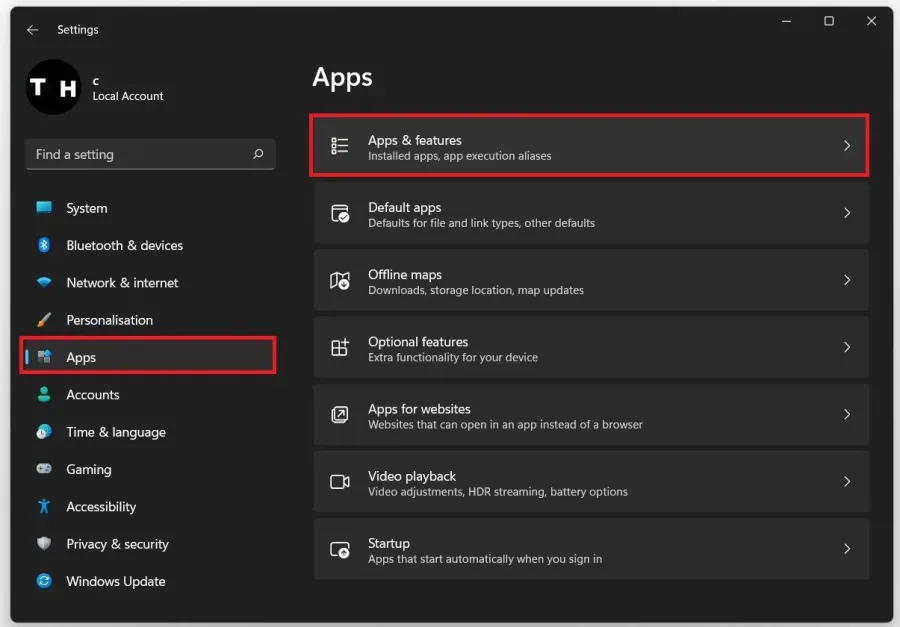
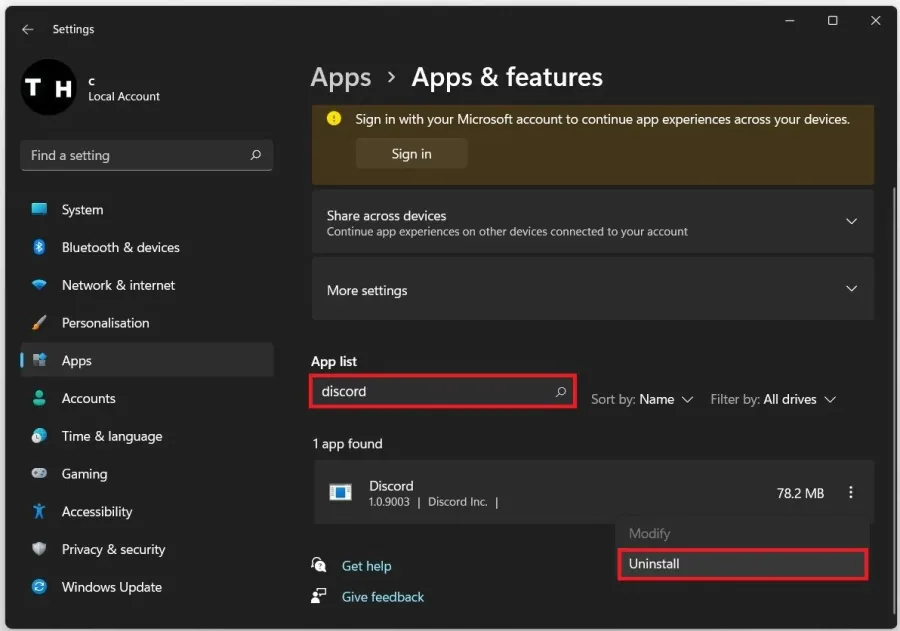
After deleting the Discord cache folders, open up your native settings application. In the Apps tab, select Apps & features.
Under App List, search for Discord
Under App List, search for Discord. Click on the burger menu on the right-hand side and select Uninstall.
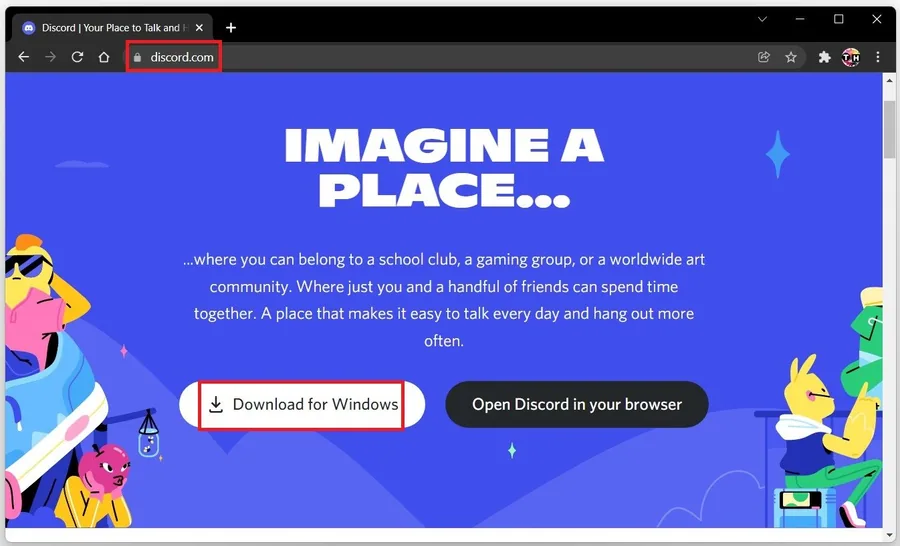
When navigating to Discord.com, you can redownload the installer, which should on…
When navigating to Discord.com, you can redownload the installer, which should only take a few seconds to complete until you can use Discord on your system again. You should also exclude Discord from being detected from your anti-virus application and you need admin permissions to properly install Discord on your system.
Video walkthrough
If it does not work
- If the current interface differs, compare it with the recorded video walkthrough.