AI · Platform not recorded
How To Allow ChatGPT Internet Access - Tutorial
Original source date
Answer
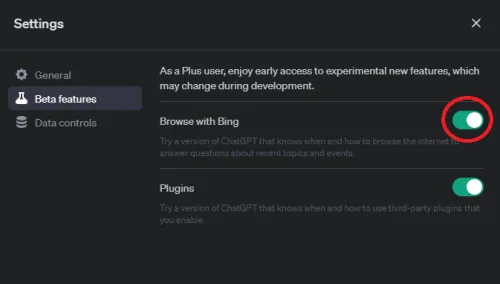
For ChatGPT Plus Users: Utilize the "Browse with Bing" feature within your account settings to enable internet access for your ChatGPT. This setting, once activated, provides real-time data access, supercharging your ChatGPT's response accuracy. For example, if you're searching for current movie reviews or trending recipes, activating this option will ensure your AI partner stays up-to-date.
Enable “Browse with Bing”
For ChatGPT Plus Users: Utilize the "Browse with Bing" feature within your account settings to enable internet access for your ChatGPT. This setting, once activated, provides real-time data access, supercharging your ChatGPT's response accuracy. For example, if you're searching for current movie reviews or trending recipes, activating this option will ensure your AI partner stays up-to-date.
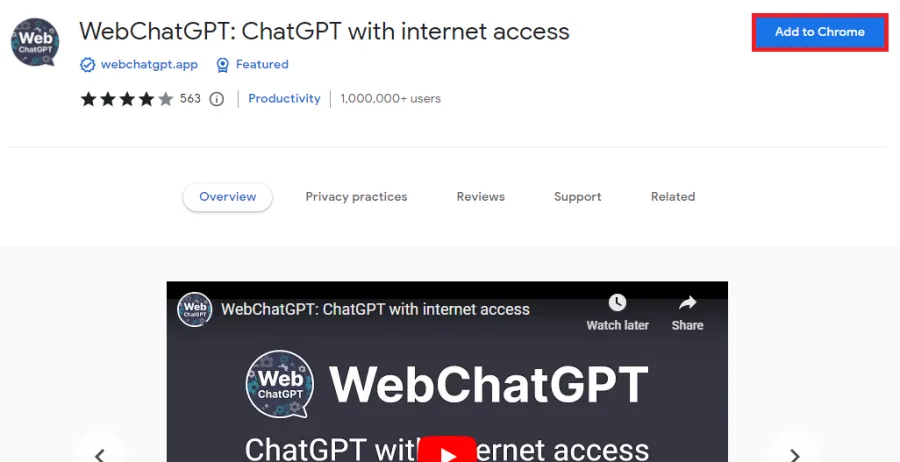
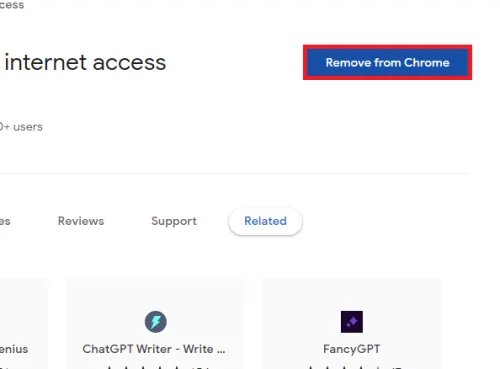
Add WebChatGPT to Chrome
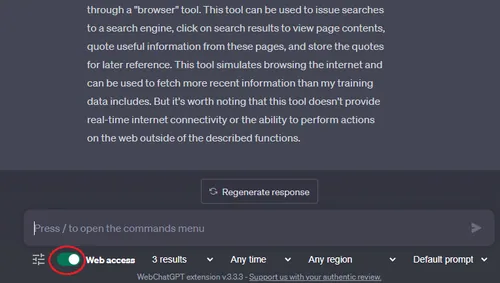
Enhancing your ChatGPT experience with real-time data is a simple, step-by-step process: Launch Google Chrome: This widely-used browser will be your platform for accessing the Chrome Web Store. You can use other browsers, but for this guide, we'll focus on Chrome.; Access the WebChatGPT Extension: Click here to access the WebChatGPT Chrome extension.; Install the Extension: Click "Add to Chrome" to integrate WebChatGPT into your browser.; Log into OpenAI: After installation, direct your browser to Chat.OpenAI.com. Log in with your existing OpenAI account to see the updated ChatGPT interface.; Activate Web Access: Look for the "Web Access" toggle at the bottom of your ChatGPT window. Switch it on to give ChatGPT its new web browsing capabilities. This enhanced version of ChatGPT will now be capable of real-time data search to answer your queries with up-to-date and accurate responses.
How To Use WebChatGPT
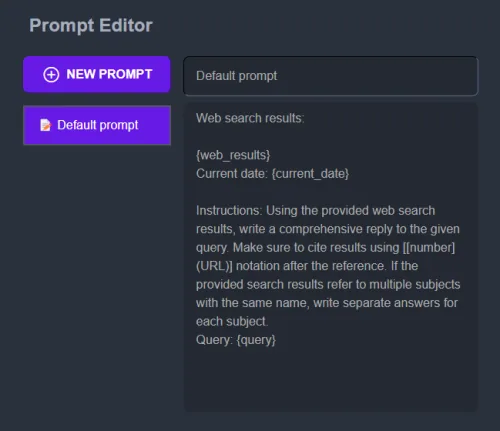
Maximizing the utility of the WebChatGPT extension involves a few simple steps: Customize Your Preferences: Within the ChatGPT interface, you'll find a variety of settings located below the text box and beside the web access toggle. Tailoring these preferences can optimize your ChatGPT experience.; Adjust Search Parameters: Determine the number of search results ChatGPT should consider before responding. A range of 3-5 results usually provides a solid balance of diversity and relevance.; Set Retrieval Location and Time: Control from where and when ChatGPT retrieves search results, tailoring responses to your specific requirements.; Design Custom Prompts (Optional): Click on "Default prompt" followed by "+New prompt" to construct your own command template for the WebChatGPT extension.
After customizing your preferences, you're ready to dive into exploring the enhan…
After customizing your preferences, you're ready to dive into exploring the enhanced capabilities of ChatGPT. Here's how to do it: Test Your Prompts: Enter your familiar prompts into the ChatGPT text box, ensuring the web access toggle is enabled. Discover how the inclusion of real-time web information refines the responses.; Ask Questions: Write your queries in the ChatGPT chatbox. The extension will fetch the latest available data related to your question, often including citations for authenticity.; Use an Optimal Number of Results: While referring to up to 10 results can provide the most comprehensive information, be aware that fetching too many may lead to less relevant data.
Managing WebChatGPT
The user-friendly WebChatGPT extension can be easily managed to enhance your ChatGPT interactions: Toggle Web Access: A simple switch allows you to enable or disable web access, reverting ChatGPT to its default state whenever required.; Remove Extension: The option to uninstall the extension from your browser is always available, ensuring user control over the tool. Empowered by the WebChatGPT Chrome extension, ChatGPT harnesses the internet to deliver precise, updated responses. Following these steps enables quick extension setup, ushering you into the world of ChatGPT enriched with the latest data. For the most dependable outcomes, configure the extension to consider a minimum of three search results.
Video walkthrough
If it does not work
- How does the WebChatGPT Chrome extension improve the functionality of ChatGPT?. WebChatGPT extension equips ChatGPT with the ability to access the internet, thereby enhancing its response accuracy with the latest information.
- Can I disable web access for ChatGPT once I have added the WebChatGPT extension?. Yes, you can easily toggle web access on and off according to your needs, effectively returning ChatGPT to its default state when preferred.
- How can I customize the WebChatGPT extension to suit my preferences?. The WebChatGPT extension comes with several configurable settings, including the number of search results it should consider and the time and location for result retrieval.
- What are the benefits of setting the search results to at least 3 in the WebChatGPT extension?. Setting the search results to at least 3 ensures that ChatGPT can compare multiple sources of information, enhancing the reliability of its responses.
- What if I no longer want the WebChatGPT extension in my browser?. The WebChatGPT extension can be easily removed from your browser at any time. This reverts ChatGPT back to its initial state without internet access.