AI · Platform not recorded
How To Edit & Improve Images with ChatGPT! - Image Editor Plugin
Original source date
Answer
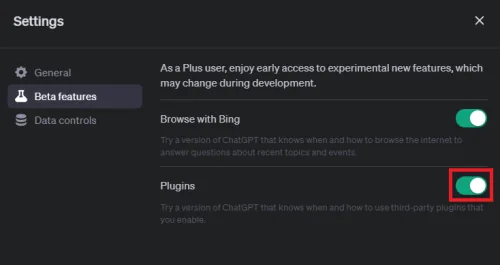
Start your journey with ChatGPT's Image Editor plugin by following these simple steps: Visit chat.openai.com, where the magic happens! Be sure you're working with the GPT-4 version and have activated plugins - this option should be readily available for all ChatGPT plus subscribers. If not, don't worry! Head to your ChatGPT settings and toggle on "Plugins" under the "Beta Features" section.
Enable and Install the Image Editor Plugin
Start your journey with ChatGPT's Image Editor plugin by following these simple steps: Visit chat.openai.com, where the magic happens! Be sure you're working with the GPT-4 version and have activated plugins - this option should be readily available for all ChatGPT plus subscribers. If not, don't worry! Head to your ChatGPT settings and toggle on "Plugins" under the "Beta Features" section.
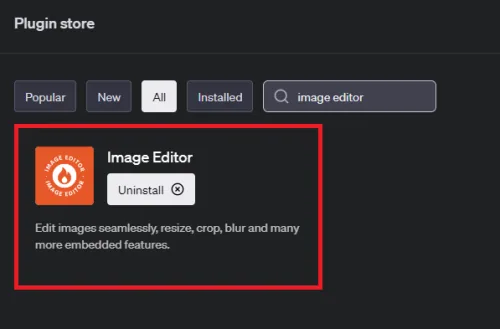
Now it's time to explore the ChatGPT plugin store
Now it's time to explore the ChatGPT plugin store. Just click on the plugins icon and dive in.; In the store, search for the "Image Editor" plugin. Install it and remember to activate it in your installed plugins list.; A word of caution - avoid enabling plugins that might conflict with the Image Editor. This simple step ensures that your image editing process goes smoothly. With these steps, you're all set to harness the power of the Image Editor plugin on ChatGPT! Happy image editing!
Navigating the Image Editor with ChatGPT
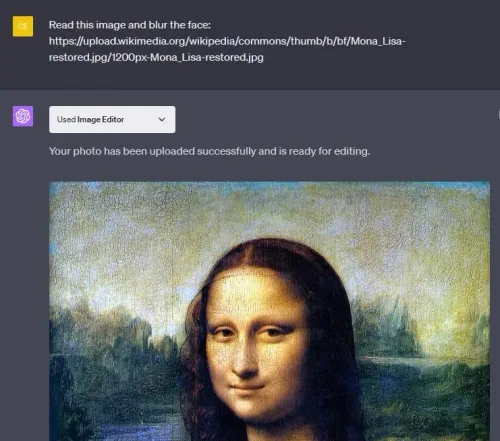
Once you've successfully installed and enabled the Image Editor plugin, you're ready to start editing! If your image file is locally stored, upload it to a cloud storage platform like Google Drive and share it. Once done, simply copy the URL of the shared image and paste it into the ChatGPT dialogue box. It might take a few moments for ChatGPT to fetch your image information and display it. While operating the Image Editor plugin, you may come across a few hitches. Here are some tips to ensure a seamless editing experience: Verify the Image Editor plugin: Make sure that the plugin is installed and enabled correctly. At times, it might be disabled or improperly installed, which can lead to issues.; Use the correct URL format: When pasting the URL into the Image Editor plugin, ensure it begins with 'http://' or 'https://'. Also, make sure that the URL is valid and accessible.; Supported file formats: The Image Editor plugin supports a variety of file formats, including PNG. Always ensure that the file format of the image you want to edit is supported by the plugin.; Be patient with bulk operations: If you're attempting to process multiple images at once, it might take some time. Refrain from making several requests in a short period as it may overload the system. With these pointers, you should be able to avoid most issues and enjoy an uninterrupted image editing experience with ChatGPT's Image Editor plugin!
Maximizing the Image Editor with ChatGPT
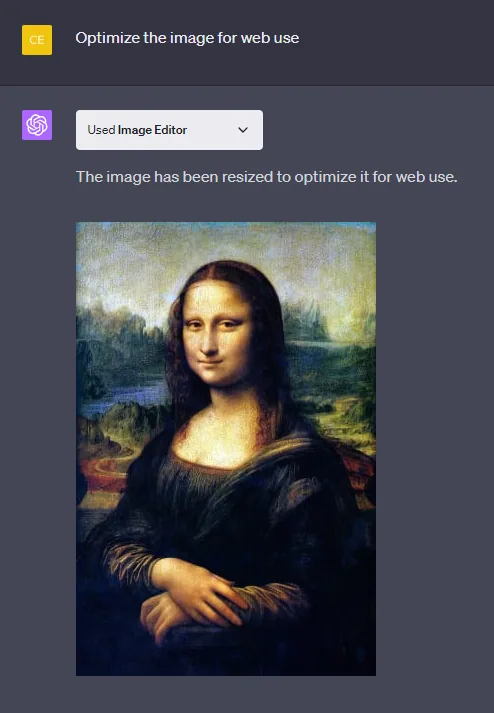
The Image Editor plugin is packed with features to help you get the most out of your image editing needs. Here are some command suggestions that can help you use this tool more efficiently: Optimize for web: Use the command "Resize image to 1200x630" to optimize your images for web use. Perfect for social media sharing, this ensures quicker load times and enhances user experience.; Crop to perfection: The command "Crop the image" helps to draw focus to the main subject by eliminating unnecessary background or distractions. This is particularly useful for product images or profile pictures.
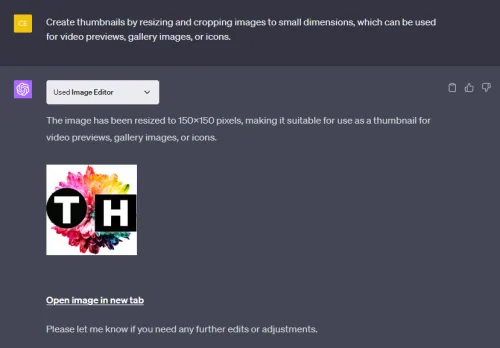
Thumbnail creation: Using the command "Create thumbnail", you can resize and crop…
Thumbnail creation: Using the command "Create thumbnail", you can resize and crop images to smaller dimensions. These thumbnails can be used for video previews, gallery images, or icons.; Blur out details: With the "Blur feature", you can obscure sensitive information or details in an image, like license plates, faces, or text.; Automate bulk edits: If you have multiple images that require similar editing (such as resizing all images to a specific dimension), automate this process by sending multiple requests to the Image Editor plugin. When you're satisfied with the edits, simply open the image in a new tab and download it. Explore these commands and more to unlock the full potential of the Image Editor plugin with ChatGPT!
Video walkthrough
If it does not work
- How can I enable plugins on ChatGPT?. Head over to chat.openai.com, ensure you're using GPT-4, and enable "Plugins" under "Beta Features" in your ChatGPT settings.
- How do I install the Image Editor plugin on ChatGPT?. In the ChatGPT plugin store, search for "Image Editor". Install the plugin and make sure to enable it in your installed plugins.
- What should I do if the Image Editor plugin isn't working correctly?. Ensure the Image Editor plugin is installed and enabled. Also, check that the URL of your image starts with 'http://' or 'https://', is accessible, and not broken.
- What image file formats are supported by the Image Editor plugin?. The Image Editor plugin supports various formats, including PNG files. Make sure the image you're trying to edit is in a supported format.
- Can I perform batch editing with the Image Editor plugin on ChatGPT?. Yes, you can automate the editing process for a series of images by sending multiple requests to the Image Editor plugin.