Windows 11 - How To Fix Random Restart & Boot Problems

Windows 11 is the latest operating system from Microsoft, and it promises to deliver a faster and more streamlined user experience. However, some users may encounter random restart and boot problems that can be frustrating and time-consuming to fix. These issues can stem from various factors, such as hardware conflicts, software errors, or even malware infections.
To ensure that your Windows 11 system runs smoothly and efficiently, it is essential to address any restart or boot problems as soon as they arise. In this article, we will explore some of the most common causes of these issues and provide you with practical solutions to fix them. Whether you are a novice or an experienced user, you will find our tips and tricks helpful in resolving random restart and boot problems in Windows 11.
Launch CMD through your Task Manager
In your start menu search, type Task Manager. Right-click the icon and start it as an administrator. Select File and click on Run new task. Select Browse, and your file explorer will open up.
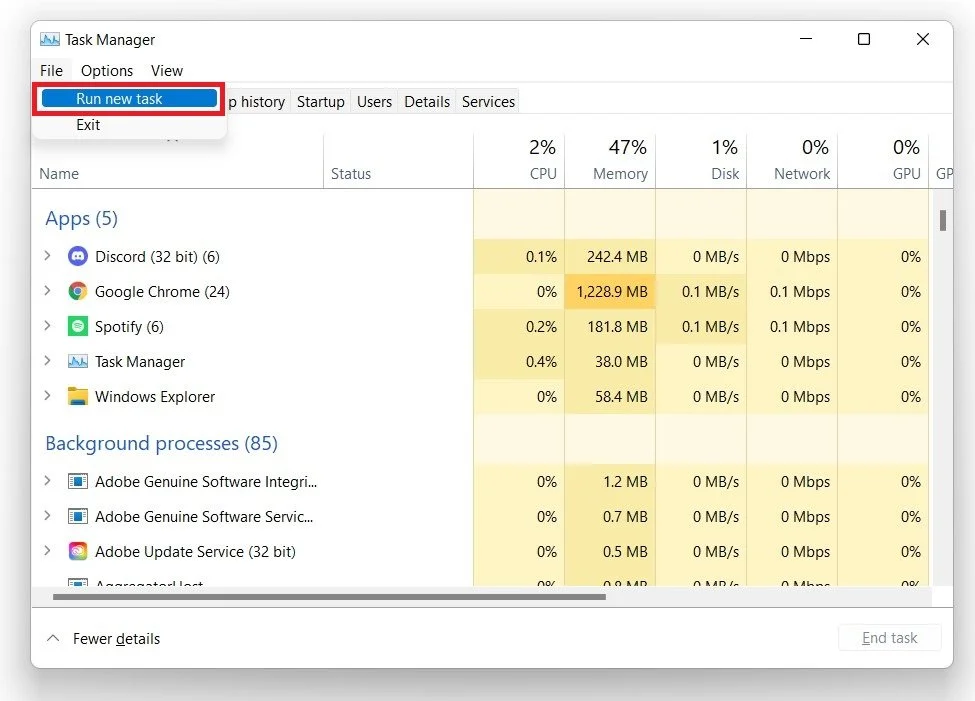
Task Manager > File > Run New Task
Navigate to your C: drive, Windows, System 32, and here find the Command Prompt application. Next, click on Open.
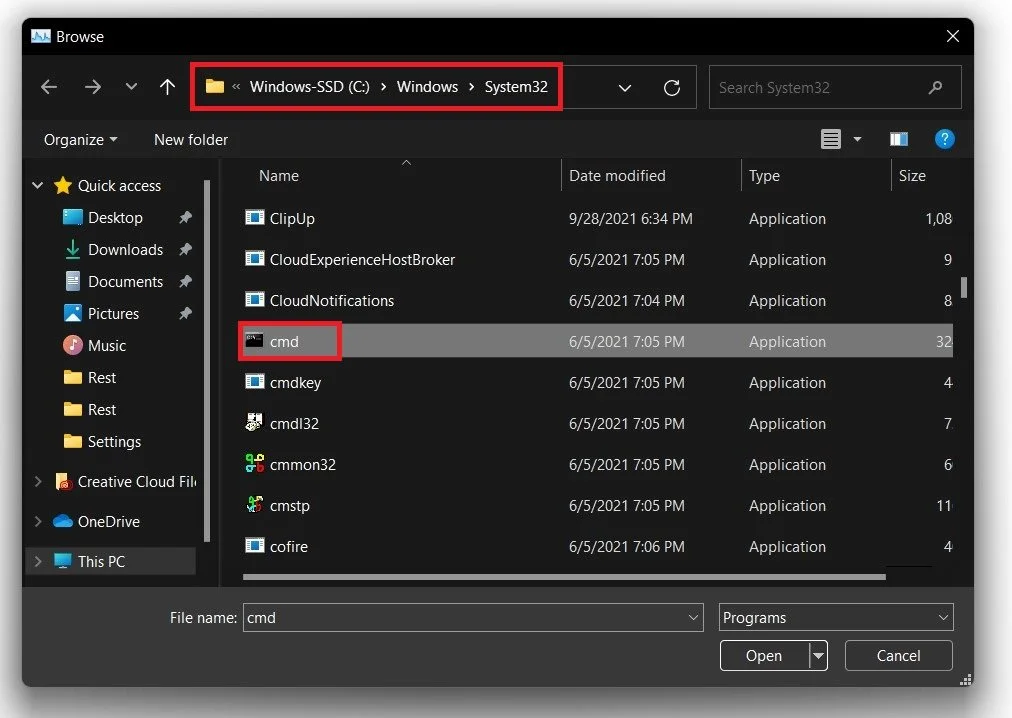
Windows PC > Windows > System32 > cmd
Check the Create this task with administrative privileges box and select Ok.
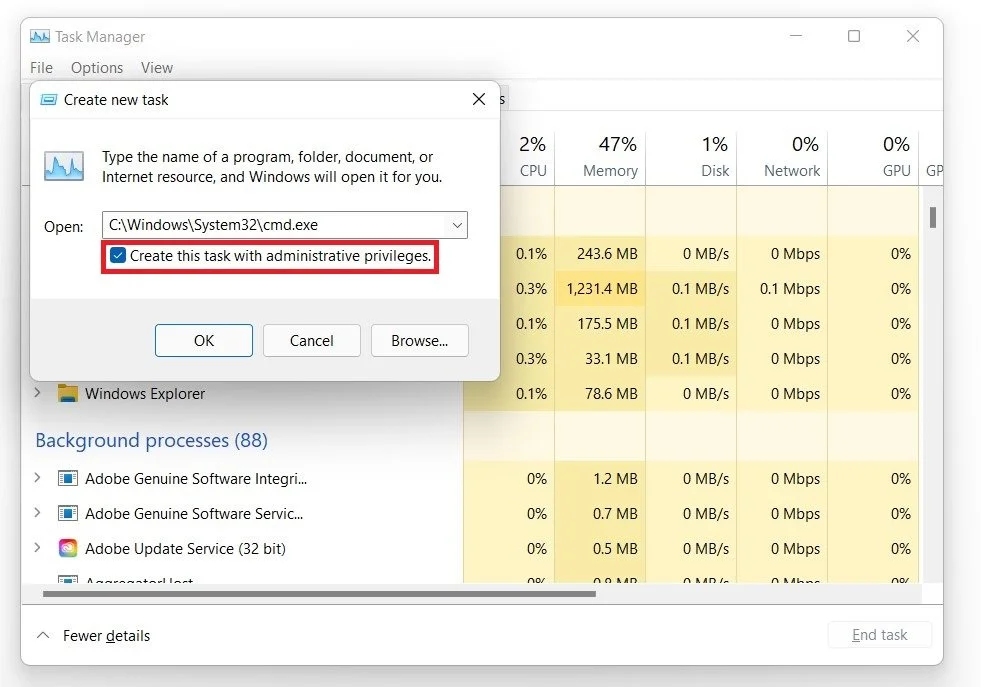
Create new Task > Create this task with admin privileges
Command Prompt
This will open up your Command Prompt. Use the following commands:
gpupdate
cls
chkdsk C:
Or instead of C:, use the letter for the drive on which your operating system is installed. For most users, this should also be C: This can take some time to find and repair some sections of your hard disk drive. You can exit out of your command prompt when you’re done.

Admin Command Prompt
Add a New Windows Update Registry Editor Value
Search for Registry Editor in your start menu search to open it up. If you cannot find it here, use the Windows key + R shortcut to open this dialogue box. Here, type regedit and hit enter. Navigate to: HKEY_LOCAL_MACHINE, SOFTWARE, Microsoft, Windows.
Right-click Windows, and select create a new key. Name it: windows update Right-click windows update and select create a new key, and name it: AU. Right-click the AU key and select to create a new DWORD (32-bit) Value or QWORD (64-bit) Value, depending on your OS type. We use a 64-bit operating system so that we will select the 64-bit value. Name it: NoAutorebootWithLoggedOnUser Double-click the new value and set its value to 1 and then you can close this window. This should prevent your Windows 11 PC from randomly restarting.

Registry Editor > Edit the newly added QWORD Value
Adjust the Startup & Recovery Options
If the issue persists, search for Advanced System Settings and hit enter to open your advanced system properties. On the window, in your Advanced tab, open your Startup and Recovery settings.
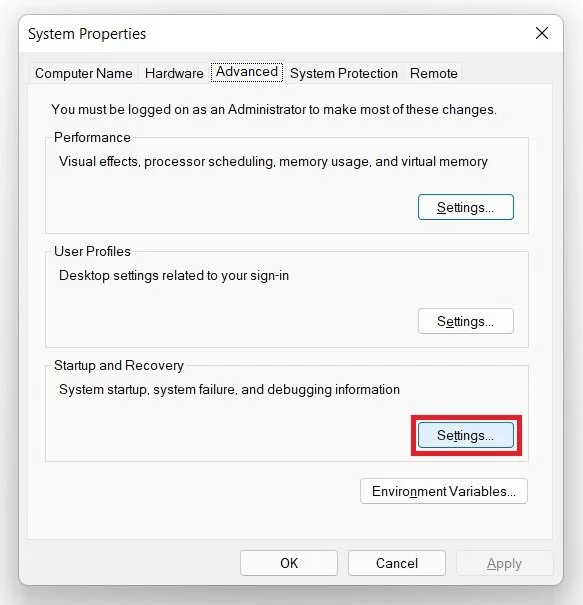
System Properties > Advanced > Startup and Recovery
Ensure the Automatically restart on system failure is disabled. Press Ok.
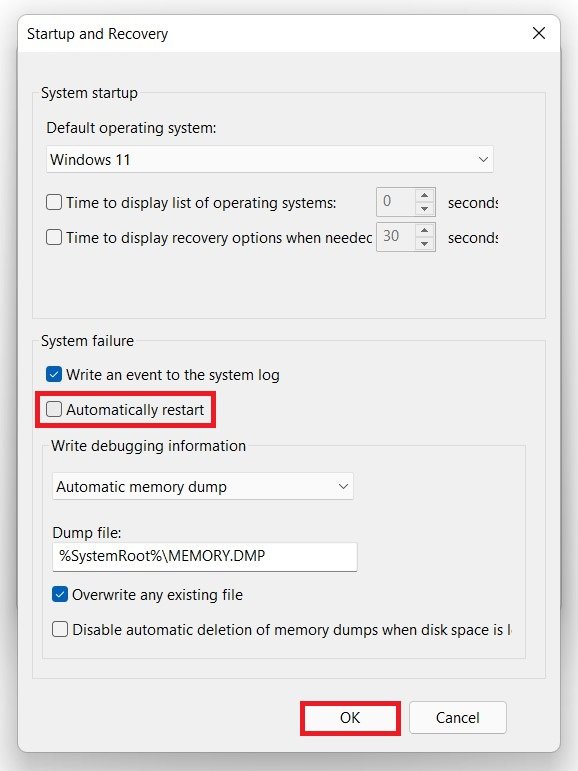
Startup and Recovery > System Failure > Automatically Restart (disable)
Edit your Windows Power Plan
Search for Power Plan and hit enter to open your Edit Plan Settings control panel window. Click on Change advanced power settings.
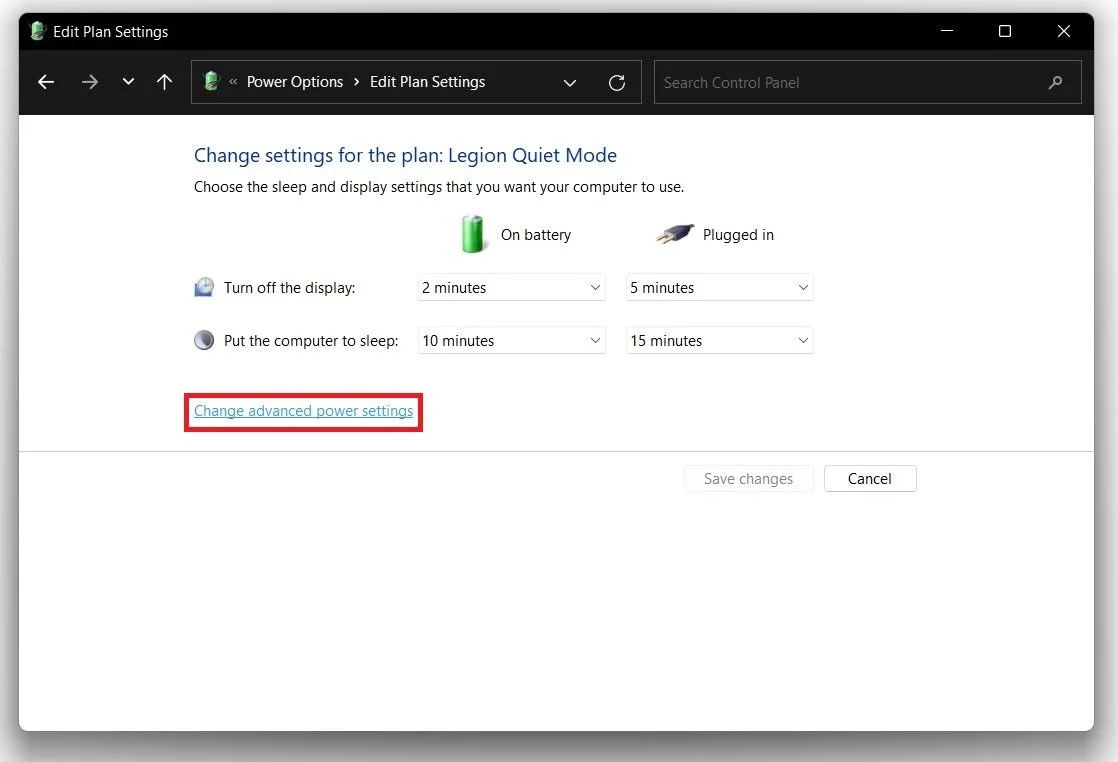
Power Options > Edit Plan Settings > Change Advanced Power Settings
On the window, expand Processor power management and Minimum processor state. If the value is set to 100%, lower it to 5; if it’s not at 100, leave it as it is.
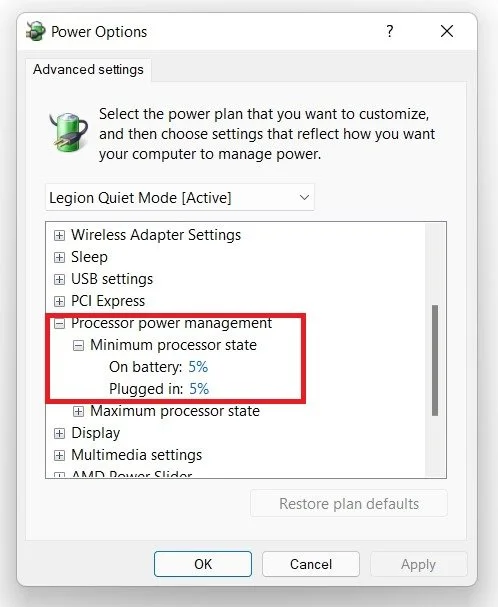
Power Options > Processor Power Management
Expand the PCI express settings, and change the link state power management option from Moderate power savings to OFF. This will ensure that your system will not restart when it’s not getting enough power.

Advanced Power Options > PCI Express > Link State Power Management
Update Graphics Card Driver
If you are still experiencing startup and restart issues, ensure you are not using faulty hardware. Ensure your RAM stick is still in its socket and your graphics card is properly connected. You can connect your monitor directly to your motherboard instead of your GPU. Search for GeForce Experience in your start menu search to open up the application if you are using an NVIDIA graphics card.
In the Drivers tab, click on Download. This will take a few minutes to automatically download and install your system's newest NVIDIA GPU driver. Before closing this window, navigate to your settings when clicking on the gear icon at the top right of your application. We suggest disabling the in-game overlay in the General tab, as it can cause lag on some systems. For AMD users, you can utilize the AMD Radeon software to complete the same step and update your graphics driver.
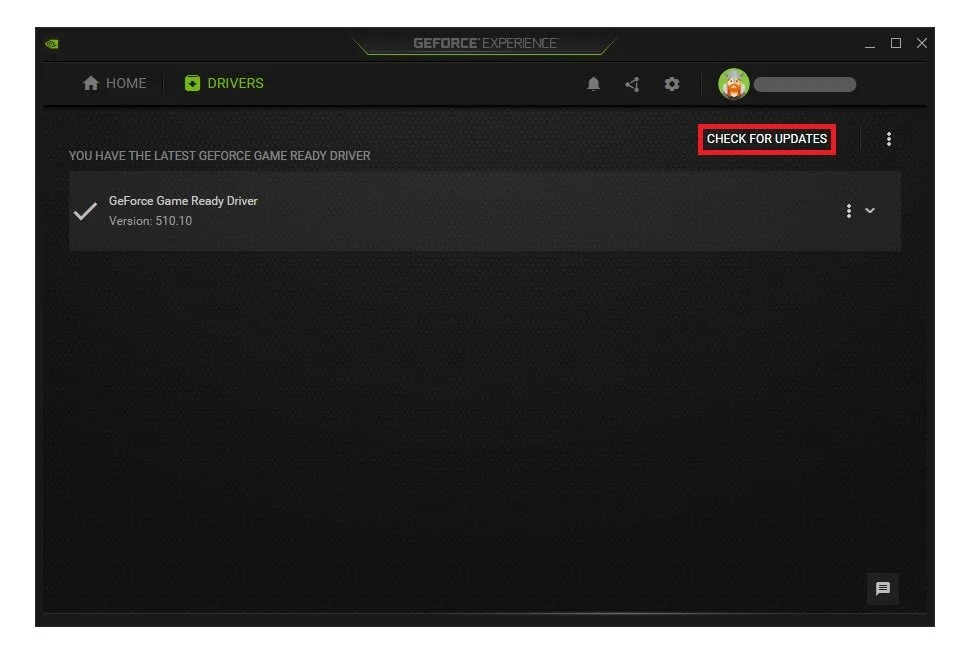
GeForce Experience > Drivers > Download
Update Windows Operating System
Ensure your operating system is up to date. Open up your settings application. Search for Update and select Check for updates. Choose to download the latest update in your Windows update settings, and restart your PC when the download is complete.
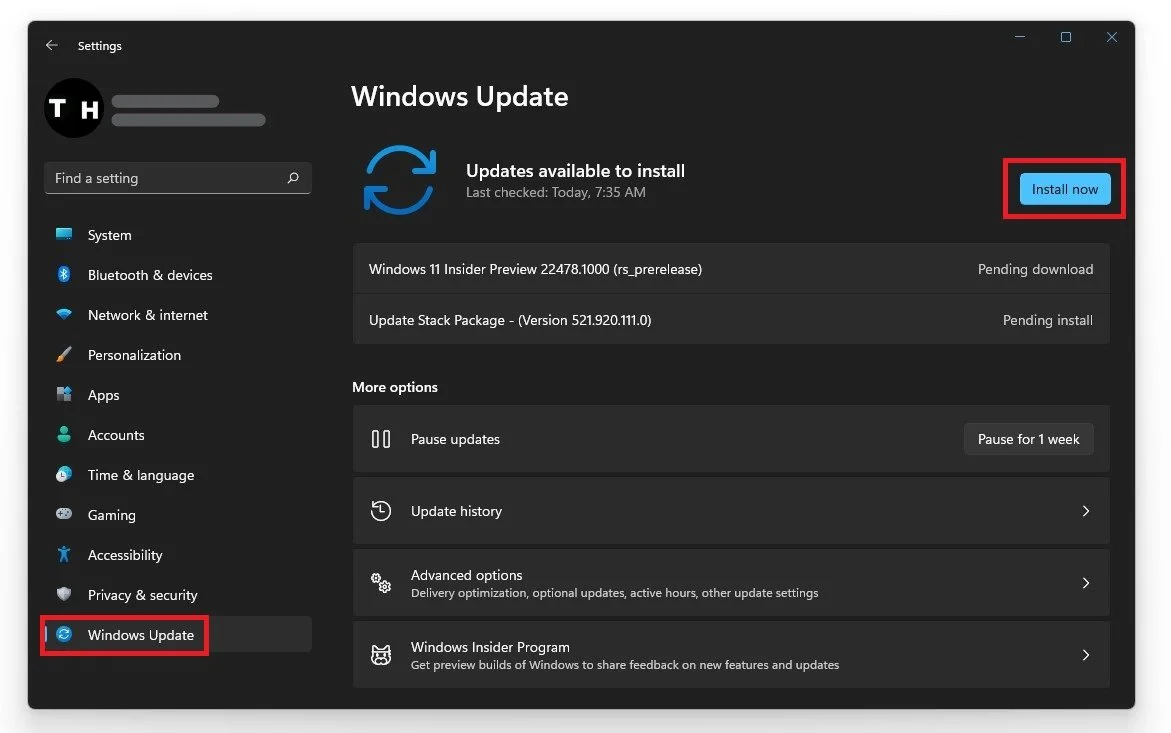
Windows Settings > Windows Update