Windows 11 · Windows
How To Fix Slow Copy Speed on Windows 11 (HDD & SSD)
Original source date
Answer
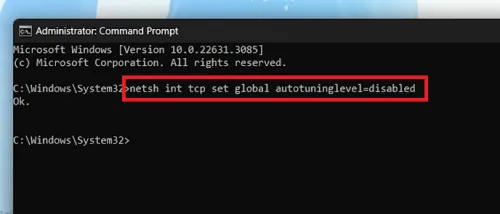
Adjust Network Performance Settings: Access Command Prompt as Administrator:Search for "cmd" in the Start Menu.Right-click on Command Prompt and select "Run as administrator".; Search for "cmd" in the Start Menu.; Right-click on Command Prompt and select "Run as administrator".; Disable Auto-Tuning:Enter the command: netsh int tcp set global autotuninglevel=disabledPress Enter to execute.; Enter the command: netsh int tcp set global autotuninglevel=disabled; Press Enter to execute.; Revert Changes if Necessary:Enter the command: netsh int tcp set global autotuninglevel=normalPress Enter to revert to default settings if needed.; Enter the command: netsh int tcp set global autotuninglevel=normal; Press Enter to revert to default settings if needed.
Optimizing TCP Auto-Tuning for Faster File Transfers
Adjust Network Performance Settings: Access Command Prompt as Administrator:Search for "cmd" in the Start Menu.Right-click on Command Prompt and select "Run as administrator".; Search for "cmd" in the Start Menu.; Right-click on Command Prompt and select "Run as administrator".; Disable Auto-Tuning:Enter the command: netsh int tcp set global autotuninglevel=disabledPress Enter to execute.; Enter the command: netsh int tcp set global autotuninglevel=disabled; Press Enter to execute.; Revert Changes if Necessary:Enter the command: netsh int tcp set global autotuninglevel=normalPress Enter to revert to default settings if needed.; Enter the command: netsh int tcp set global autotuninglevel=normal; Press Enter to revert to default settings if needed.
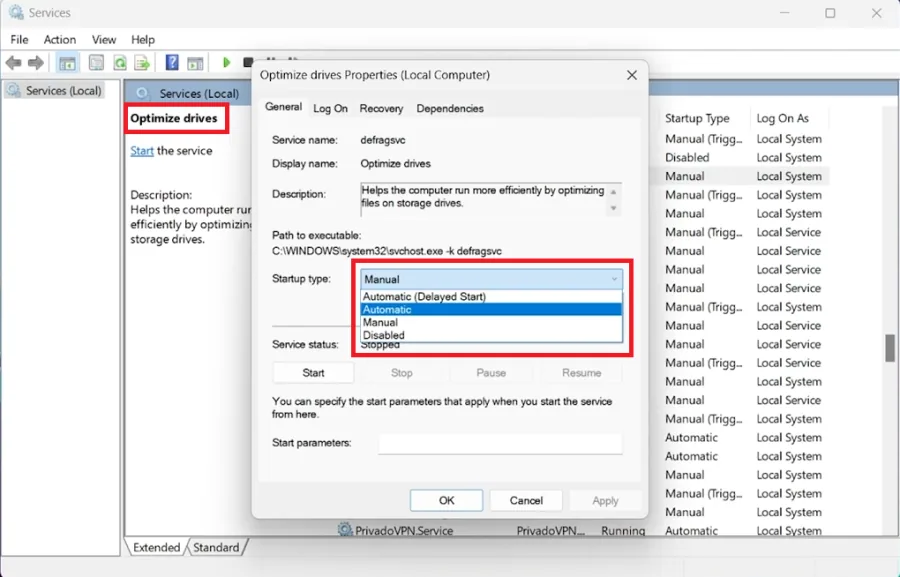
Enhancing File Transfer Speed by Optimizing Drive Performance
Tune the Optimize Drives Service: Access Services:Type "services" into the Start Menu search bar and select "Services".; Type "services" into the Start Menu search bar and select "Services".; Configure Optimize Drives:Scroll to "Optimize Drive" service and double-click it.Set startup type to "Automatic" and click "Start".Apply changes and click "OK”.; Scroll to "Optimize Drive" service and double-click it.; Set startup type to "Automatic" and click "Start".; Apply changes and click "OK”.
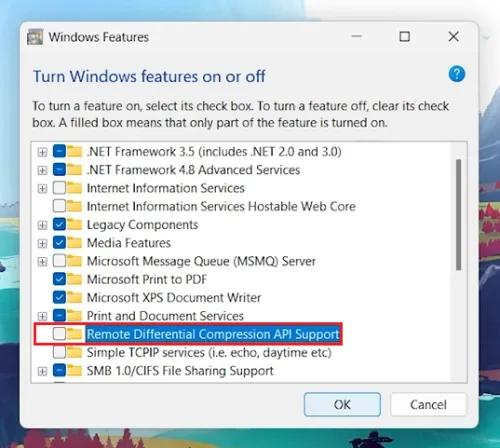
Disabling Remote Differential Compression for Faster Local Transfers
Improve Local File Transfers: Access Windows Features:Search "Turn Windows features on or off" in the Start Menu and open it.; Search "Turn Windows features on or off" in the Start Menu and open it.; Adjust the Feature:Find "Remote Differential Compression API Support" and uncheck the box.Click "OK" and restart your computer if prompted.; Find "Remote Differential Compression API Support" and uncheck the box.; Click "OK" and restart your computer if prompted. Precautionary Measures: Set a System Restore Point or Back Up Files:Ensure data safety before making changes to avoid unforeseen issues.; Ensure data safety before making changes to avoid unforeseen issues.
Summary
By adjusting TCP Auto-Tuning, optimizing the Optimize Drives service, and disabling Remote Differential Compression, you can significantly improve file transfer speeds on your Windows 11 PC. These simple tweaks help enhance your device’s performance, ensuring faster and more efficient data transfers.
Video walkthrough
If it does not work
- How can I improve my file transfer speed on Windows 11?. Increase file transfer speeds by adjusting the TCP Auto-Tuning level, optimizing drive service settings, and disabling Remote Differential Compression API Support.
- What is the TCP Auto-Tuning level and how does it affect file transfer?. TCP Auto-Tuning optimizes data transfer over networks. Adjusting its level can improve or reduce file transfer speeds, depending on your system's configuration.
- Can optimizing the Optimize Drives service impact file transfer speeds?. Yes, setting the Optimize Drives service to automatic and starting it can enhance the performance of your HDD or SSD, indirectly speeding up file transfers.
- Why might I want to disable Remote Differential Compression API Support?. Disabling this feature can improve local file transfer speeds by preventing the system from only sending data differences, which might slow down direct transfers.
- Is it necessary to back up data before making these adjustments?. Absolutely, creating a restore point or backing up essential files is crucial before making system changes to prevent data loss in case of errors.