Windows 11 · Windows
How To Switch From Windows 11 Back to Windows 10
Original source date
Answer
Secure Your Files: Back up important documents, photos, and other files.; Use an external hard drive or USB flash drive. Maintain Activation: Verify your Windows 11 digital license is connected to your Microsoft account.; Go to Settings > System > Activation to check license status.
Backing Up Your Data Before Downgrading
Secure Your Files: Back up important documents, photos, and other files.; Use an external hard drive or USB flash drive.
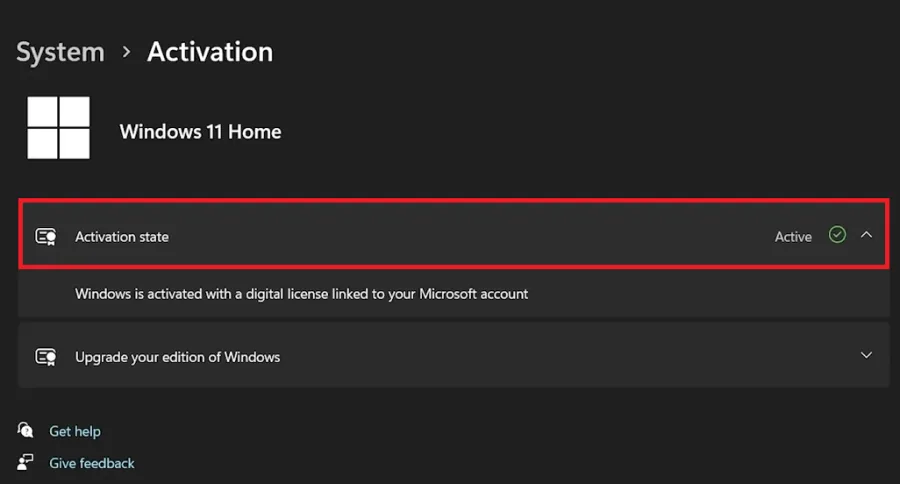
Ensuring Windows Digital License Integrity
Maintain Activation: Verify your Windows 11 digital license is connected to your Microsoft account.; Go to Settings > System > Activation to check license status.
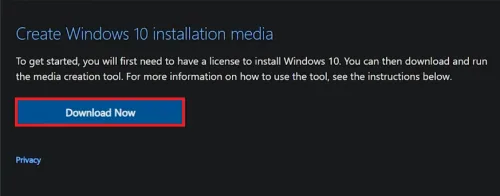
Preparing Windows 10 Installation Media
Download Installation Tool: Visit the Microsoft website to download the Windows 10 installation media tool.; Follow the prompts to download the tool.
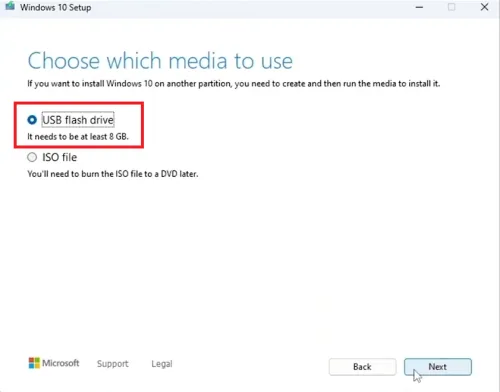
Create Installation Media: Launch the tool and agree to the license terms.; Selec…
Create Installation Media: Launch the tool and agree to the license terms.; Select "Create installation media for another PC".; Choose language, edition, and architecture settings, then create the bootable USB or DVD.
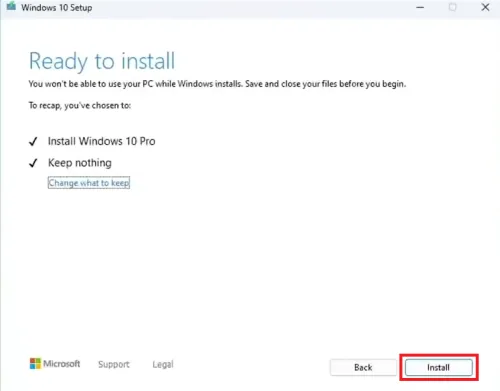
Executing Windows 10 Installation
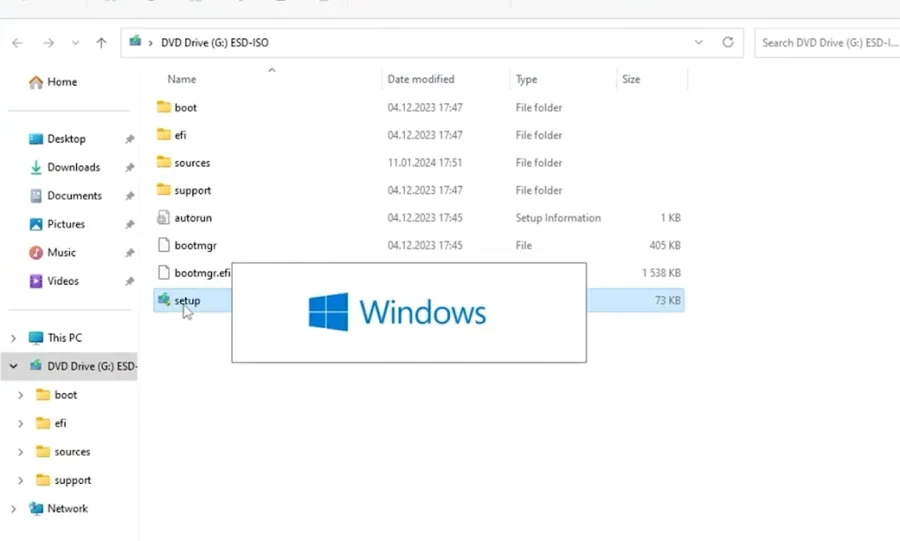
Install Windows 10: Insert the bootable USB or DVD and restart your computer.; Access BIOS/UEFI settings (typically by pressing F2, F12, Del, or Esc during startup) to boot from the installation media.; Follow the prompts to start the installation.
Perform Clean Installation: Select “Custom: Install Windows only (advanced)” to p…
Perform Clean Installation: Select “Custom: Install Windows only (advanced)” to perform a clean installation.; This will erase all data on the installation drive. Complete Setup: Follow the initial setup prompts for region, language, and keyboard layout.; Sign in with your Microsoft account, create a new account, or set up a local user account. By following these steps, you can revert from Windows 11 to Windows 10 efficiently, ensuring your system is back to the familiar environment you prefer.
Video walkthrough
If it does not work
- Can I revert to Windows 10 after more than 10 days of upgrading to Windows 11?. Yes, you can still switch back to Windows 10 after the 10-day period; however, this requires a clean installation using the Windows 10 installation media, as the built-in rollback option will no longer be available.
- Will I lose my Microsoft license if I downgrade to Windows 10 from Windows 11?. No, your Microsoft license remains intact. Ensure your Windows 11 is activated with a digital license linked to your Microsoft account, allowing Windows 10 to automatically reactivate post-installation.
- How can I ensure I don’t lose any data during the downgrade process?. Before initiating the downgrade, back up all important files, documents, and photos to an external hard drive or USB flash drive. This step is crucial to prevent data loss during the clean installation of Windows 10.
- Do I need a product key to install Windows 10 after downgrading?. If your device was previously activated with a digital license for Windows 11, you would not need a product key for Windows 10. The installation should automatically activate once connected to the internet, recognizing your device’s digital license.
- How do I access the BIOS or UEFI settings to boot from the USB/DVD installation media?. Restart your computer and watch for a message on the startup screen indicating which key to press to enter the setup—common keys include F2, F12, Del, or Esc. Press the indicated key to enter your BIOS/UEFI and change the boot order to prioritize the USB/DVD drive.