Windows 11 · Windows
How To Share Screen in Microsoft Teams - Tutorial
Original source date
Answer
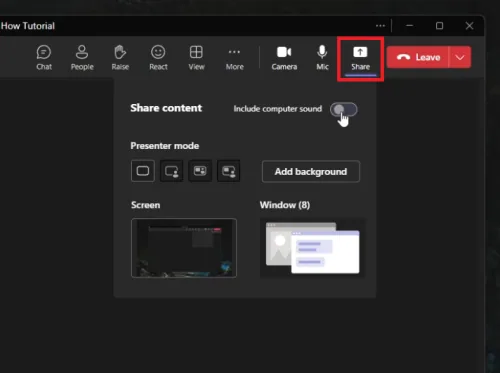
Locate the Share Button:During a Microsoft Teams meeting, find the user interface on your screen.Click the "Share" button, typically located at the top or bottom right corner of the meeting window.; During a Microsoft Teams meeting, find the user interface on your screen.; Click the "Share" button, typically located at the top or bottom right corner of the meeting window.
Initiating Screen Share in Microsoft Teams
Locate the Share Button:During a Microsoft Teams meeting, find the user interface on your screen.Click the "Share" button, typically located at the top or bottom right corner of the meeting window.; During a Microsoft Teams meeting, find the user interface on your screen.; Click the "Share" button, typically located at the top or bottom right corner of the meeting window.
Screen Sharing Options
Include Computer Sound:Choose to include your computer's sound in the share or keep it muted based on your presentation needs.; Choose to include your computer's sound in the share or keep it muted based on your presentation needs.; Choose Presenter Mode:Select different presenter modes to tailor your presentation style.Options include sharing your desktop or application window, with or without webcam footage.; Select different presenter modes to tailor your presentation style.; Options include sharing your desktop or application window, with or without webcam footage.
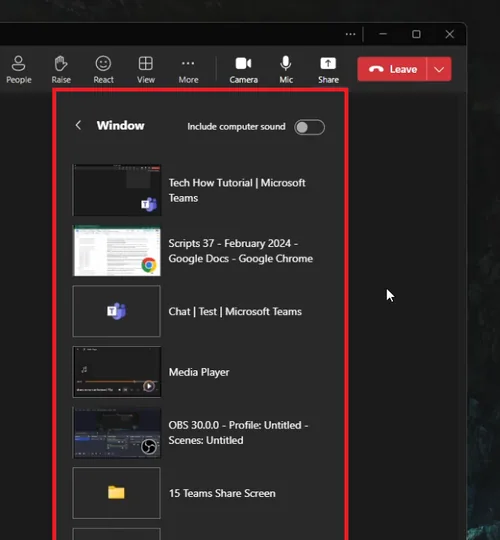
Selecting What to Share in Teams
Share Entire Screen:Opt to share your "Screen," which means everything visible on your monitor will be shared.Microsoft Teams will minimize, and a red border will appear around your screen, indicating what is visible to participants.; Opt to share your "Screen," which means everything visible on your monitor will be shared.; Microsoft Teams will minimize, and a red border will appear around your screen, indicating what is visible to participants.; Share Specific Window:Choose to share a specific "Window" to focus attendees' attention on a particular content.This option displays a list of active windows (e.g., web browser, document editor).Selecting one isolates it for sharing, ensuring only the chosen window is visible, protecting other information or applications on your screen from being displayed.; Choose to share a specific "Window" to focus attendees' attention on a particular content.; This option displays a list of active windows (e.g., web browser, document editor).; Selecting one isolates it for sharing, ensuring only the chosen window is visible, protecting other information or applications on your screen from being displayed. This flexibility enhances the security and efficiency of your presentations, allowing for a tailored sharing experience in Teams meetings.
Video walkthrough
If it does not work
- Can I share my screen in Microsoft Teams without hosting the meeting?. Yes, participants in a Microsoft Teams meeting can share their screen if they have been granted permission by the meeting organizer or if the meeting settings allow participant screen sharing.
- How do I share sound from my computer during a Microsoft Teams meeting?. When you choose to share your screen, simply click the option to include computer sound in the share selection window. This will share any audio playing on your computer with meeting attendees.
- Is it possible to share a specific application window in Teams?. Absolutely. Instead of sharing your entire screen, select the "Window" option after clicking "Share." You'll be presented with a list of open applications to choose from, allowing you to share just that application.
- Will participants see my notifications if I share my entire screen?. Yes, if you share your entire screen, participants can see everything, including any pop-up notifications. To maintain privacy, consider sharing only a specific window or turning off notifications.
- Can I switch between sharing my entire screen and a specific window during a Teams meeting?. Yes, you can switch what you're sharing during the meeting. Simply stop the current share and then go back to the "Share" options to select a different screen or application window.