How To Enable FPS Counter with NVIDIA GeForce Experience

Are you a gaming enthusiast who likes to keep track of your frame rate while playing games on your PC? If you are, you know how important having a high frame rate is for a smooth and seamless gaming experience. Fortunately, if you have an NVIDIA graphics card, you can enable an FPS counter with the NVIDIA GeForce Experience software. In this tutorial, we will guide you through the steps to enable this feature and ensure you can easily monitor your frame rate.
Use the GeForce Experience Overlay
Open up your GeForce Experience application. Navigate to your settings, and in the General tab, ensure the In-Game Overlay option is enabled. This will allow you to access your overlay settings. Click on Settings, which will launch your overlay settings.
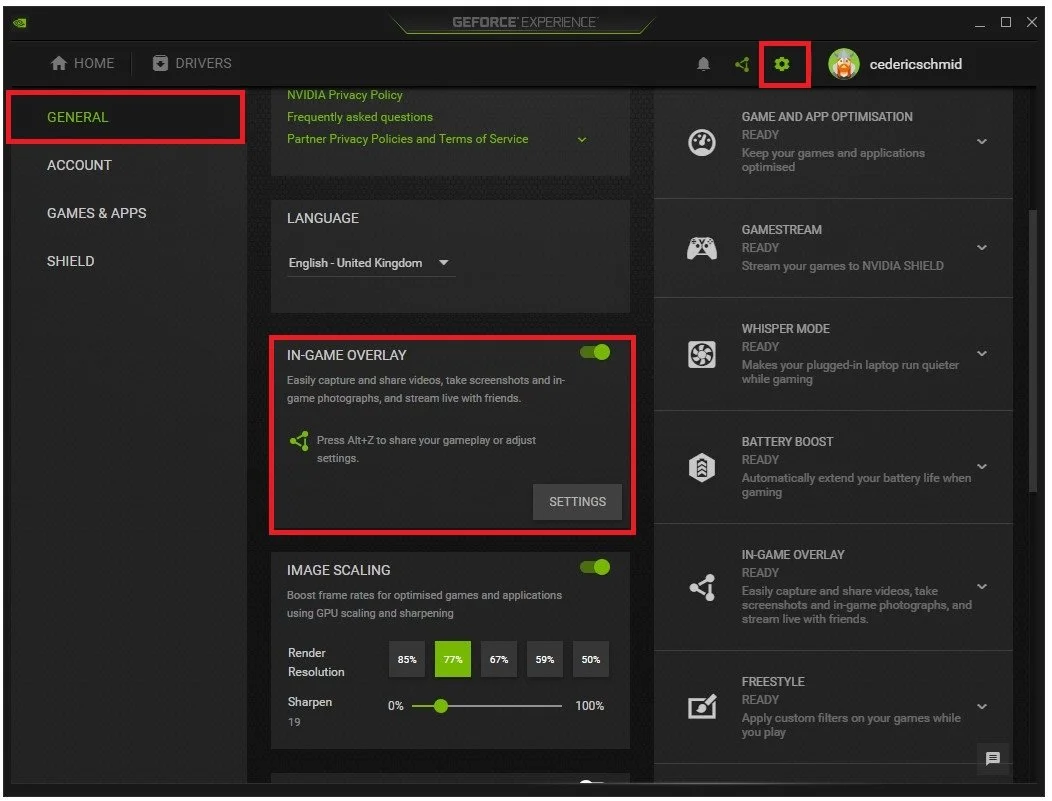
GeForce Experience Settings > General > In-Game Overlay
Enable & Adjust the Frame Rate Counter
In the HUD Layout section, you can enable many different Performance or Status indicators, as well as your current Viewers or Comments, in case you intend on steaming. In the Performance tab, change the position of your overlay to one of your four screen corners, and then you can set this to FPS, which will only show you your current FPS, even when you’re not in-game.
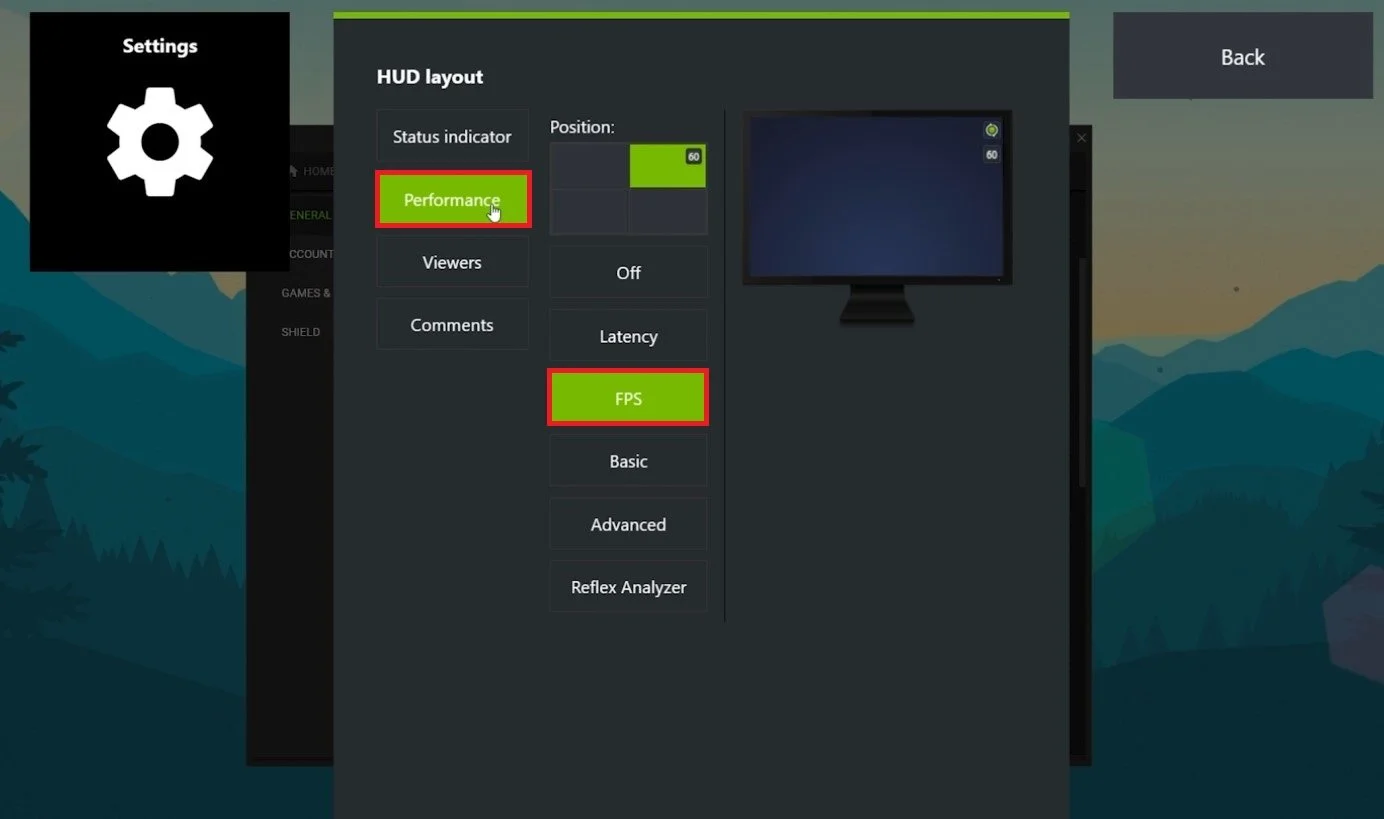
HUD Layout > Performance > FPS > Position
You can also use the Basic or Advanced performance overlay, which will, in addition, show you a lot of different metrics, such as your GPU and CPU utilization, memory usage, or fan speed.
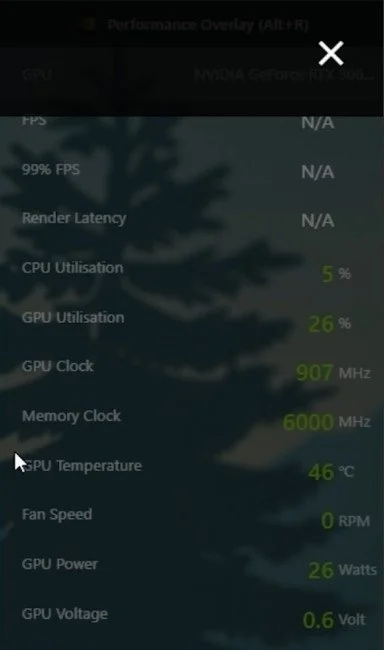
Show FPS, Render Latency, CPU & GPU Utilisation and much more