Windows 11 · Windows
How to fix 100% Disk Usage in Windows 11
Original source date
Answer
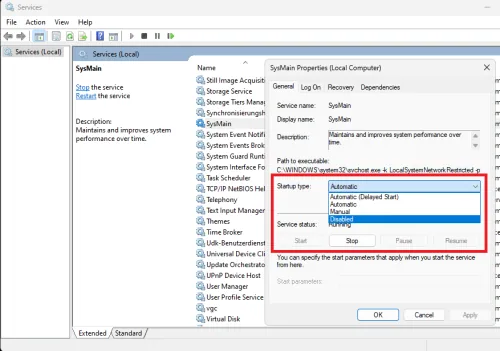
The SysMain service, formerly known as "Super Fetch," is often involved in the 100% disk usage issue in Windows 11. Disabling this service can be a powerful part of your solution. Follow the steps below: Open Windows Services Manager: Search for "Services" in your start menu or type "run" to open the "Run" command window. Then type "services.msc" and hit enter.; Locate the SysMain Service: In the "Services" window, click inside the list to activate the pane and type the letter S. This will lead you to services starting with S, where you can find the "SysMain" service. If it's not there, look for the "Super Fetch" service.; Modify the SysMain Service Properties:Right-click on the service: Select "Properties."Disable the service: Set the startup type to "Disabled."Stop the service: Click "Stop" to cease its operation.Apply the changes: Don't forget to apply before proceeding.; Right-click on the service: Select "Properties."; Disable the service: Set the startup type to "Disabled."; Stop the service: Click "Stop" to cease its operation.; Apply the changes: Don't forget to apply before proceeding. By following this procedure, you will have successfully stopped the SysMain service from running, potentially alleviating the 100% disk usage issue on your Windows 11 system.
Stopping the SysMain Service: A Step-by-Step Guide
The SysMain service, formerly known as "Super Fetch," is often involved in the 100% disk usage issue in Windows 11. Disabling this service can be a powerful part of your solution. Follow the steps below: Open Windows Services Manager: Search for "Services" in your start menu or type "run" to open the "Run" command window. Then type "services.msc" and hit enter.; Locate the SysMain Service: In the "Services" window, click inside the list to activate the pane and type the letter S. This will lead you to services starting with S, where you can find the "SysMain" service. If it's not there, look for the "Super Fetch" service.; Modify the SysMain Service Properties:Right-click on the service: Select "Properties."Disable the service: Set the startup type to "Disabled."Stop the service: Click "Stop" to cease its operation.Apply the changes: Don't forget to apply before proceeding.; Right-click on the service: Select "Properties."; Disable the service: Set the startup type to "Disabled."; Stop the service: Click "Stop" to cease its operation.; Apply the changes: Don't forget to apply before proceeding. By following this procedure, you will have successfully stopped the SysMain service from running, potentially alleviating the 100% disk usage issue on your Windows 11 system.
Checking and Optimizing Your Hard Drive: A Comprehensive Guide
Your computer's hard drive is its essential storage component, and ensuring its health is vital for smooth operation. Here's how to check for errors and optimize your hard drive in Windows 11, specifically focusing on the C: drive.
Step 1: Check for Errors
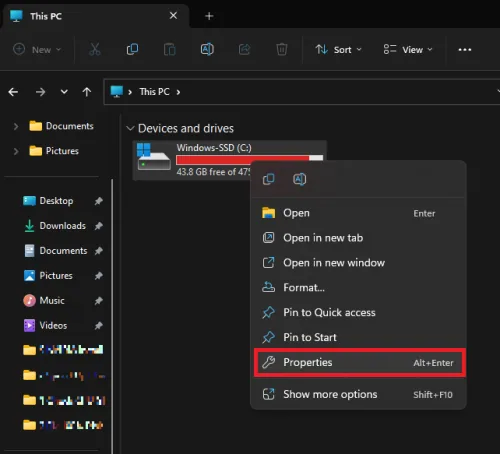
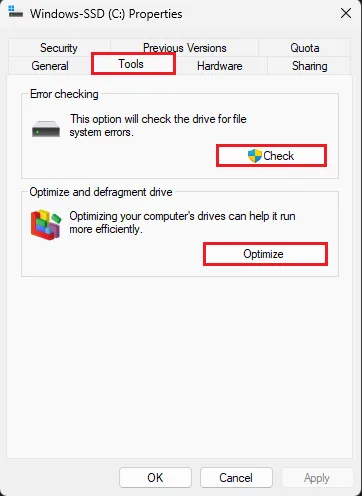
Open File Explorer: Click on "This PC" in the left-side pane.; Right-click on C: Drive: Select "Properties."; Navigate to Tools Tab: Here, you'll find the "Error Checking" section.; Run an Error Scan: This action will identify and remove any bad sectors if present, ensuring your disk is free from physical and logical errors. It's a crucial step in maintaining the integrity and efficiency of your data storage.
Step 2: Optimize and Defragment the Drive
Under the Tools Tab: Locate the "Optimize and defragment drive" section.; Click "Optimize": This will open the "Optimize Drives" window.; Select "Change Settings": Uncheck the "Run on a schedule" option if you wish to manage optimization manually.; Click OK: Then close the "Optimize Drives" window. Optimizing and defragmenting your drive consolidates fragmented files, enhancing your system's reading and writing efficiency. This step-by-step guide makes the process simple and helps maintain your hard drive in peak condition.
Optimizing Startup Applications Using Task Manager
In many systems, unnecessary startup applications can slow down the boot process and consume valuable resources. By disabling applications that you don't need immediately upon starting your PC, you can significantly boost your system's performance. Here's a clear step-by-step guide to help you optimize your startup applications in Windows 11:
Access Task Manager
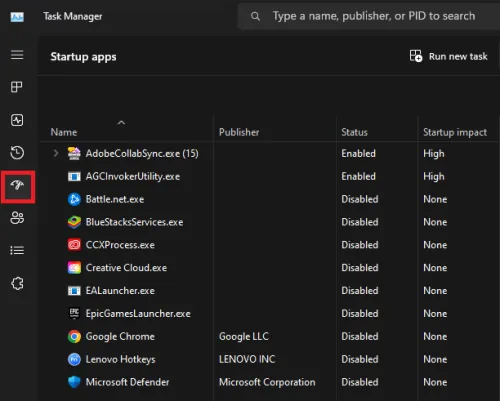
Open Task Manager: Use the start menu search to find and open Task Manager.; Navigate to the "Startup" Tab: Here you'll find a list of applications that start with your PC.
Disable Unnecessary Applications
Identify Unneeded Applications: Look through the list and identify applications that are not essential during startup. Examples might include messaging apps, additional browsers, or software updaters.; Right-Click and Disable: Simply right-click on the unneeded application and select "Disable." By selectively disabling startup applications, you are maximizing free hard disk utilization and enhancing your system's overall speed and efficiency. This quick optimization could be a game-changer for your daily computing experience.
Video walkthrough
If it does not work
- What does disabling startup applications in Task Manager do?. Disabling unnecessary startup applications in Task Manager frees up hard disk resources and can speed up your PC's boot process.
- How do I identify which startup applications to disable?. Look for applications that you don't require immediately upon starting your PC. Examples might be secondary browsers or tools that aren't essential for daily use.
- Is it safe to disable startup applications?. Yes, it's generally safe. Just be cautious not to disable essential system applications. When in doubt, research the specific application or consult with a tech expert.
- Will this optimization affect the functionality of my disabled applications?. No, disabling startup applications only prevents them from launching at boot time. You can still open and use these applications normally after your system starts.
- Can I re-enable a startup application if I change my mind?. Absolutely! You can simply go back to the Task Manager, find the application under the "Startup" tab, right-click, and select "Enable.”