How To Speed Up Google Chrome Downloads on Windows 10/11
Introduction
Do you find yourself impatiently watching the download bar in Google Chrome, wishing for a faster way? You're in the right place! In this guide, we will dive into the specific settings and tricks that can significantly speed up Google Chrome downloads on Windows 10/11. From adjusting your DNS service provider to managing extensions and activating parallel downloading, these simple but effective methods can make a world of difference in your browsing and downloading experience. Say goodbye to long waits and embrace a swifter, more efficient Google Chrome!
Use a Custom DNS Provider to Speed Up Chrome
Want to enhance your Google Chrome experience on Windows 10/11? Customizing your DNS provider can make a significant difference. Here's a step-by-step guide:
Open Google Chrome Settings:
Click on the 3 dots located in the upper right corner of the Google Chrome screen.
Select "Settings" from the drop-down menu.

Access the Google Chrome settings
Navigate to Security Options:
In the left side pane, click the "Privacy and Security" tab.
Select the "Security" option to open the page.
Configure Custom DNS:
Scroll down to find the "Use secure DNS" section.
Check the "With Custom" button, then click "Custom."
From the drop-down menu, choose a DNS service provider such as Google (8.8.8.8) or Cloudflare (1.1.1.1).
Alternatively, you can enter your preferred DNS service provider in the given field.
By following these simple steps, you're not only ensuring a secure browsing experience but potentially boosting your browsing speed as well. Explore more tech solutions on our website for an even smoother digital journey!
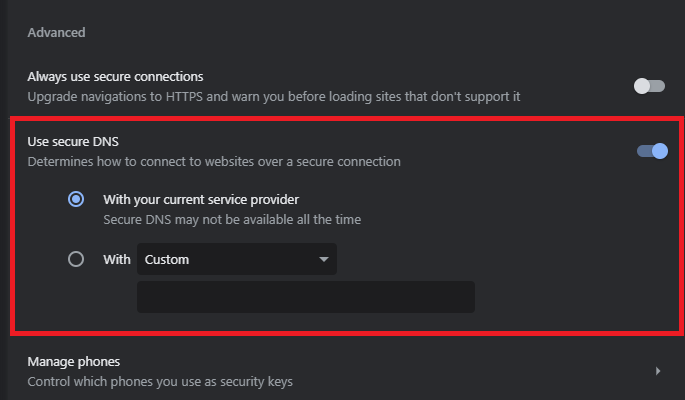
Google Chrome Settings > Privacy > Security
Optimize Google Chrome for Faster Downloads
To get the most out of your Google Chrome browser, especially if you're aiming to speed up downloads, you can apply two critical adjustments: disabling background running and removing unneeded extensions. Here's how to execute these optimizations:
Disable Background Running for Chrome
Background running can consume extra bandwidth even when Chrome is closed. By disabling this feature, you free up resources that can be used to increase download speeds. Follow these simple steps:
Access Chrome's System Settings:
Open the Settings page in Chrome.
Click on the "System" tab.
Disable Background Apps:
Uncheck the option that says “Continue running background apps when Google Chrome is closed.”
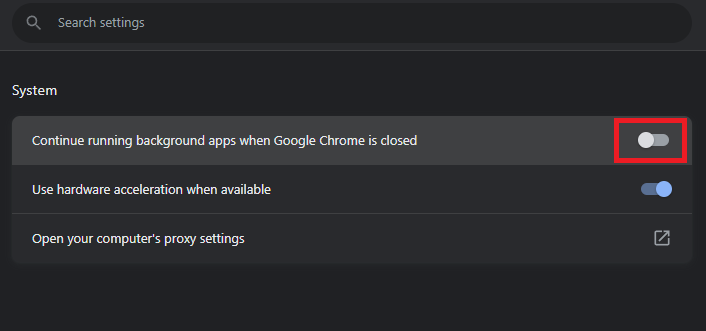
Chrome Settings > System
Disable Unneeded Chrome Extensions
Extensions may slow down your browser, especially if you're not actively using them. To streamline your Chrome experience, you can remove or disable these extensions:
Open Chrome Extensions:
Click the 3 dots in the upper right corner of your browser.
Navigate to "Extensions" and select “Manage extensions.”
Remove or Disable Extensions:
In the Extensions tab, identify the extensions you no longer use or require.
Remove them entirely or disable them as needed. (Removing is generally a better option.)
Examples of commonly disabled extensions might include toolbars, themes, or widgets that you've installed but no longer need.
By following these optimizations, you'll likely notice a more efficient browsing experience, faster downloads, and reduced strain on your system. Explore our other tech solutions to continue enhancing your digital life!
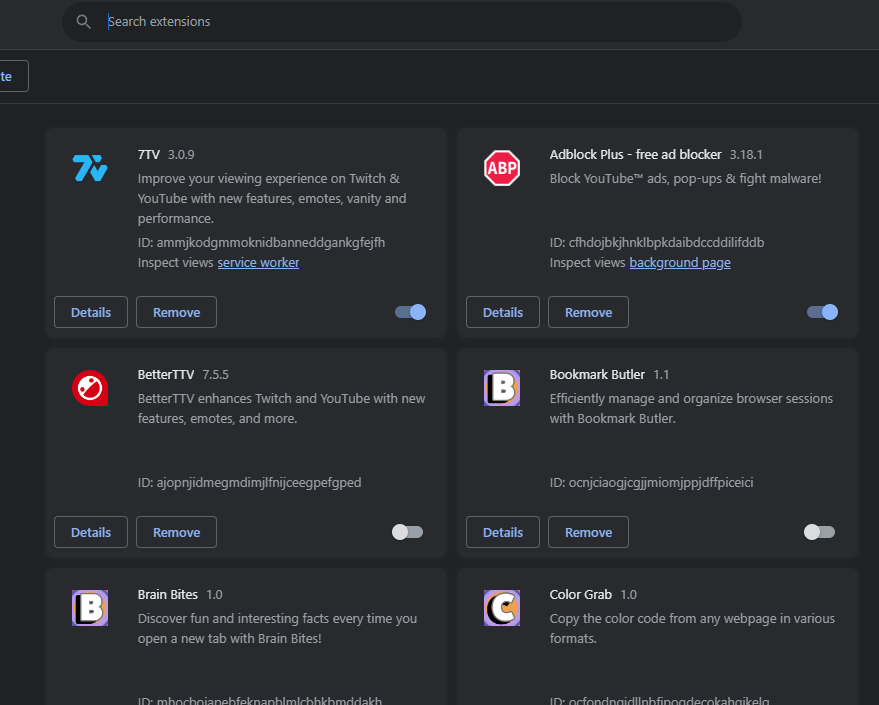
Disable unneeded Google Chrome extensions
Enable Parallel Downloading in Chrome
Boosting your download speed in Google Chrome can be achieved through a hidden feature known as parallel downloading. Here's how you can enable it:
1. Access Chrome Flags
Open a new tab in your Google Chrome browser.
In the URL search bar, type “chrome://flags” and press Enter (You can copy this URL directly if needed).
Chrome flags are experimental features that can be enabled or disabled within the browser.
2. Enable Parallel Downloading
Once you're in the ‘Experiments’ tab, locate the search box.
Type “parallel downloading” and hit Enter.
Click on the drop-down menu next to the 'Parallel downloading' option and select "Enabled."
Please note that you must relaunch Google Chrome for the changes to take effect.
By enabling parallel downloading, your files will be broken down into smaller parts and downloaded simultaneously, enhancing the overall speed. Make sure to explore other flags for additional functionality, but proceed with caution as they are experimental features.
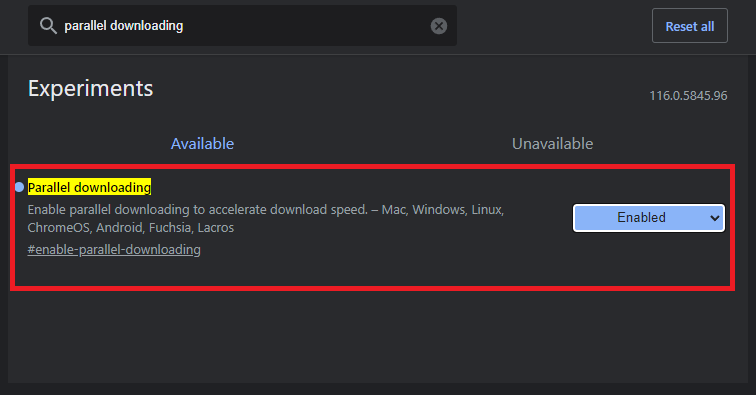
Google Chrome Flags > Parallel Downloading
-
You can disable background running apps in Google Chrome by navigating to the "System" tab in Settings and unchecking the “Continue running background apps when Google Chrome is closed” option.
-
Disabling or removing unneeded Chrome extensions enhances your browser's performance by reducing unnecessary load. This can increase download speeds and improve overall responsiveness.
-
Removing a Chrome extension deletes it completely, while disabling it turns it off but keeps it installed. Removing is often the better option to free up system resources.
-
Yes, by freeing up bandwidth and system resources, these optimizations can lead to increased download speeds and a smoother browsing experience.
-
These specific adjustments are tailored for Google Chrome. However, similar principles might apply to other browsers. For browser-specific guidance, explore our other tech solutions.