Adobe · Platform not recorded
After Effects - How To Enable GPU Acceleration
Original source date
Answer
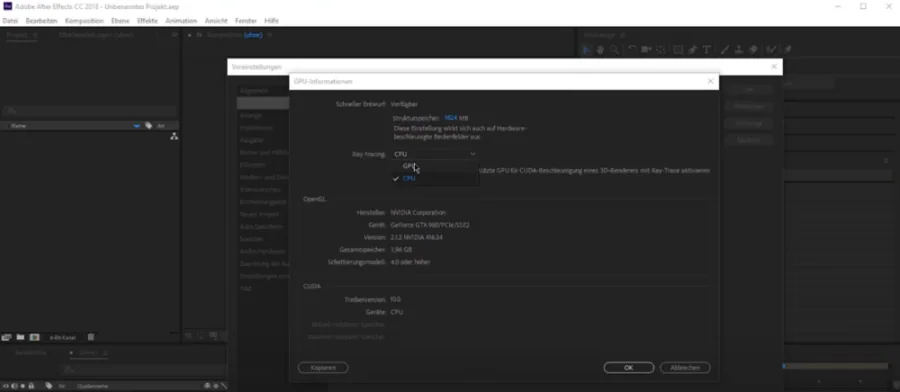
This change will enable After Effects to use your graphics card to render your project. Open up the After Effects application. Navigate to Edit > Preferences > Previews. On the new window, select the GPU Information button. If you use a supported graphics card, check to Enable untested, unsupported GPU and then click Ok. It would be best if you then changed the Ray-Tracing option from CPU to GPU, which will change the processor utilization to the graphics processor. Your GPU should now appear as the CUDA device. If your graphics card does not appear, you will have to open up your file explorer.
Change the GPU Acceleration Settings in After Effects
This change will enable After Effects to use your graphics card to render your project. Open up the After Effects application. Navigate to Edit > Preferences > Previews.
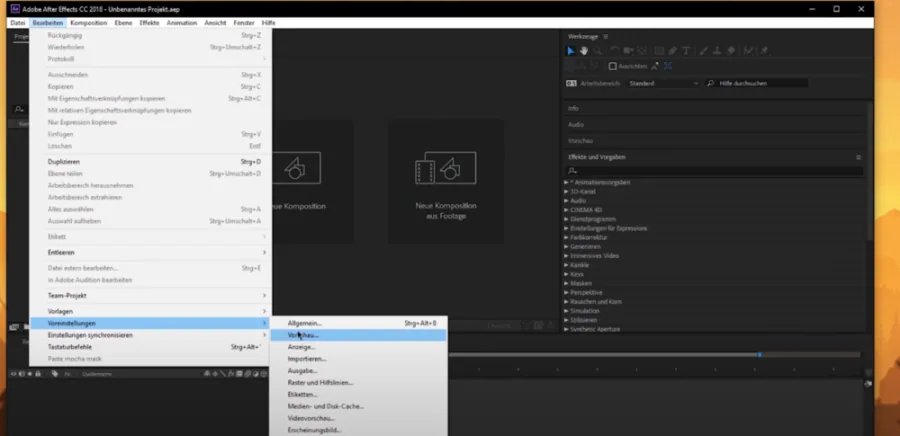
On the new window, select the GPU Information button
On the new window, select the GPU Information button. If you use a supported graphics card, check to Enable untested, unsupported GPU and then click Ok. It would be best if you then changed the Ray-Tracing option from CPU to GPU, which will change the processor utilization to the graphics processor. Your GPU should now appear as the CUDA device. If your graphics card does not appear, you will have to open up your file explorer.
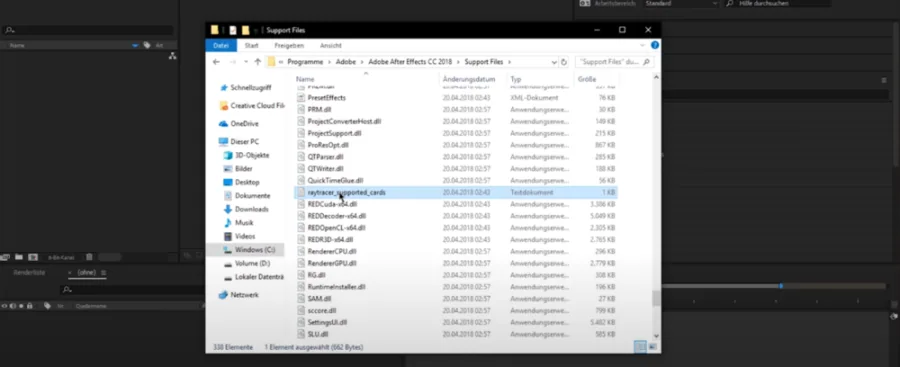
Change the Supported Cards Text File
Navigate to the drive on which you saved After Effects. Go to: Program Files > Adobe > Adobe After Effects CC > Supported Files. Open the raytracer_supported_cards file with a text editor like notepad. You will find a list with the supported graphics cards. To enable your GPU, add the name to the list and save your changes
Video walkthrough
If it does not work
- If the current interface differs, compare it with the recorded video walkthrough.