Adobe · Platform not recorded
Text Font Animation - After Effects Tutorial & Template
Original source date
Answer
Creating compelling text animations in After Effects starts with the right template. Here’s how to download and set up your text font animation template from Envato Elements: Access Envato Elements:Click here to visit the Envato Elements text font animation page to download the template.; Click here to visit the Envato Elements text font animation page to download the template.; Sign Up for Access:If you're not already a member, sign up for Envato Elements. This gives you access to a wide range of resources, including the text font animation template, plus numerous other add-ons, plugins, and templates for After Effects and other software.; If you're not already a member, sign up for Envato Elements. This gives you access to a wide range of resources, including the text font animation template, plus numerous other add-ons, plugins, and templates for After Effects and other software.; Download the Template:Once you've found the text font animation template, click the download button.The file will download to your computer, typically landing in the 'Downloads' folder.; Once you've found the text font animation template, click the download button.; The file will download to your computer, typically landing in the 'Downloads' folder.
How to Download and Extract the Text Font Animation Template
Creating compelling text animations in After Effects starts with the right template. Here’s how to download and set up your text font animation template from Envato Elements:
Downloading the Template
Access Envato Elements:Click here to visit the Envato Elements text font animation page to download the template.; Click here to visit the Envato Elements text font animation page to download the template.; Sign Up for Access:If you're not already a member, sign up for Envato Elements. This gives you access to a wide range of resources, including the text font animation template, plus numerous other add-ons, plugins, and templates for After Effects and other software.; If you're not already a member, sign up for Envato Elements. This gives you access to a wide range of resources, including the text font animation template, plus numerous other add-ons, plugins, and templates for After Effects and other software.; Download the Template:Once you've found the text font animation template, click the download button.The file will download to your computer, typically landing in the 'Downloads' folder.; Once you've found the text font animation template, click the download button.; The file will download to your computer, typically landing in the 'Downloads' folder.

Extracting the Template File
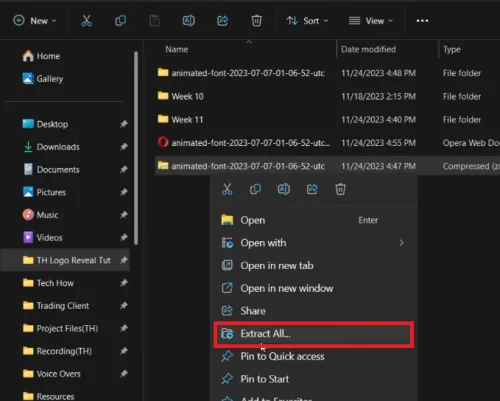
Unzip the File:On a Windows PC:Locate the downloaded .zip file in your 'Downloads' folder.Right-click the file and choose 'Extract All' to unzip the contents.On a Mac:Double-click the .zip file in your 'Downloads' folder to automatically extract it.; On a Windows PC:Locate the downloaded .zip file in your 'Downloads' folder.Right-click the file and choose 'Extract All' to unzip the contents.; Locate the downloaded .zip file in your 'Downloads' folder.; Right-click the file and choose 'Extract All' to unzip the contents.; On a Mac:Double-click the .zip file in your 'Downloads' folder to automatically extract it.; Double-click the .zip file in your 'Downloads' folder to automatically extract it.; Access the Template:After extraction, a new folder will appear containing the After Effects template file.; After extraction, a new folder will appear containing the After Effects template file. With the template now extracted, you’re ready to import it into After Effects and begin crafting your personalized text font animations.
Editing and Exporting the After Effects Text Font Animation Template
Once you've downloaded and extracted your text font animation template, the next step is to edit and export it in After Effects for your project.
Importing and Exploring the Template
Import the Template:Drag and drop the downloaded template file into your After Effects project.; Drag and drop the downloaded template file into your After Effects project.; Explore the Variants:Click the arrow to expand the contents.You will find 14 different animation variants or scenes, labeled for easy identification.; Click the arrow to expand the contents.; You will find 14 different animation variants or scenes, labeled for easy identification.
Customizing Your Text Animation
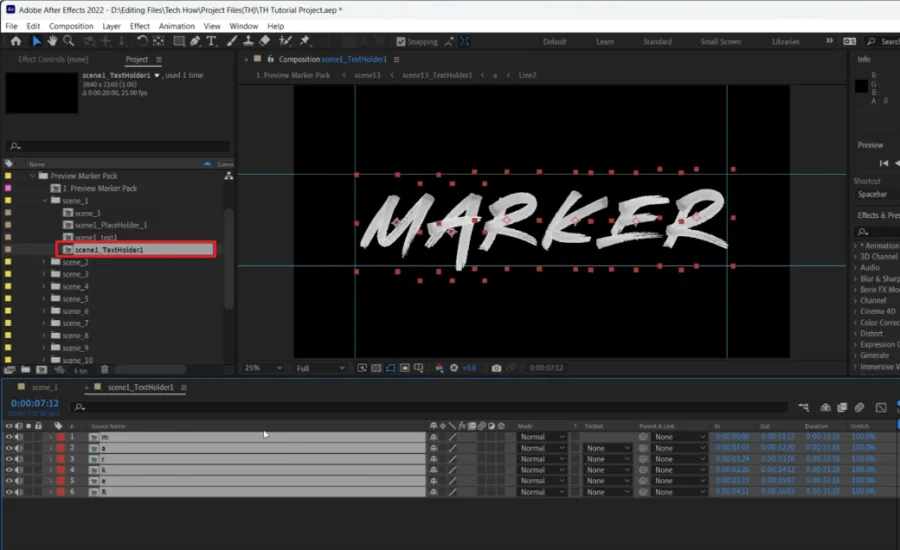
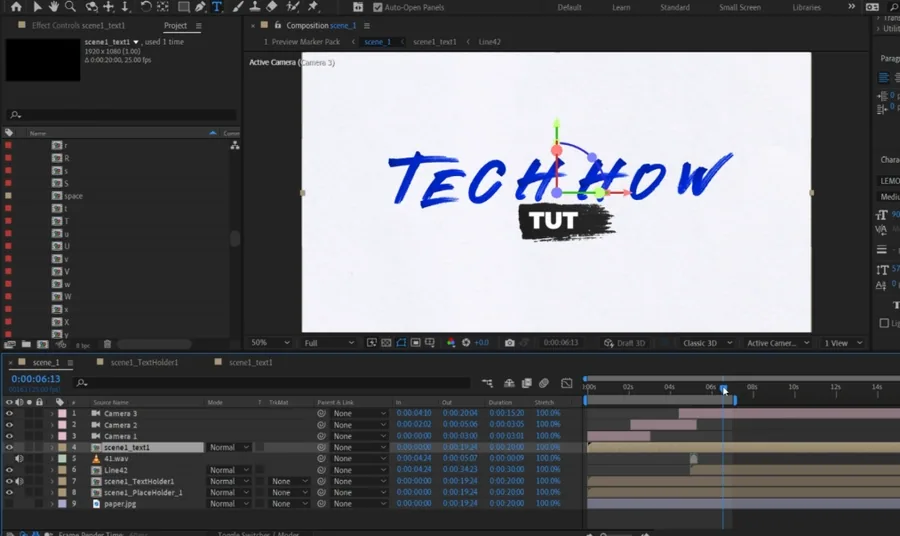
Choose Your Scene:For this tutorial, we'll use "Scene 1". Open the 'Preview Marker Pack' folder, then the 'Scene 1' folder.Double-click on the 'scene_1' composition to view the animation layout.; For this tutorial, we'll use "Scene 1". Open the 'Preview Marker Pack' folder, then the 'Scene 1' folder.; Double-click on the 'scene_1' composition to view the animation layout.; Edit the Main Text:Double-click on 'Scene 1_TextHolder' to customize the main text.In our example, replace the default text with 'TECH HOW' by deleting existing layers and adding new ones from the 'Letters' folder.; Double-click on 'Scene 1_TextHolder' to customize the main text.; In our example, replace the default text with 'TECH HOW' by deleting existing layers and adding new ones from the 'Letters' folder.; Arrange and Time the Layers:Arrange the letter layers on the timeline, ensuring a sequential flow of the animation.Adjust timing by aligning the start and end points of each layer's waveform for a cohesive effect.; Arrange the letter layers on the timeline, ensuring a sequential flow of the animation.; Adjust timing by aligning the start and end points of each layer's waveform for a cohesive effect.; Fine-tune the Animation:Resize or reposition layers as needed using keyboard shortcuts like ‘S’ for scale.This fine-tuning ensures that each letter appears correctly in the final animation.; Resize or reposition layers as needed using keyboard shortcuts like ‘S’ for scale.; This fine-tuning ensures that each letter appears correctly in the final animation.
Finalizing and Exporting
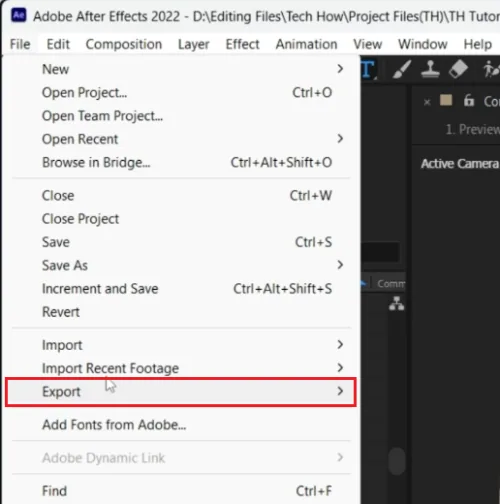
Preview and Adjust:Return to the 'Scene 1' composition to preview your animation.Make any final adjustments to ensure it meets your expectations.; Return to the 'Scene 1' composition to preview your animation.; Make any final adjustments to ensure it meets your expectations.; Export the Animation:Once satisfied, export your animation:Navigate to 'File' -> 'Export' -> 'Add to Media Encoder Queue'.In Adobe Media Encoder, press the start button to begin the rendering process.; Once satisfied, export your animation:Navigate to 'File' -> 'Export' -> 'Add to Media Encoder Queue'.In Adobe Media Encoder, press the start button to begin the rendering process.; Navigate to 'File' -> 'Export' -> 'Add to Media Encoder Queue'.; In Adobe Media Encoder, press the start button to begin the rendering process. By following these steps, you can effectively use and customize one of the 14 versatile animation variants in the template, leading to a professional and personalized text animation for your project.
Affiliate Disclosure: Some of the links on this page are affiliate links, which m…
Affiliate Disclosure: Some of the links on this page are affiliate links, which means that we may earn a commission if you click through and make a purchase from our recommended template providers. This doesn’t affect the price you pay and helps us maintain this site to continue providing you with the best template recommendations.
Video walkthrough
If it does not work
- How do I import the text font animation template into After Effects?. Drag and drop the downloaded template file into your After Effects project to import it. You can then explore its contents, including various animation scenes.
- Can I customize the text in the template to match my project?. Absolutely. Double-click on the text composition (e.g., 'Scene 1_TextHolder') and replace the existing text with your own. You can adjust the font, size, and positioning as needed.
- What if I want to use a different animation variant in the template?. The template includes 14 different animation variants. You can preview each one and choose the variant that best suits your project's style and needs.
- Is it possible to adjust the timing of the text animations in After Effects?. Yes, you can adjust the timing by rearranging and aligning the start and end points of each layer's waveform, ensuring a smooth and cohesive animation sequence.
- How do I export my final text animation from After Effects?. Once you're happy with your animation, go to 'File' -> 'Export' -> 'Add to Media Encoder Queue'. In Adobe Media Encoder, press the start button to begin rendering your animation.