Windows 11 · Windows
Record Any Game with Xbox Game Bar - Guide
Original source date
Answer
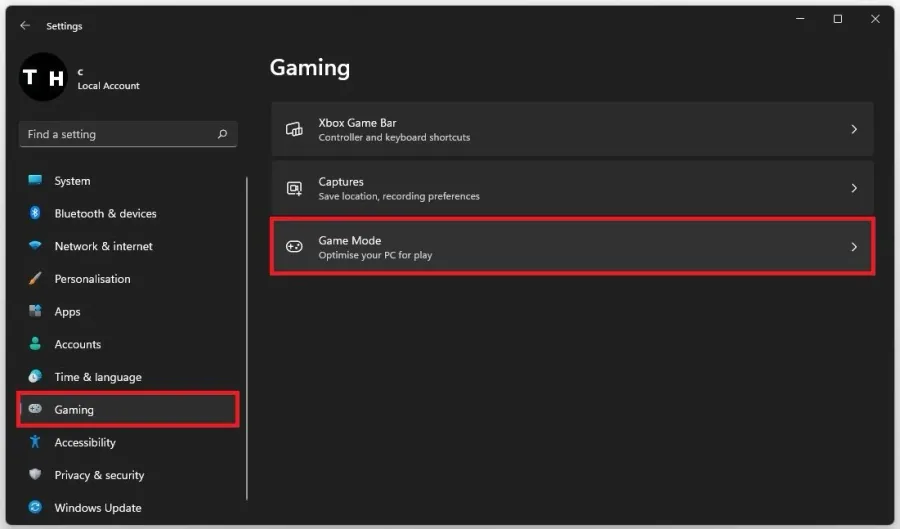
While playing a game on your Windows PC, use the shortcut Windows key + G. This will toggle your Xbox Game Bar overlay. If the Xbox Game Bar overlay is not opening up, open up your Windows settings. Under Gaming, click on Game Mode.
Enable Xbox Game Bar on your PC
While playing a game on your Windows PC, use the shortcut Windows key + G. This will toggle your Xbox Game Bar overlay.

If the Xbox Game Bar overlay is not opening up, open up your Windows settings
If the Xbox Game Bar overlay is not opening up, open up your Windows settings. Under Gaming, click on Game Mode.
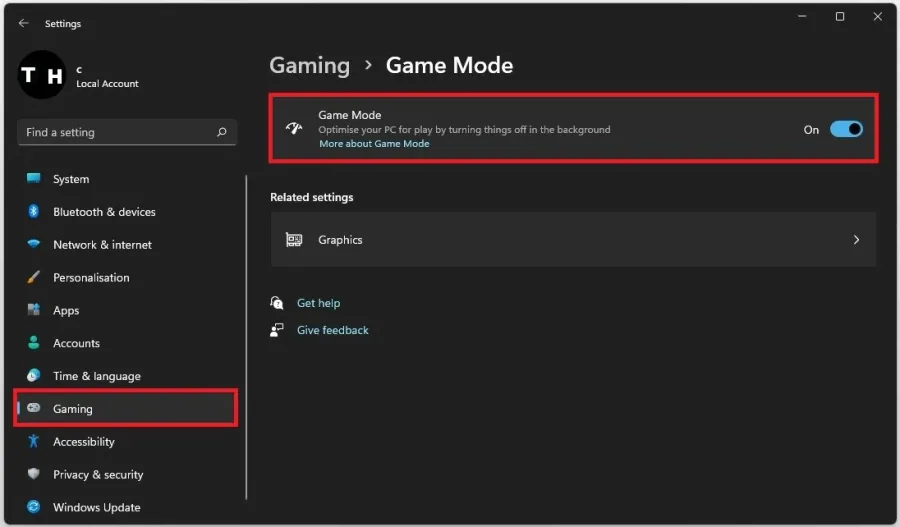
Enable Game Mode
Enable Game Mode. This will not only allow you access to the Xbox Game Bar overlay, but it will in addition improve your overall performance when playing a game on your PC.
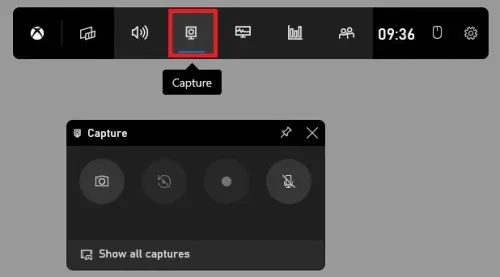
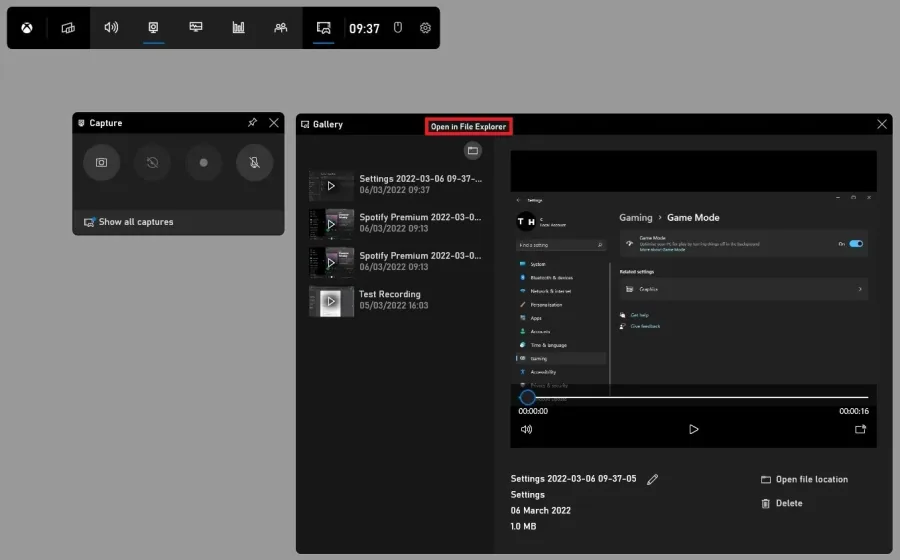
Xbox Game Bar Capture Widget
When using the Windows key + G shortcut, you can preview all widgets in the top navigation. Click on the Capture icon to toggle your Capture widget. You can select to take a screenshot or use the designated shortcut to take a screenshot while in-game. When enabling the background recording option, the Xbox Game Bar allows you to save a recording of the last 30 seconds of your gameplay. This is very useful, but it might reduce your overall Windows performance while in-game.
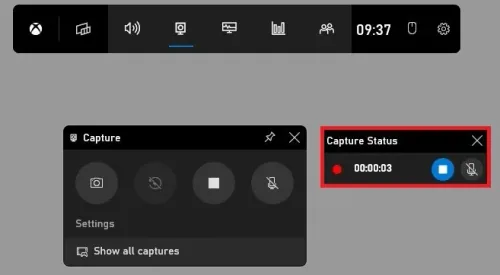
You can select to start a recording, and a new overlay will show up, staying on w…
You can select to start a recording, and a new overlay will show up, staying on while in-game. You can see the amount of time being recorded; you can stop the recording and toggle your microphone on and off from this small menu.
Find Game Bar Captures
To preview your recordings and screenshots, select Show All Captures. You can find your screenshots in this gallery, and when selecting the folder icon, you can access the folder that contains all of your recordings.
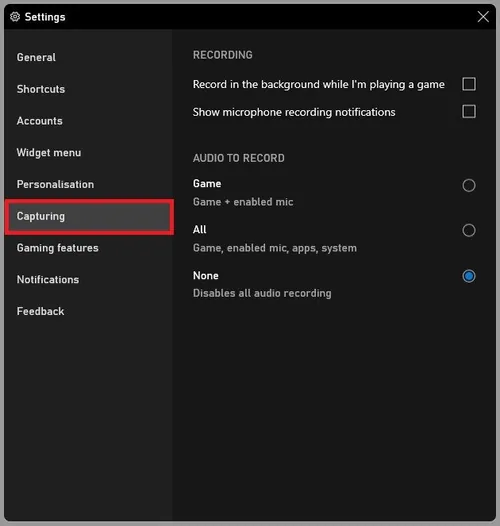
Adjust the Xbox Game Bar Settings
We will look at your Game Bar settings to optimize your recording and shortcuts to your preference. Click on the gear icon on the top right of your screen. In the Shortcuts tab, set these shortcuts to your preference, but make sure to use a shortcut that is not currently assigned on your PC.

In the Capturing section of your settings, you have the option to enable the Back…
In the Capturing section of your settings, you have the option to enable the Background Recording option. This will allow you to record the last 30 seconds of your gameplay, but your performance will suffer a bit. You can enable or disable the Game and Microphone recording settings below.
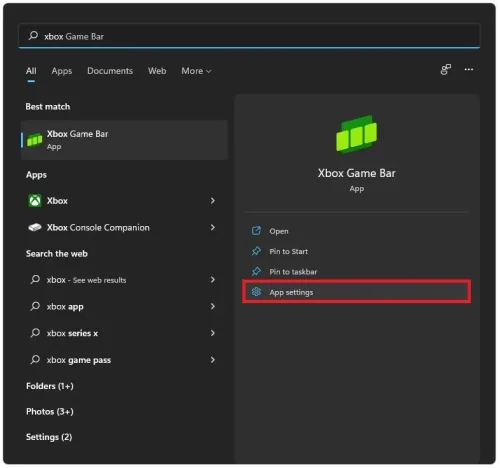
Fix Xbox Game Bar Problems on your PC
If you experience issues with Xbox Game Bar, search for Xbox Game Bar in your start menu search and click on App Settings.
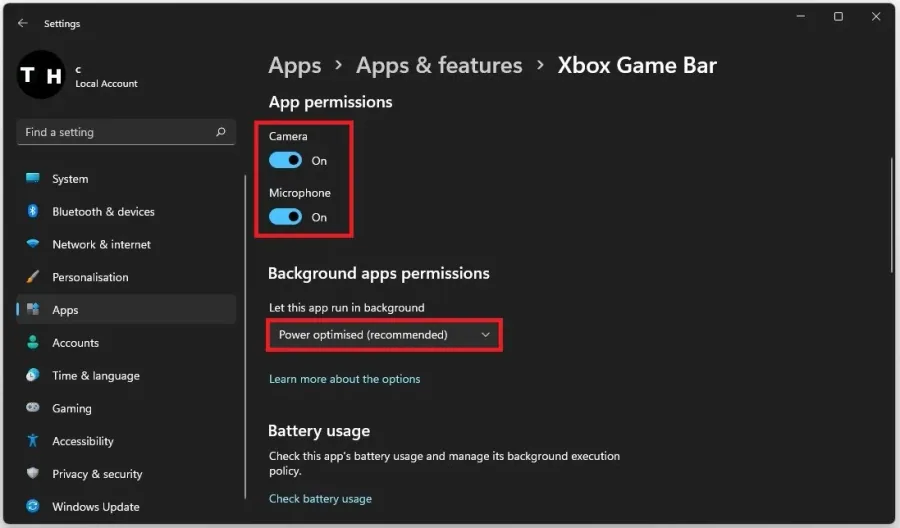
Allow the app to access your camera and microphone
Allow the app to access your camera and microphone. These will only be utilized when using the in-app chat or recording your gameplay. Set the Let this app run in the background option to Power Optimised.
Scroll down and select Repair
Scroll down and select Repair. This will take a second to ensure the application is complete and up to date. You might need to log back into your Microsoft account after repairing the Xbox Game Bar application.

Video walkthrough
If it does not work
- If the current interface differs, compare it with the recorded video walkthrough.