Windows 11 · Windows
How To Fix Windows 11 Lagging or Slow Problem
Original source date
Answer
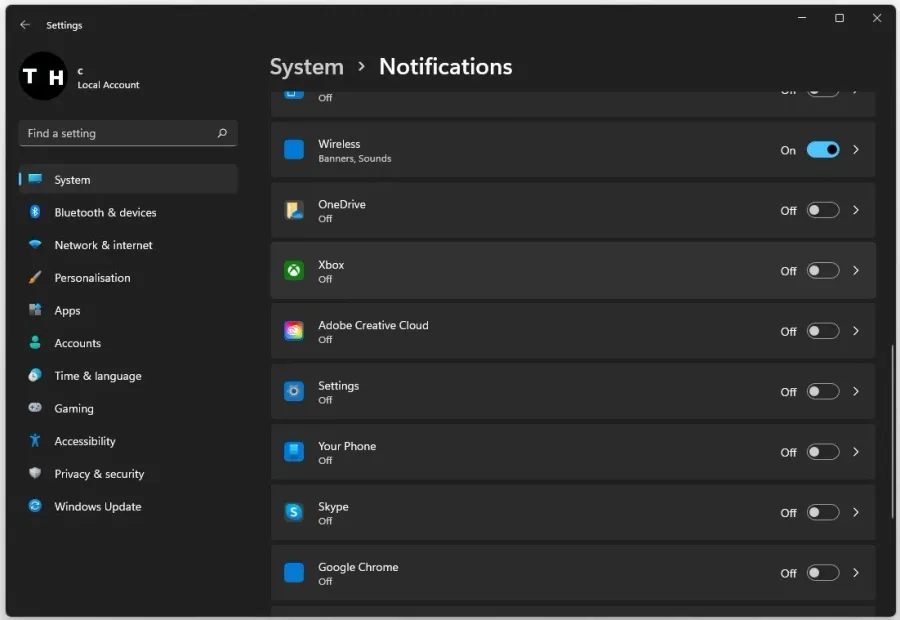
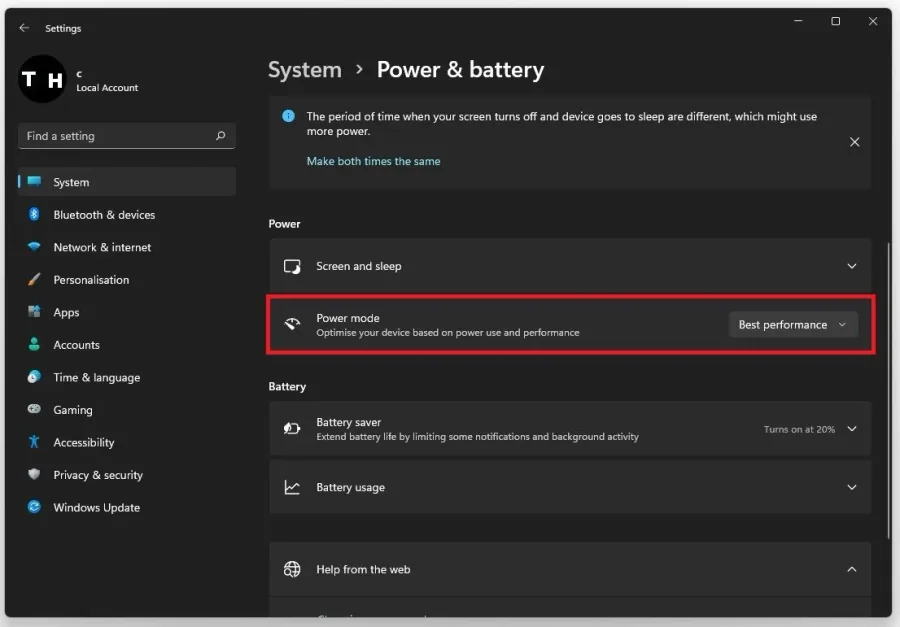
Open up your Windows settings to the System tab. Under Notifications, you should prevent some applications from sending you notifications, especially from 3rd party senders, such as Adobe Creative Cloud or Discord. Under Power & Battery, change your Power Mode to Best Performance. This can use up more power, or battery if you are using a laptop but it’s suggested to use this mode when plugged into a power source to fix potential lag on your system.
Disable Notifications from Apps & Programs
Open up your Windows settings to the System tab. Under Notifications, you should prevent some applications from sending you notifications, especially from 3rd party senders, such as Adobe Creative Cloud or Discord.
Adjust your Windows Power Settings
Under Power & Battery, change your Power Mode to Best Performance. This can use up more power, or battery if you are using a laptop but it’s suggested to use this mode when plugged into a power source to fix potential lag on your system.
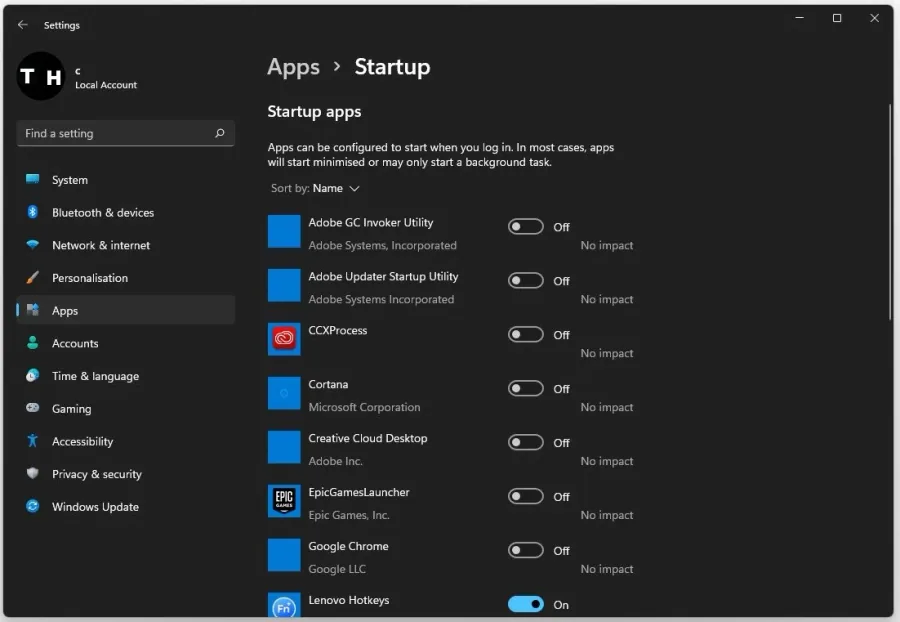
Disable Automatic App Startup
Navigate to the Apps tab and select Startup. Prevent applications from starting on system boot, increasing your Windows 11 performance and fixing lag. We suggest only keeping the applications enabled that you use daily.
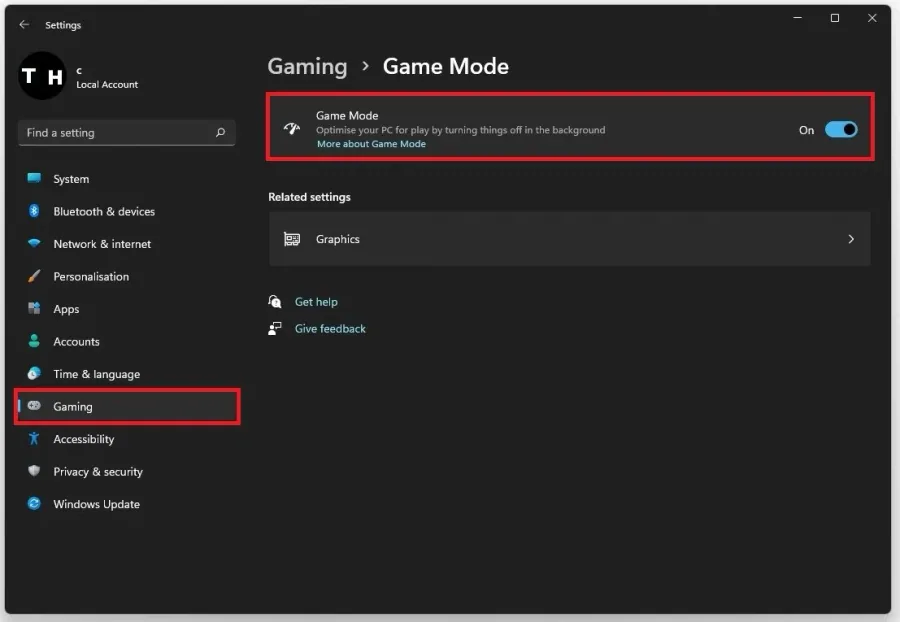
Enable Windows Game Mode
Under Gaming, select Game Mode. When planning on playing games or when experiencing lag while in-game, you should enable the Game Mode option to get the best performance.
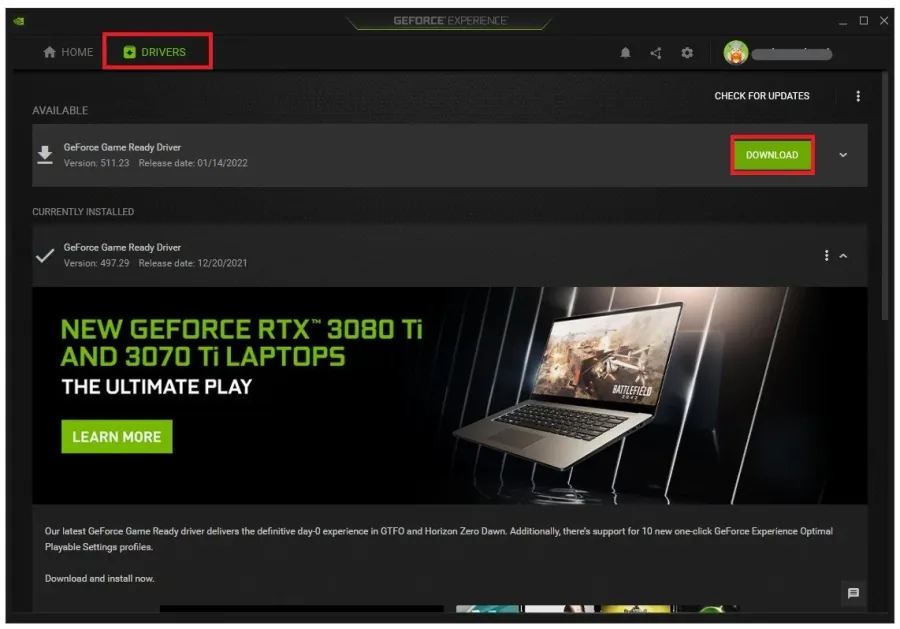
Enable NVIDIA Image Scaling
Enable the new NVIDIA Image Scaling feature for NVIDIA graphics card users to boost your FPS further when playing on a high resolution. To do so, you will need to use the GeForce Experience application. In the application, navigate to the Drivers tab. Click Download to download and install the latest NVIDIA driver automatically.
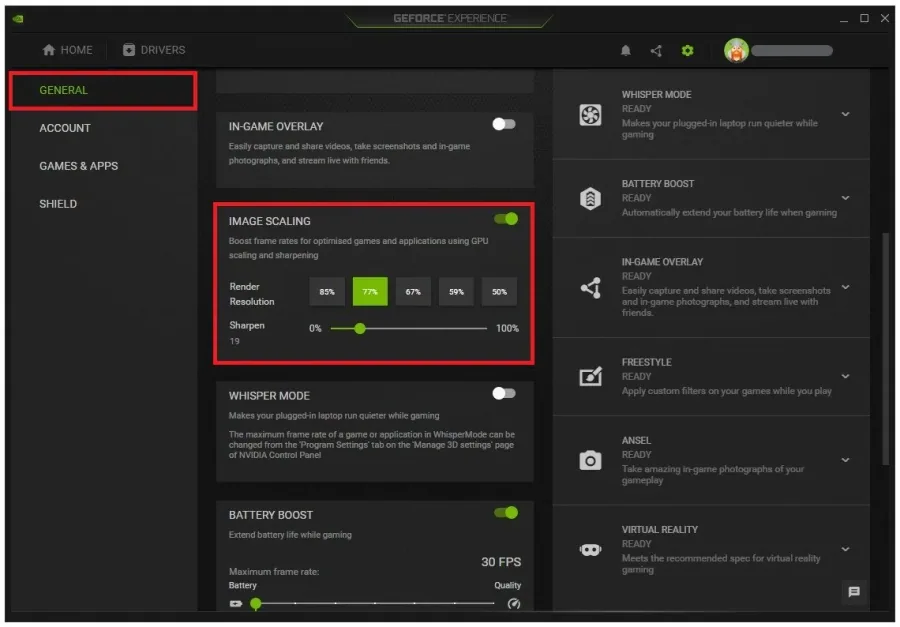
After the installation is complete, navigate to your settings
After the installation is complete, navigate to your settings. In the General tab, scroll down to enable the Image Scaling option. Set the Sharpen option to around 20%. This will increase your gaming performance for all games you’ll be playing on your Windows 11 PC.
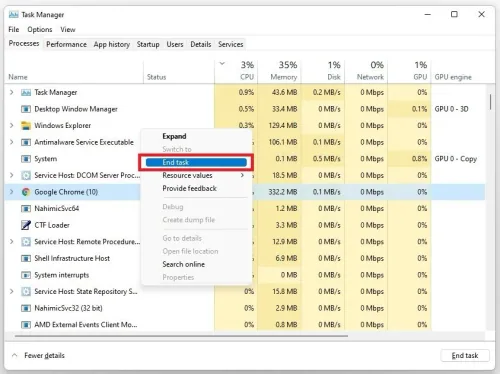
End Resource-Intensive Processes
Open up your Task Manager by searching for it in your start menu search. On this window, in the Processes tab, end some programs from running on your PC which could use up your available resources, such as Adobe applications, OBS, Discord or your browser running in the background.
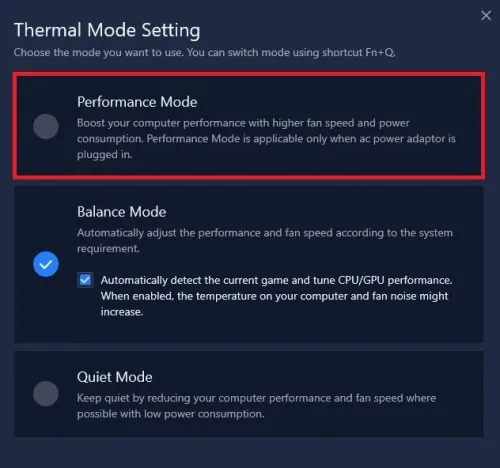
3rd Party Applications
You can also use other apps, such as the Lenovo Vantage application for Lenovo devices to change your Thermal Mode. In this case, it’s set to Balance Mode, but will change to Performance Mode once it’s needed.
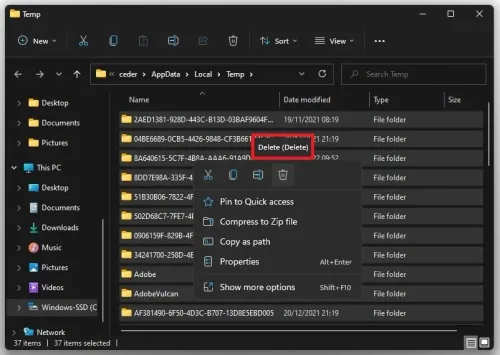
Delete Windows Temporary Files
Search for %temp% and hit enter. This folder contains all your temporary files saved by your programs and should be deleted occasionally. You can safely delete everything in this folder; some files might remain, so leave them in the folder.
Device Manager
Ensure your device’s drivers are up to date. Search for Device Manager to open it up. On the window, expand your Audio inputs and outputs, Disk drives, Network adapters, and other components or devices connected to your PC. For each, right-click the device, the audio output device in this example, and select Update Driver. Lastly, click on Search automatically for drivers.

Windows OS Update
Ensure that your Windows version is up to date. Search for Update in your Start Menu search and select Check for Updates. In your system settings, click on Check for updates, Download or Install now. After downloading, simply restart your system to install the latest Windows update.

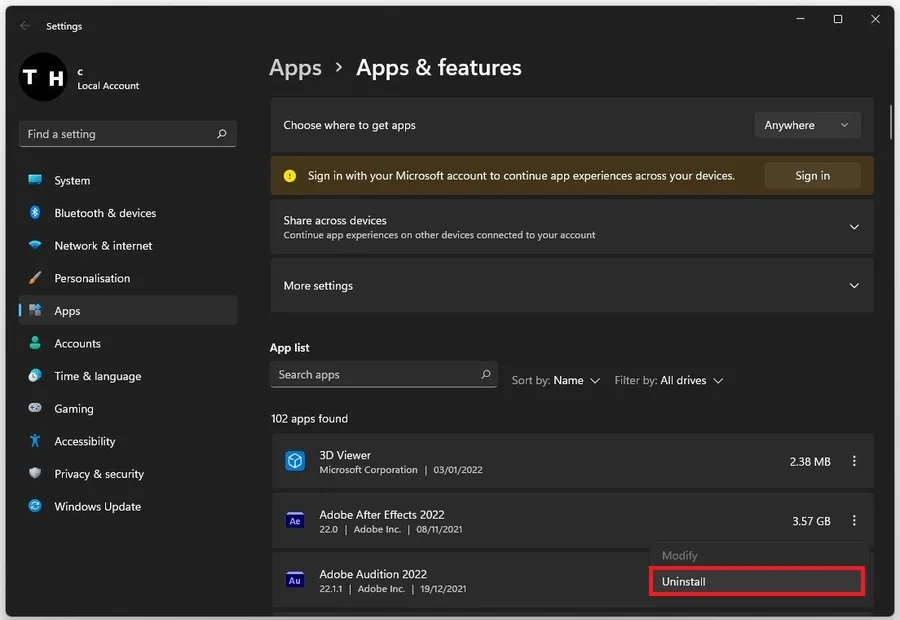
Uninstall Unused Apps
To further improve your Windows 11 performance, uninstall unused applications and programs on your system. To do so, search for Apps in your start menu search to open up your Apps & Features system settings window. Search for specific apps, and filter them by drives on your PC. To uninstall a program, click the burger menu next to the app’s name and select Uninstall.
Video walkthrough
If it does not work
- If the current interface differs, compare it with the recorded video walkthrough.