Windows 11 · Windows
Windows 11 - How To Remove Buzzing & Static Noise from Microphone
Original source date
Answer
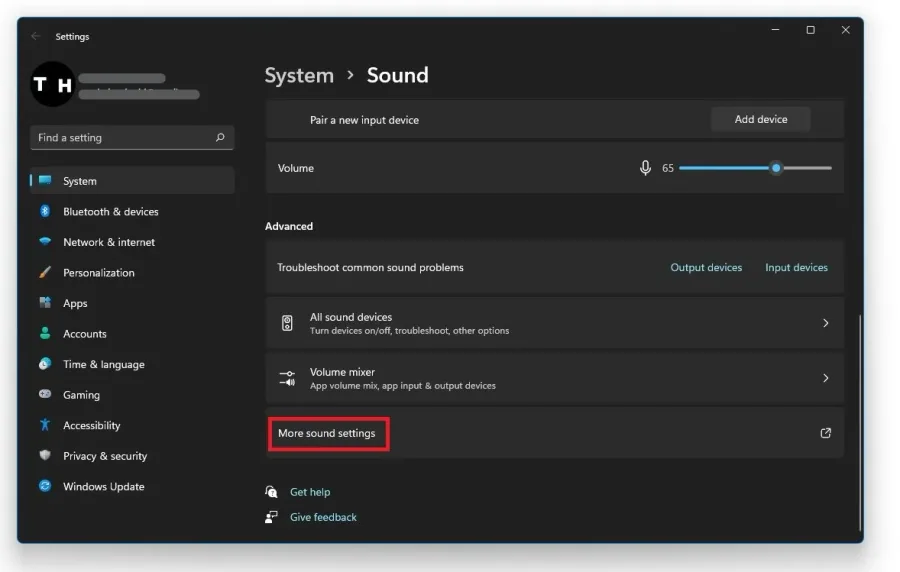
To get started, click on the gear icon in your taskbar to open up your Windows settings, or search for Settings in your start menu search to get to this window. Under System, click on Sound. Select More sound settings at the bottom of this section to open up your Sound control panel.
Adjust your Microphone Properties
To get started, click on the gear icon in your taskbar to open up your Windows settings, or search for Settings in your start menu search to get to this window. Under System, click on Sound. Select More sound settings at the bottom of this section to open up your Sound control panel.
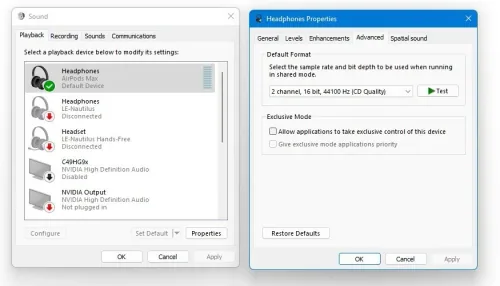
Under Recording, you can preview all sound input devices, usually microphones, th…
Under Recording, you can preview all sound input devices, usually microphones, that have been or are still connected to your Windows 11 PC. Locate your microphone in this list, right-click its name, and select Properties.; On this window, navigate to the Listen tab.; Select Listen to this device. This will allow you to check if the buzzing and static noise is hardware-related, meaning that your mic is faulty or related to software running on your system. Set your Playback through this device option to Default Playback Device. Under Advanced, check the two Exclusive mode options allowing other applications to take control and change some in-program settings. The Default Format option should be set to 44’100 or 48’000 Hz. Anything above should be useful for audiophiles using expensive equipment.
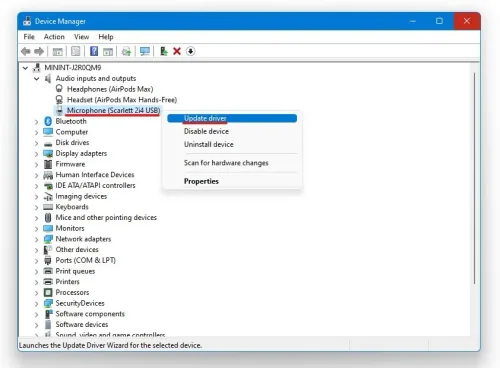
Update the Audio Input Device Driver
If the problem persists, ensure that your microphone’s driver is up to date. Close your Sound control panel, and open up your Device Manager. Under Audio inputs and outputs, double-click the microphone you are using, and in the Driver tab, click on update driver and then Search automatically for drivers. This will take a few seconds to download and install the latest microphone driver.
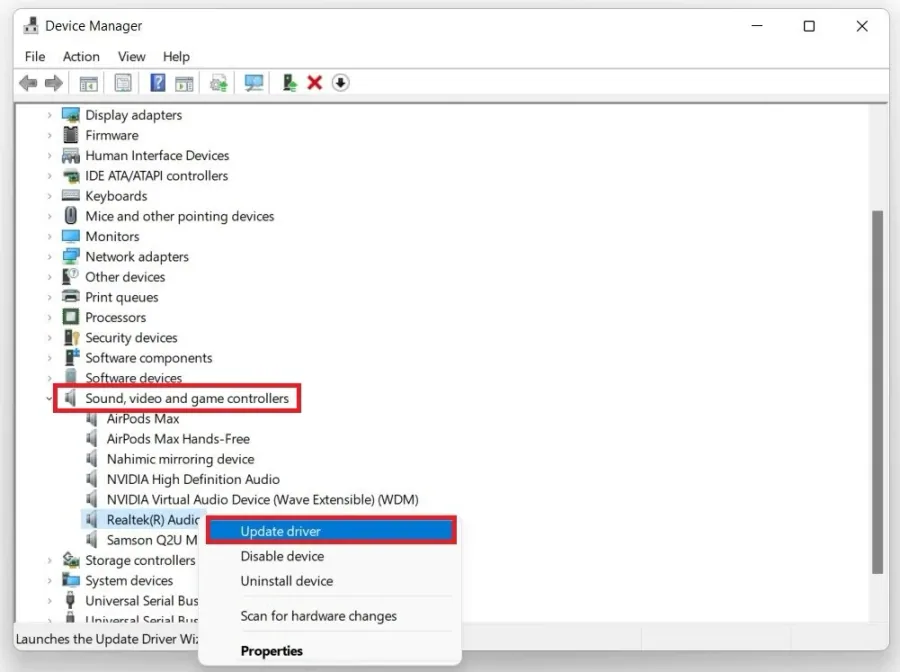
Expand your Sound, video and game controllers
Expand your Sound, video and game controllers. In the list of audio devices, locate the Realtek High Definition Audio device and double-click it. Again, in the driver tab, select to update the driver automatically. You can then close these windows, and the static noise from your microphone should be fixed if it’s related to software or drivers.
Adjust the Application Settings
Other applications, such as Discord, Microsoft Teams, or Skype, using your microphone have in-application settings that can improve or worsen your sound input. In this example, we will open Discord, as many of our viewers and readers use the application. On this window, navigate to your User Settings, and then under App Settings, select Voice & video.
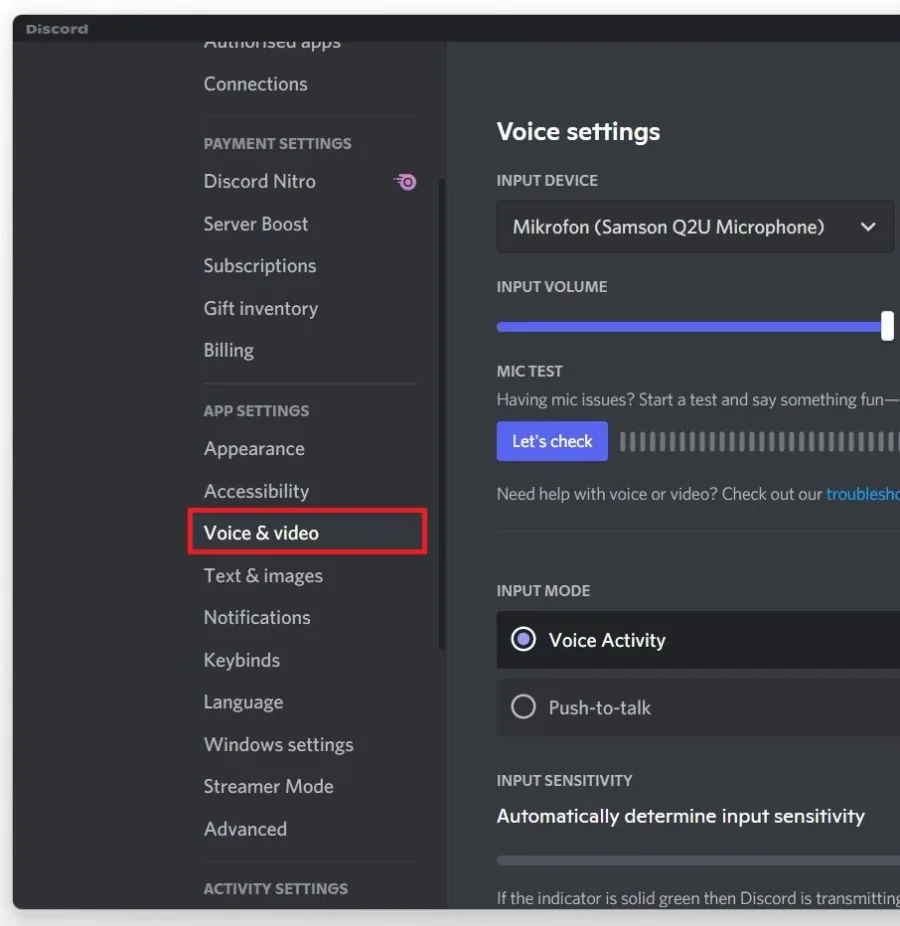
Set the input mode to Voice Activity, and enable the Automatically determine inpu…
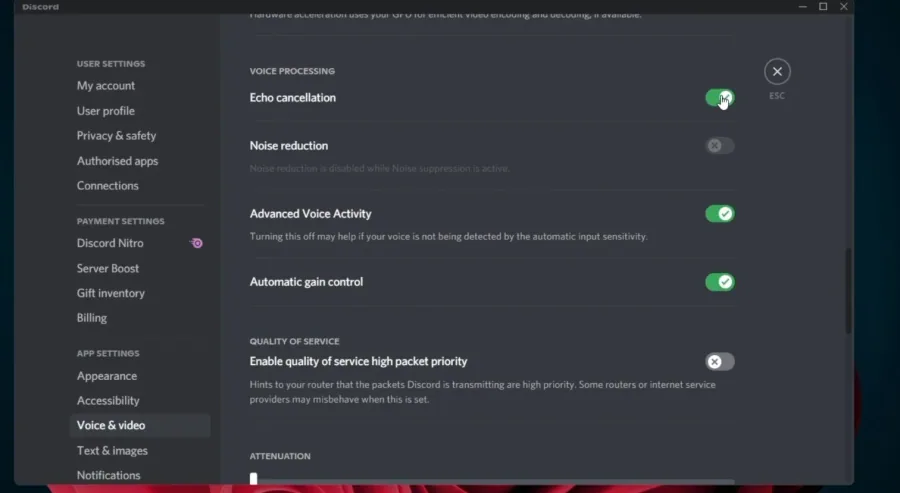
Set the input mode to Voice Activity, and enable the Automatically determine input sensitivity option. Below, enable the Noise suppression option, which should reduce the background noise from your microphone. Under Voice processing, disable and re-enable the Echo cancellation, Advanced Voice Activity and Automatic gain control options.
Video walkthrough
If it does not work
- If the current interface differs, compare it with the recorded video walkthrough.