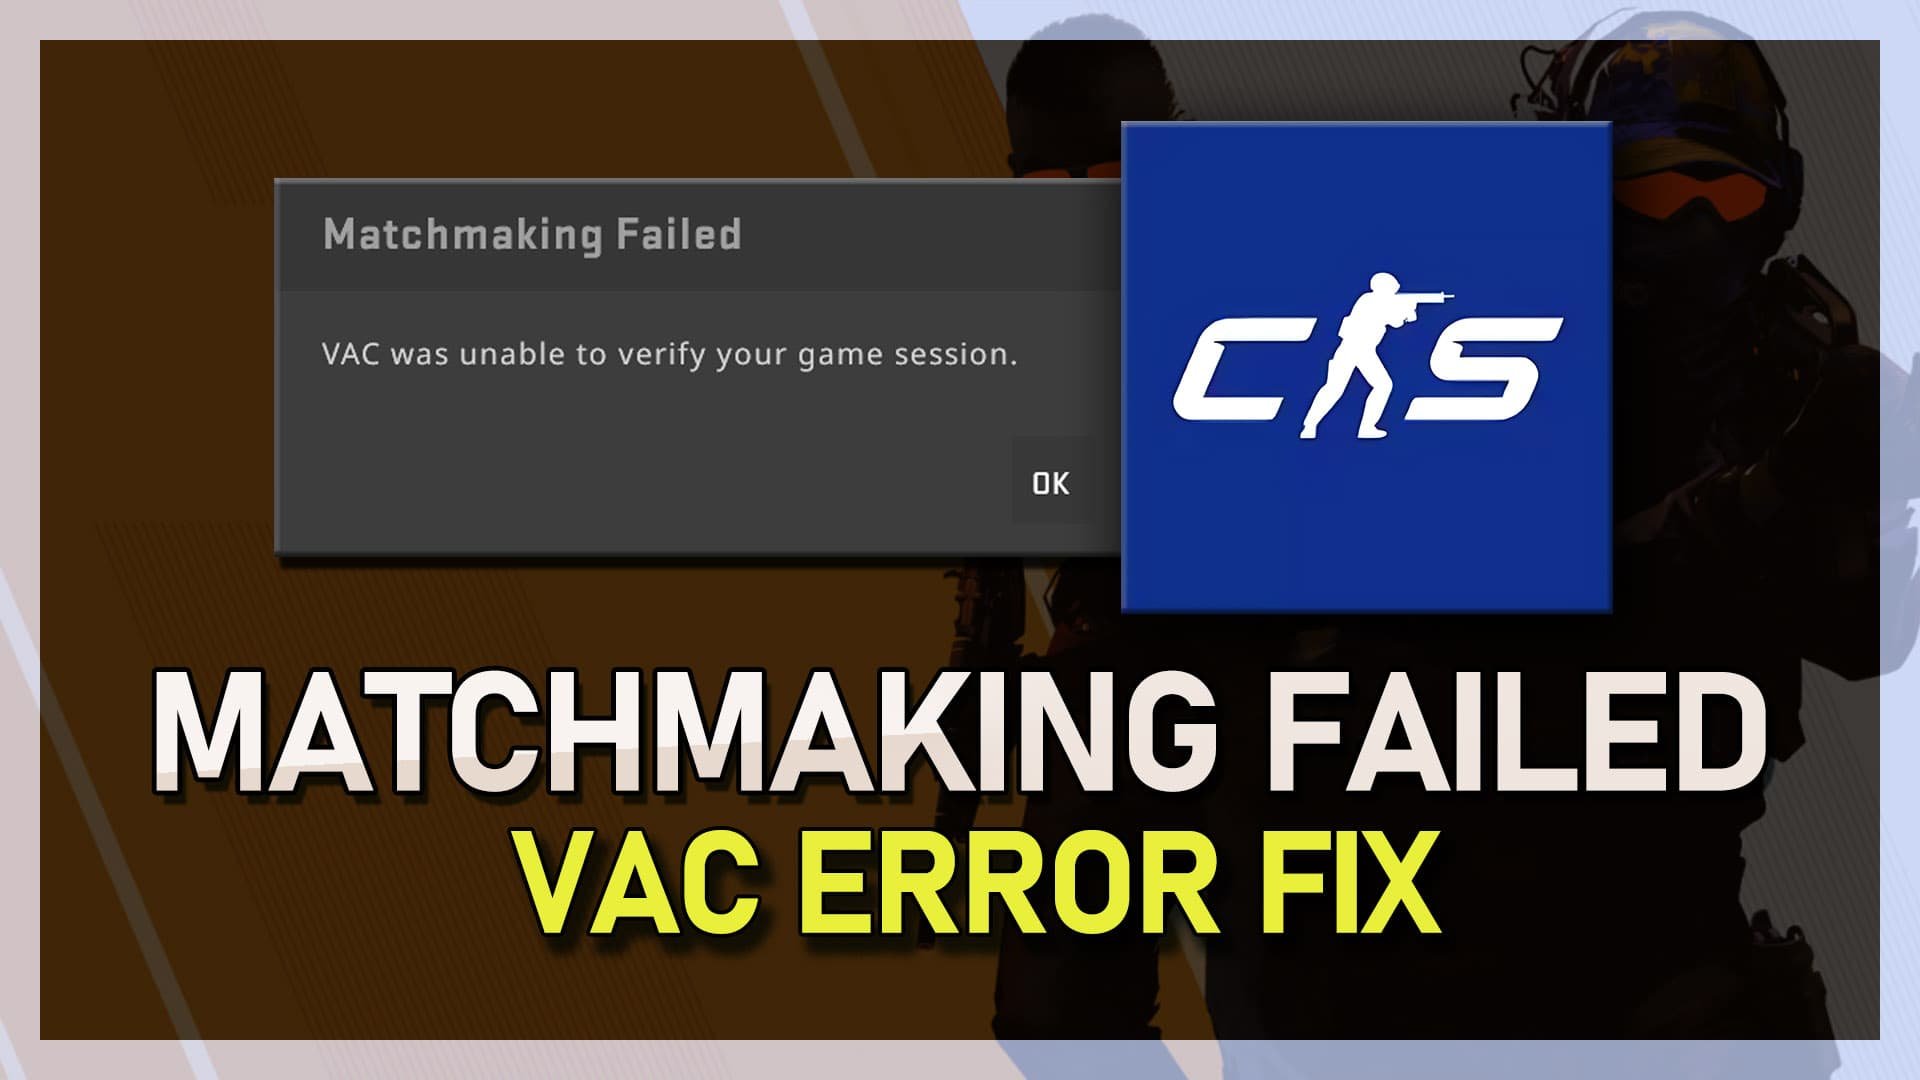
Fix CS2 VAC Was Unable To Verify Your Game Session Error
Introduction
In the thrilling world of Counter Strike 2 (CS2), encountering the "VAC (Valve Anti-Cheat) was unable to verify your game session" error can momentarily disrupt your gaming adventure. Thankfully, remedying this common hiccup doesn't necessitate expert skills or extensive technical know-how. From verifying the integrity of your game files to fine-tuning launch options, a series of straightforward steps stand between you and your seamless return to the gaming battlefield. Delve into this concise guide, where we unravel the quick and easy solutions to get you back in the game, fortified against potential VAC verification issues. Let's rekindle your uninterrupted gaming session, stepping confidently past this temporary setback.
Step 1: Verify CS2 Game Files Integrity
To begin, launch your Steam application and navigate to the game library. Here, locate and select CS2. Right-click on it to delve into its properties. On the left pane, you'll find the 'Installed Files' tab — click on it.
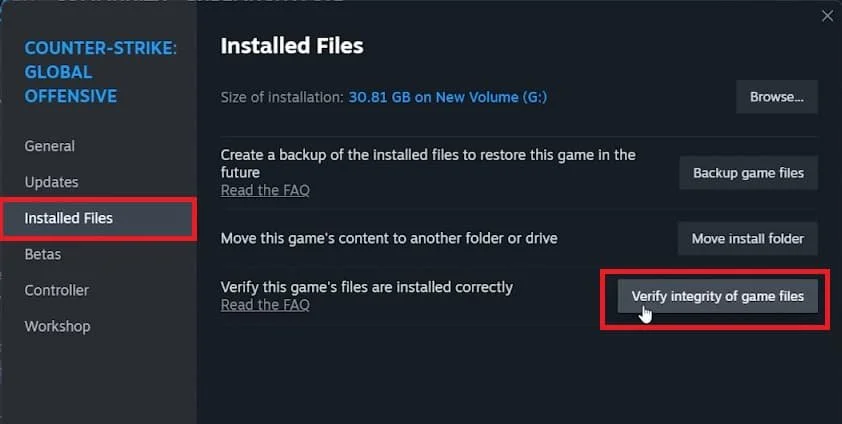
CS2 Properties > Installed Files > Verify Integrity of game files
Proceed to click on "verify integrity of game files." This action initiates a thorough check to ensure all your files are intact and uncorrupted. Be patient, as this process might take a few minutes to complete. Once it's done, head to the upper left corner of your screen and select the 'Steam' tab. From the emerging drop-down menu, choose 'Exit' to close the Steam application.
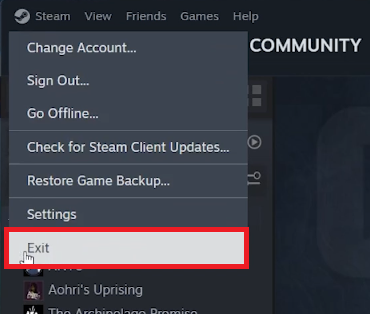
Steam > Exit
Step 2: Terminate All Steam Processes
After exiting Steam, it's time to ensure that all background processes linked to the application are closed. To do this, open your 'Task Manager' (you can do this by pressing CTRL+SHIFT+ESC or right-clicking on the taskbar and selecting 'Task Manager'). Within Task Manager, navigate to the 'Details' tab and activate the list by clicking anywhere inside it. Utilize the shortcut 'S' on your keyboard to quickly identify all processes that begin with the letter 'S'. Scan through to find any lingering Steam processes, right-click on each, and opt to "End Process" to close them completely. This step ensures that no residual processes interfere with your next session of CS2.
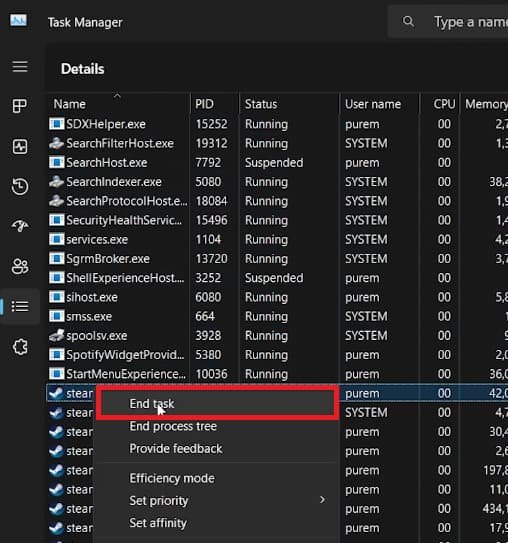
Task Manager > Details > End Task
Step 3: Launch CS2 with Administrative Privileges
Having closed all the Steam-related processes, you are now ready to restart the Steam application and launch CS2 anew. This simple restart often eliminates the "VAC was unable to verify your game session" error, enabling a smooth gaming experience for many users.
Troubleshooting Persistent Errors
However, if the vexing error persists, don't fret. Here's a proven workaround to try:
Exit CS2 and revisit your game library to find Counter Strike.
Access the game's properties and locate the "Installed Files" section. Click "Browse" to open your file explorer, which will display all the CS2 files you have.

CS2 Properties > Installed Files > Browse
Locate the CS.exe application within the displayed files. Right-click on it and select "Properties".
Navigate to the compatibility tab and tick the option “Run this program as an administrator” to grant it administrative privileges. Make sure to apply the changes before closing the dialog box.
By running the game with administrative permissions, you further enhance the chances of bypassing the recurring VAC error, paving the way for an uninterrupted gaming session.
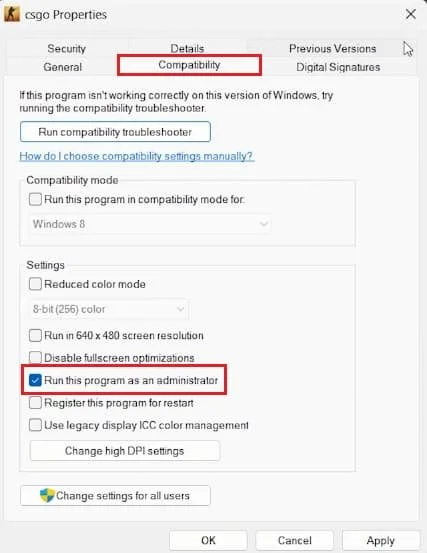
CS2 Properties > Compatibility > Run as administrator
Step 4: Optimize CS2 Launch Options
Finally, to ensure a smooth and error-free gaming session, it's crucial to scrutinize the launch options in your game properties. Occasionally, conflicting or incorrect launch options may be the culprits behind the stubborn VAC error. Here's how you can fine-tune the settings:
Navigate back to your Steam library and right-click on CS2 or CSGO to open the game's properties.
Switch to the 'General' tab and find the 'Launch Options' section.
Remove any existing launch options as a troubleshooting step to check if this resolves the VAC error that has been interrupting your game sessions.
Tip: Always initiate the game directly from your Steam library instead of using desktop shortcuts, to avoid potential glitches and ensure a stable gaming environment.
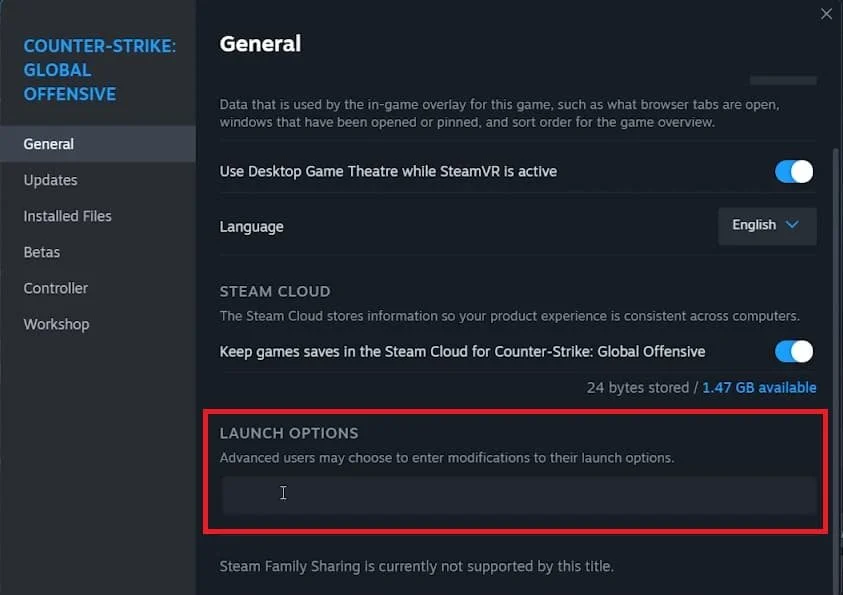
CS2 Properties > General > Launch Options
-
The VAC (Valve Anti-Cheat) error, commonly encountered in games like CS2, typically signifies potential issues with the game files or settings, obstructing a secure and fair gaming environment. This error can prevent you from joining servers or participating in online matches.
-
To fix this error, you can try several methods such as verifying the integrity of game files, running the game as an administrator, or resetting launch options to their default settings. These methods are known to resolve the error most of the time.
-
First, open your Steam launcher and select CS2 in the game library. Right-click on the game, access its properties, and navigate to the 'Installed Files' tab to find and click on the "verify integrity of game files" option.
-
If the error persists, navigate to your game library and access CS2 properties. Click on "Browse" in the “Installed Files” section to open the file explorer containing all CS2 files. Right-click on the CS.exe application, select “Properties”, and check the option “Run this program as an administrator” before applying the changes.
-
Yes, modifying launch options can sometimes resolve the VAC error. To do this, go to the game's properties in your Steam library, locate the "Launch Options" section in the General tab, and remove all existing launch options. Always launch the game through Steam library to avoid any potential glitches.