
Gaming · Windows & macOS
How To Play LifeAfter: Night Falls on PC & Mac
Original source date
Answer
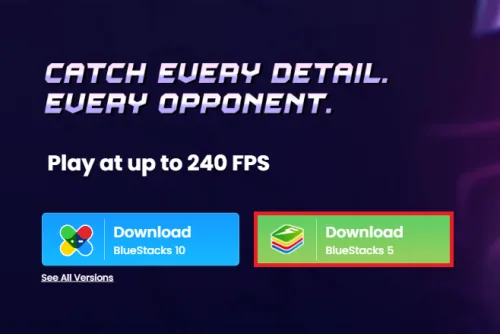
To enjoy LifeAfter: Night Falls on your computer, you'll need an Android emulator like BlueStacks. Widely recognized for its exceptional performance, BlueStacks is designed to optimize PC mobile gaming. The download and installation process is straightforward and quick – follow the on-screen instructions provided by the setup wizard. With BlueStacks installed, you'll be all set to experience LifeAfter: Night Falls in a whole new way on your PC or Mac.
Download & Install BlueStacks
To enjoy LifeAfter: Night Falls on your computer, you'll need an Android emulator like BlueStacks. Widely recognized for its exceptional performance, BlueStacks is designed to optimize PC mobile gaming. The download and installation process is straightforward and quick – follow the on-screen instructions provided by the setup wizard. With BlueStacks installed, you'll be all set to experience LifeAfter: Night Falls in a whole new way on your PC or Mac.
Download LifeAfter: Night Falls
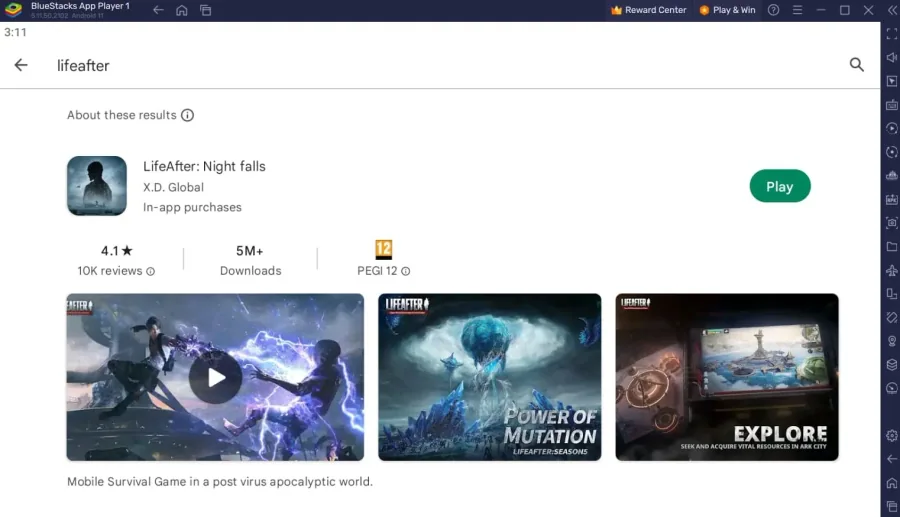
Open your Play Store and log in with your Google account. Search for LifeAfter: Night Falls and download the game to your BlueStacks emulator. This might take a few minutes to complete depending on your network connection.
Optimize BlueStacks Performance Settings
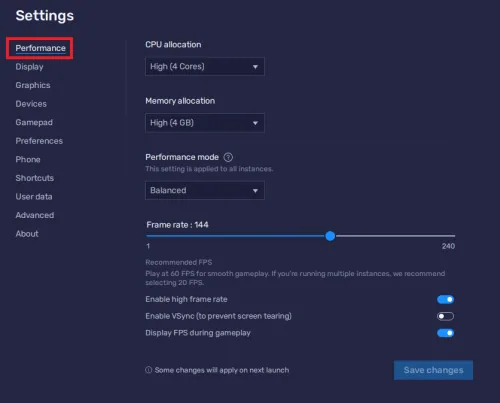
While downloading the game, take a moment to review your emulator settings. In the Performance tab, adjust the settings based on your PC's capabilities. Allocate a high number of CPU cores if you have minimal background applications running. Similarly, consider your Memory allocation; for users with 4GB or less RAM, set this option to Low. Under Performance Mode, select the Balanced option to optimize memory and CPU usage, reducing lag or performance issues. For an enhanced gaming experience, enable the High FPS option and match the emulator's frame rate to your screen's refresh rate, ensuring smooth gameplay.
BlueStacks Display Settings
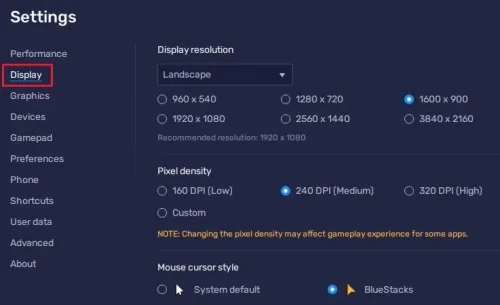
In your Display settings, set the display orientation to landscape, and choose a proper resolution to play LifeAfter: Night Falls on your monitor. You can also adjust the size of this window by dragging its corners.
LifeAfter Night Falls Control Customization
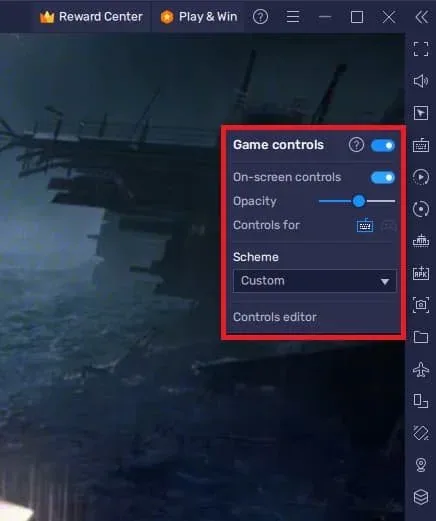
Once you've logged in to your account and completed the latest patch download, you're all set to begin your LifeAfter journey. To fine-tune your keyboard or controller keybindings, simply click the keyboard icon located in the BlueStacks menu bar. This will grant you access to the controls editor, where you can personalize the settings for your keyboard and mouse, or your preferred controller. Feel free to toggle the on-screen controls on or off and adjust their transparency and location on your screen for an optimal gaming experience. Get ready to master LifeAfter Night Falls with your customized control scheme!
LifeAfter Night Falls Performance Optimization
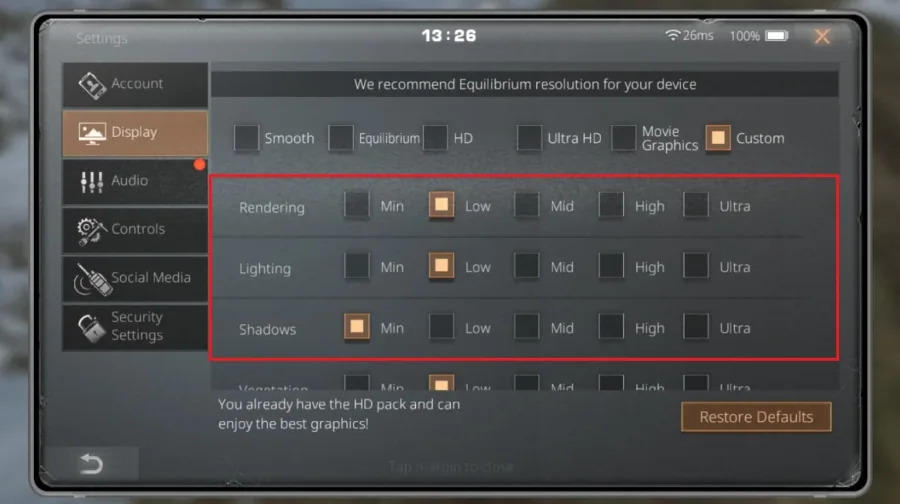
Should you encounter performance issues while playing LifeAfter Night Falls, head to the in-game settings to fine-tune your display options. In the Display section, opt for the balanced or smooth setting if you're using a low-end system. For those with mid to high-end systems, consider using the HD or Ultra HD settings to fully enjoy the game on a higher resolution. Regarding render settings, reducing this option can help alleviate performance problems. Personally, I like to decrease the shadows setting and choose a "Realistic" screen style for an immersive gaming experience. Don't forget to adjust the FPS setting based on your BlueStacks emulator's frame rate. Disabling anti-aliasing and customizing other settings according to your preferences will further enhance your LifeAfter Night Falls gameplay on PC and Mac.
How to troubleshoot common problems with BlueStacks on Windows
How To Fix “Device Isn’t Compatible With Bluestacks” Error; Best BlueStacks Settings for Low-End PC - Fix Lag & Boost FPS; How To Fix BlueStacks 5 Not Launching or Loading on Windows; How To Run Android 11 Apps & Games on Windows 11
Video walkthrough
If it does not work
- Can I play LifeAfter Night Falls on PC and Mac using BlueStacks emulator?. Yes, you can enjoy LifeAfter Night Falls on your PC and Mac with the help of the BlueStacks emulator, which provides a seamless gaming experience.
- How do I customize the controls for LifeAfter Night Falls on BlueStacks?. To adjust the controls for LifeAfter Night Falls on BlueStacks, click on the keyboard icon in the menu bar, then access the controls editor. From there, you can customize your controls for keyboard and mouse or a controller as per your preference.
- How can I optimize the in-game settings for better performance in LifeAfter Night Falls?. To optimize performance, head to the in-game settings, adjust the display options, render settings, and other options like shadows, screen style, and FPS based on your system's capabilities and your personal preferences.
- Do I need a powerful PC or Mac to play LifeAfter Night Falls on BlueStacks?. While LifeAfter Night Falls can be played on low-end systems by adjusting the in-game settings, a mid to high-end system will provide a more immersive and visually appealing experience.
- Is it possible to use a controller while playing LifeAfter Night Falls on BlueStacks?. Yes, you can use a controller for LifeAfter Night Falls on BlueStacks. Make sure to enable the Gamepad detection option in your BlueStacks Gamepad settings and adjust the controls accordingly.