
Windows 11 · Windows
Set up headphones and a microphone in Windows 11
Source-checked About 10 minutes
Answer
Connect the headset, select it under Sound output and input, test playback and recording, then allow microphone access for the apps that need it.
Identify and test the exact audio device
Confirm the exact microphone, headphones, port or wireless connection, then record the selected Windows input and output, volume, mute state, app permission, and result in another trusted recording or playback app. Keep gain low while testing to protect hearing and avoid feedback. Change one mixer, enhancement, format, permission, or driver setting at a time.
Start with the supported check
Connect the headset by the correct audio jacks, USB, or Bluetooth pairing flow.
Apply the current setting
Open Settings > System > Sound and select it under Output.
Test the result
Select its microphone under Input, start a microphone test, and adjust input volume.
Escalate safely
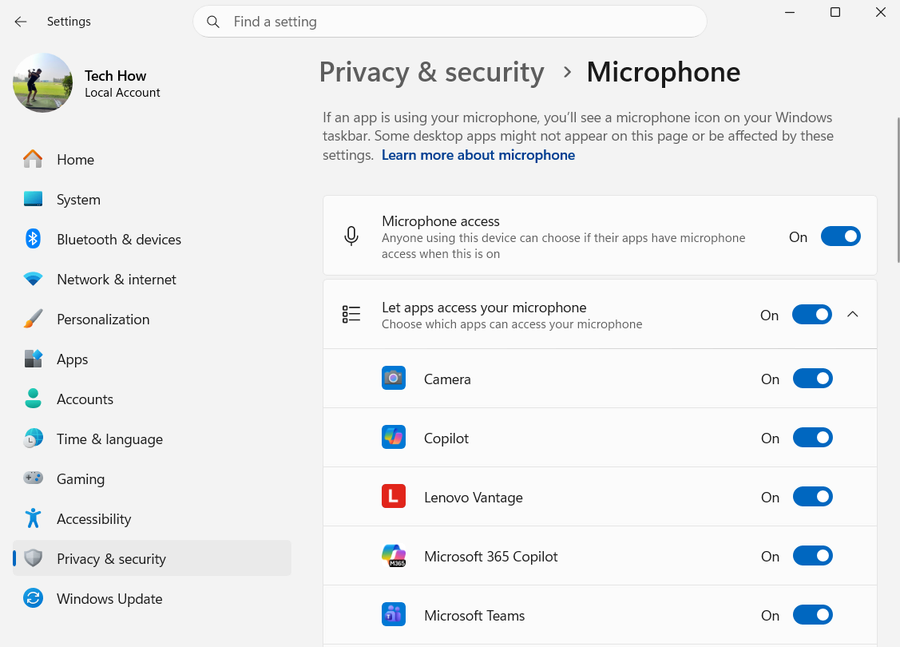
Open Privacy & security > Microphone and allow access for the required apps and desktop apps.
Verify playback and recording
Play a left-right audio test through the selected headphones, record a short microphone sample, and confirm the intended app uses the same input and output after reconnecting the headset.
Video walkthrough
If it does not work
- If the headset is detected only as input or output, verify the plug type, splitter, Bluetooth profile and selected devices in Sound settings. Test the headset elsewhere and use the PC or headset maker's model-specific guidance rather than repeatedly reinstalling generic drivers.
Sources and verification
Checked against official documentation on . Scope: Windows.
Follow the linked first-party guidance if labels differ after a platform update.