
Windows 10 · Windows
Windows 10 - How To Repair A Corrupted SD Card
Original source date
Answer
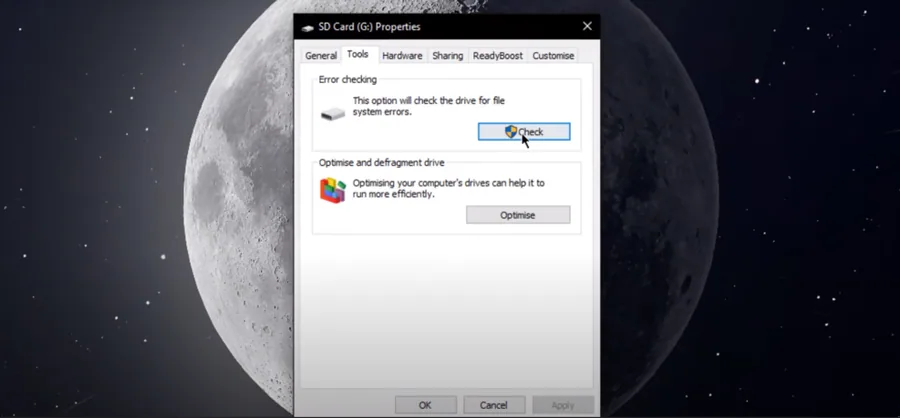
To address possible issues with your SD card, you can use the built-in error-checking tool in Windows 10. To access this feature, open your File Explorer and navigate to This PC. Locate your SD card under the Devices and Drives section, then right-click on it and select Properties from the context menu. Within the Properties window, switch to the Tools tab, where you'll find the Error Checking section. Click on the Check button to initiate scanning your SD card for any system errors or inconsistencies. Windows will automatically detect and fix common issues, making it a valuable tool to identify and resolve problems affecting your SD card quickly.
Perform an Error-Check
To address possible issues with your SD card, you can use the built-in error-checking tool in Windows 10. To access this feature, open your File Explorer and navigate to This PC. Locate your SD card under the Devices and Drives section, then right-click on it and select Properties from the context menu. Within the Properties window, switch to the Tools tab, where you'll find the Error Checking section. Click on the Check button to initiate scanning your SD card for any system errors or inconsistencies. Windows will automatically detect and fix common issues, making it a valuable tool to identify and resolve problems affecting your SD card quickly.
Format SD Card Storage
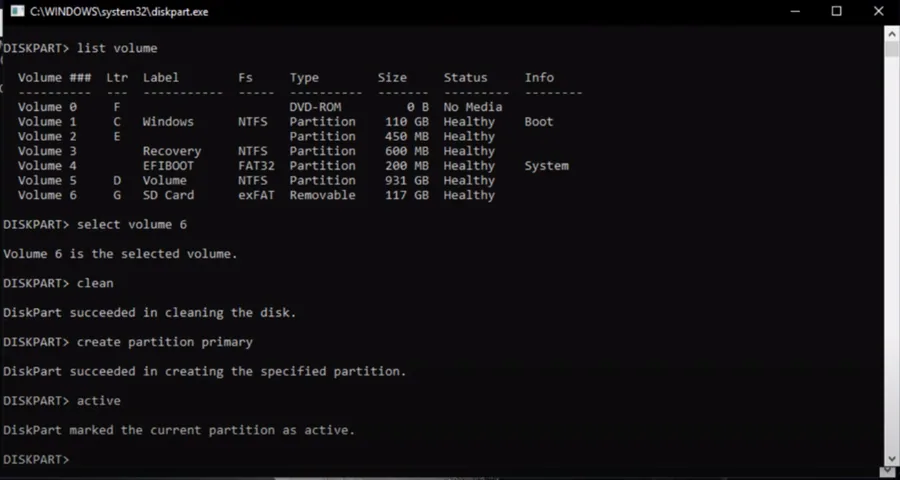
To format your SD card and potentially fix any issues, you can utilize the Command Prompt in Windows 10. Begin by searching for CMD in your taskbar search, then hit Enter to launch the Command Prompt window. Enter the command: diskpart and press Enter to access the DiskPart utility. Next, type in the command list volume and press Enter to display all the partitions or volumes connected to your computer. Identify the volume number corresponding to your SD card. Now, execute the following commands one by one, replacing "(the Volume number of your SD card)" with the actual volume number: select volume (the Volume number of your SD card); clean; create partition primary; active; select volume (the Volume number of your SD card); format fs=fat32 Keep in mind that formatting the partition as a file system using the command format fs=fat32 may take a few minutes, depending on the size of your SD card. Once the process is complete, your SD card should be ready for use, free from any previous errors or issues.
Video walkthrough
If it does not work
- If the current interface differs, compare it with the recorded video walkthrough.