Windows 10 · Windows
Windows 10 - How To Install Wifi Drivers
Original source date
Answer
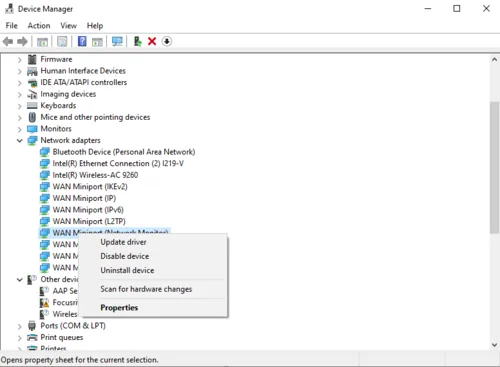
To begin, type 'Device Manager' in your taskbar search box and open the application. Within Device Manager, locate the 'Network adapters' section and expand it to reveal a list of available network adapters on your system. If you're unsure about the specific name of the network adapter you are currently using, navigate to the 'Network Connections' system settings. Click on 'Change Adapter Settings' to display a list of network adapters and their respective names. Once you have identified the network adapter you are using, return to the Device Manager. Right-click on the desired network adapter and select 'Update driver' from the context menu. Opt for 'Search automatically for updated driver software' to let Windows search and install the latest Wi-Fi driver for your device. This process ensures your network adapter stays up-to-date and functions optimally with your Windows 10 system.
Locate Network Adapter in Device Manager
To begin, type 'Device Manager' in your taskbar search box and open the application. Within Device Manager, locate the 'Network adapters' section and expand it to reveal a list of available network adapters on your system. If you're unsure about the specific name of the network adapter you are currently using, navigate to the 'Network Connections' system settings. Click on 'Change Adapter Settings' to display a list of network adapters and their respective names. Once you have identified the network adapter you are using, return to the Device Manager. Right-click on the desired network adapter and select 'Update driver' from the context menu. Opt for 'Search automatically for updated driver software' to let Windows search and install the latest Wi-Fi driver for your device. This process ensures your network adapter stays up-to-date and functions optimally with your Windows 10 system.
Video walkthrough
If it does not work
- If the current interface differs, compare it with the recorded video walkthrough.