Windows 10 · Windows
Windows 10 - How To Clean Your Local C: Drive
Original source date
Answer
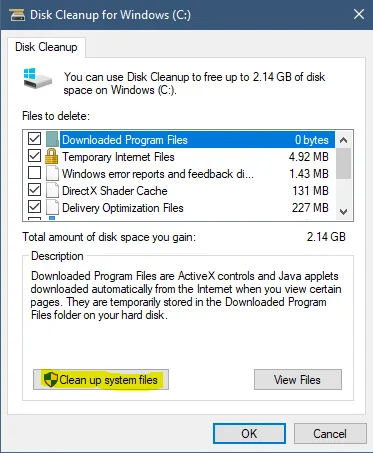
To begin cleaning your local C: drive, search for the Disk Clean-up tool in the Windows search bar and hit enter. This built-in utility will assist you in freeing up valuable storage space on your computer. Once the Disk Clean-up window appears, select your C: drive from the options list and click OK. The next step involves choosing the Clean up system files button to initiate a more thorough scan of your C: drive. This process might take a few minutes as the tool searches for unnecessary files, such as temporary files, system logs, or old Windows updates. When the scan is finished, you'll be presented with the total amount of disk space you can reclaim. To proceed with the clean-up, click OK once more, and the Disk Clean-up tool will begin deleting the selected files from your system. This simple yet effective method will help you maintain a clutter-free C: drive, improving your Windows 10 computer's performance and efficiency.
Utilizing the Disk Clean-up Tool
To begin cleaning your local C: drive, search for the Disk Clean-up tool in the Windows search bar and hit enter. This built-in utility will assist you in freeing up valuable storage space on your computer. Once the Disk Clean-up window appears, select your C: drive from the options list and click OK. The next step involves choosing the Clean up system files button to initiate a more thorough scan of your C: drive. This process might take a few minutes as the tool searches for unnecessary files, such as temporary files, system logs, or old Windows updates. When the scan is finished, you'll be presented with the total amount of disk space you can reclaim. To proceed with the clean-up, click OK once more, and the Disk Clean-up tool will begin deleting the selected files from your system. This simple yet effective method will help you maintain a clutter-free C: drive, improving your Windows 10 computer's performance and efficiency.
Eliminate Windows Temporary Files
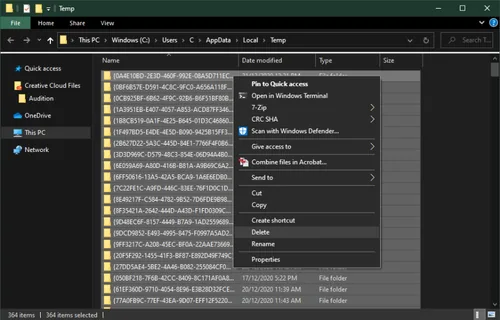
Over time, your hard drive may accumulate significant unwanted files, leading to slower performance and system lag if not dealt with appropriately. To address this issue, you can either manually delete temporary files or opt for PC cleanup programs like CCleaner, which will automatically manage and maintain your hard drive's cleanliness. Using a cleanup application is often the most efficient choice, as it automates the process, ensuring your system stays clutter-free. However, if you prefer to manually delete your temporary files, enter %temp% in your taskbar search and hit enter. A new folder containing your temporary files will open up. It's essential to delete the contents of this folder to free up valuable space. This process may take a few minutes, especially if you haven't performed a clean-up recently. It's worth noting that some files may remain in your temp folder, as active programs are still utilizing them. To completely remove these lingering files, empty your recycle bin as well. This two-step process will help you maintain a cleaner, more efficient Windows 10 system.
Remove Malware and Unnecessary Programs
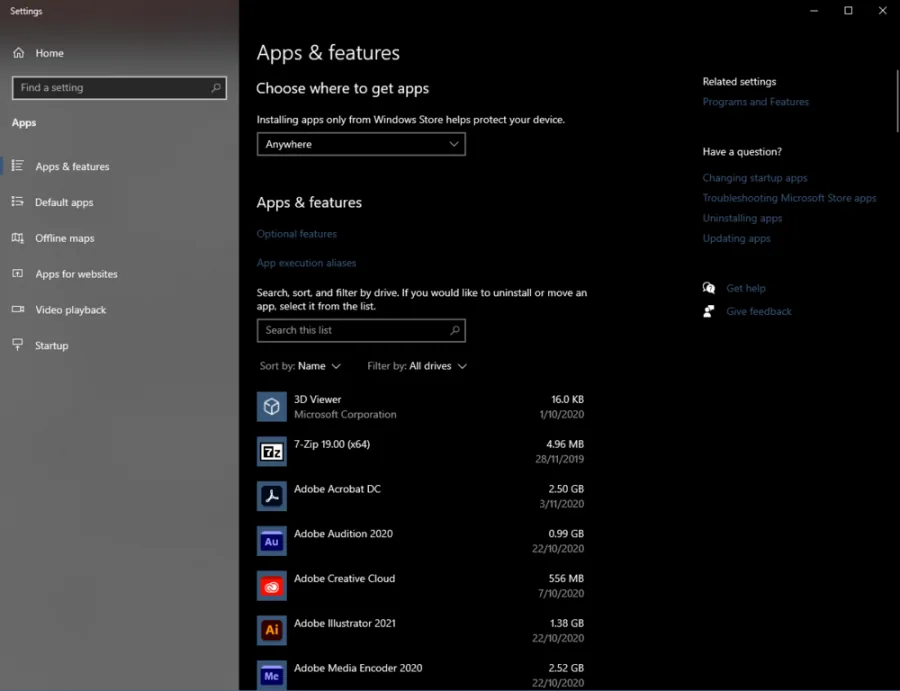
To optimize your Windows 10 system, searching for and uninstalling any malware or unneeded programs that may be taking up valuable disk space is crucial. To do this, simply search for "Uninstall" in your taskbar search and open up the Apps & Features system settings. Once there, filter the installed programs by your C: drive and carefully review the list of applications. Uninstall programs that are no longer in use, redundant, or suspicious in nature, as these may contribute to decreased performance and clutter. Some examples of programs you might consider removing include old games, outdated software, or browser toolbars that you no longer utilize. After completing the uninstallation process, don't forget to empty your Recycle Bin to remove the associated files permanently. It's a good idea to repeat this process every few months to maintain a clean, efficient, and well-organized disk on your Windows 10 system. This routine maintenance will ensure optimal performance and a clutter-free environment.
Video walkthrough
If it does not work
- If the current interface differs, compare it with the recorded video walkthrough.