Windows 10 · Windows
Windows 10 - How To Stop "Antimalware Service Executable" From Using CPU Resources
Original source date
Answer
To bypass Windows Defender and optimize your system performance, first, search for Windows Defender in your taskbar search and open the Windows Defender system settings. Once you've opened the settings, navigate to the Windows Security system settings section, and select the Virus & Threat protection option. This will allow you to access and modify various security settings to ensure your system is well-protected while still maintaining optimal performance. By adjusting these settings, you can prevent Windows Defender from consuming excessive resources, thereby reducing any potential slowdowns or performance issues. Be sure to explore the various options available to strike the perfect balance between robust security and efficient system operation.
Bypassing Windows Defender
To bypass Windows Defender and optimize your system performance, first, search for Windows Defender in your taskbar search and open the Windows Defender system settings. Once you've opened the settings, navigate to the Windows Security system settings section, and select the Virus & Threat protection option. This will allow you to access and modify various security settings to ensure your system is well-protected while still maintaining optimal performance. By adjusting these settings, you can prevent Windows Defender from consuming excessive resources, thereby reducing any potential slowdowns or performance issues. Be sure to explore the various options available to strike the perfect balance between robust security and efficient system operation.

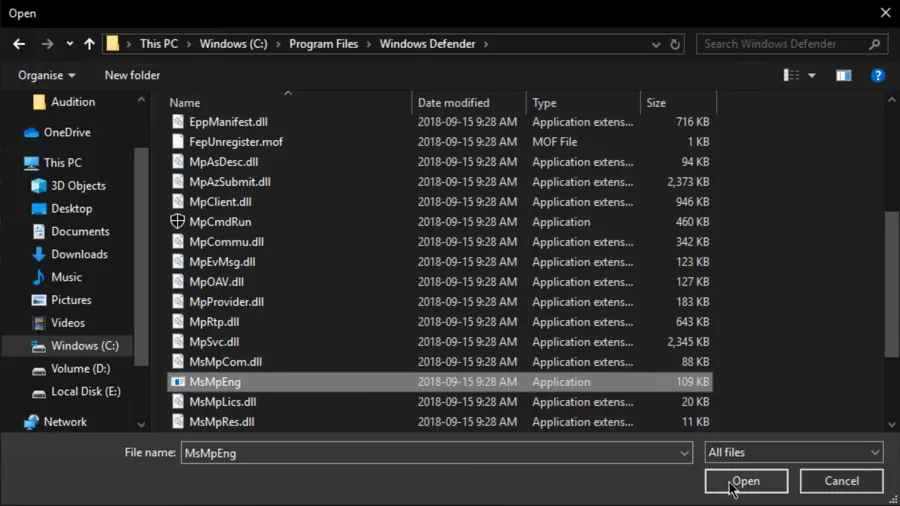
Managing Exclusion Settings
In the new window that opens, locate the “Manage settings” option and click on it to access various security configurations. Scroll down the list of options until you find the Exclusions section, and then select “Add or remove exclusions” to manage the list of files and folders excluded from scanning. To add an exclusion, left-click the “Add an exclusion” button and choose the File option. Now, open your file explorer and navigate to This PC. If your operating system is installed on your C: drive, head over to the C: drive and proceed to your program files > Windows Defender. Within the Windows Defender folder, locate the MsMpEng application and select it to open. After a few moments, the exclusion should be successfully added, preventing the Antimalware Service Executable from using unnecessary CPU resources when scanning this particular file.
Video walkthrough
If it does not work
- If the current interface differs, compare it with the recorded video walkthrough.