Windows 11 · Windows
Windows 11 Taskbar Customization Guide
Original source date
Answer
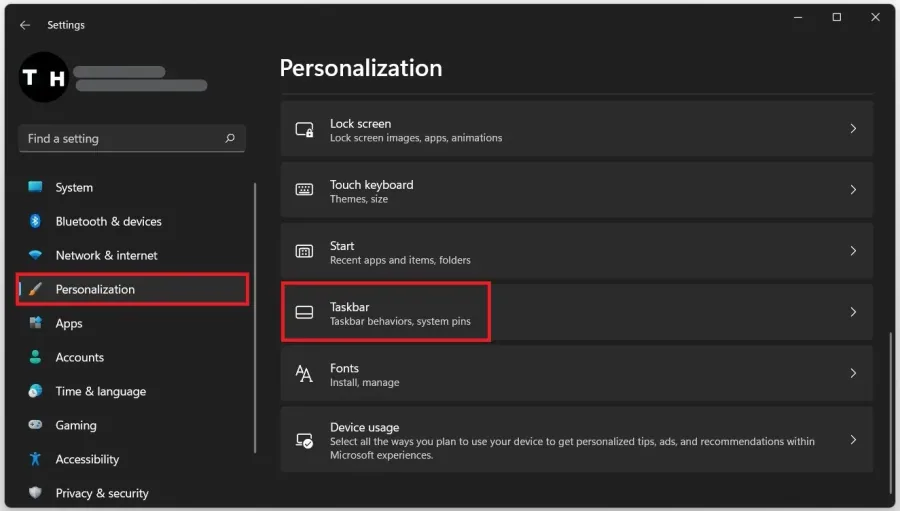
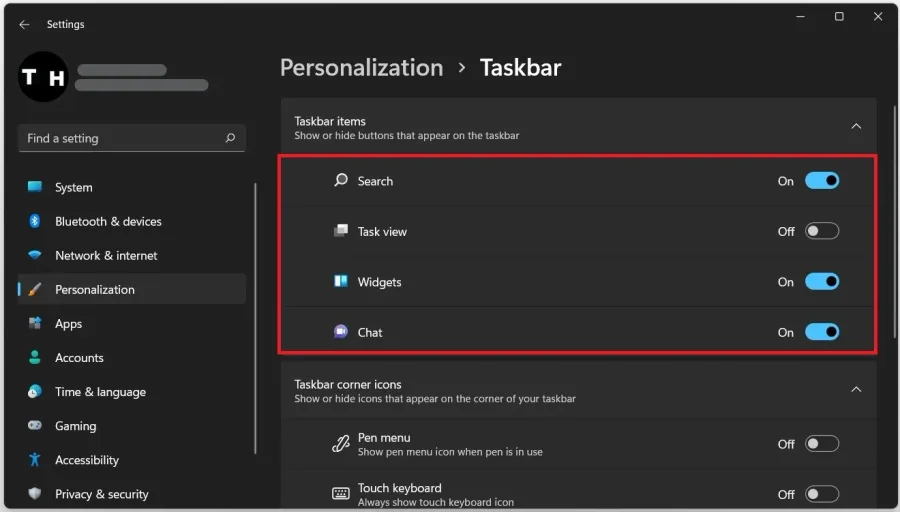
First, we will take a look at your default taskbar options. Open up your settings when clicking on the gear icon in your taskbar, or open up your start menu and search for Settings. Navigate to Personalization and select Taskbar. The first option lets you disable some of the default taskbar items. Enable or disable the Search, Task view and Widgets to your liking.
Customize the Windows Taskbar Settings
First, we will take a look at your default taskbar options. Open up your settings when clicking on the gear icon in your taskbar, or open up your start menu and search for Settings. Navigate to Personalization and select Taskbar.
The first option lets you disable some of the default taskbar items
The first option lets you disable some of the default taskbar items. Enable or disable the Search, Task view and Widgets to your liking.
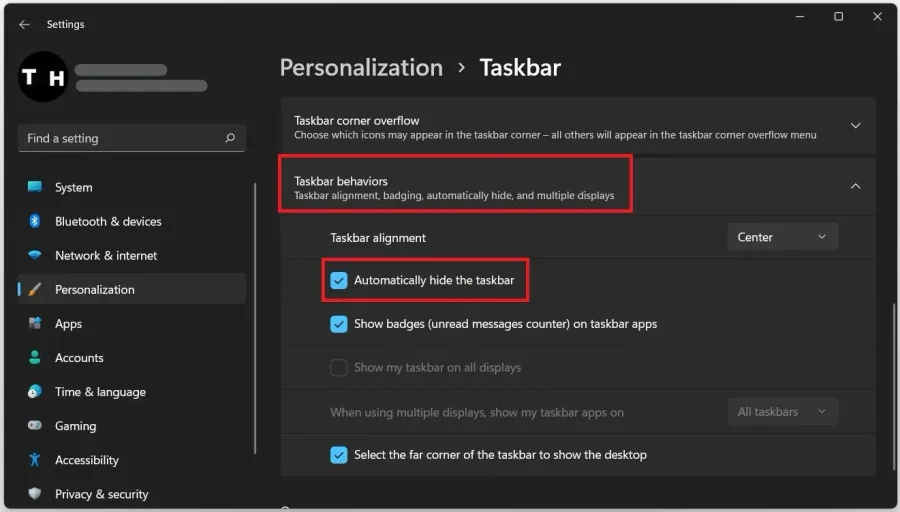
Below, you can show or hide icons on the corner of your taskbar next to your syst…
Below, you can show or hide icons on the corner of your taskbar next to your system tray. Expand your Taskbar corner overflow settings to show or hide more icons that could come in handy, depending on what you prefer to do with your taskbar. We will leave most of these settings disabled to keep a clean taskbar. Under Taskbar behaviors, you can change the taskbar alignment from the center to the left side, in case you prefer the Windows 10 look. You can also enable the Automatically hide the taskbar option. For users with multiple displays, you can also enable the Show my taskbar on all displays option.
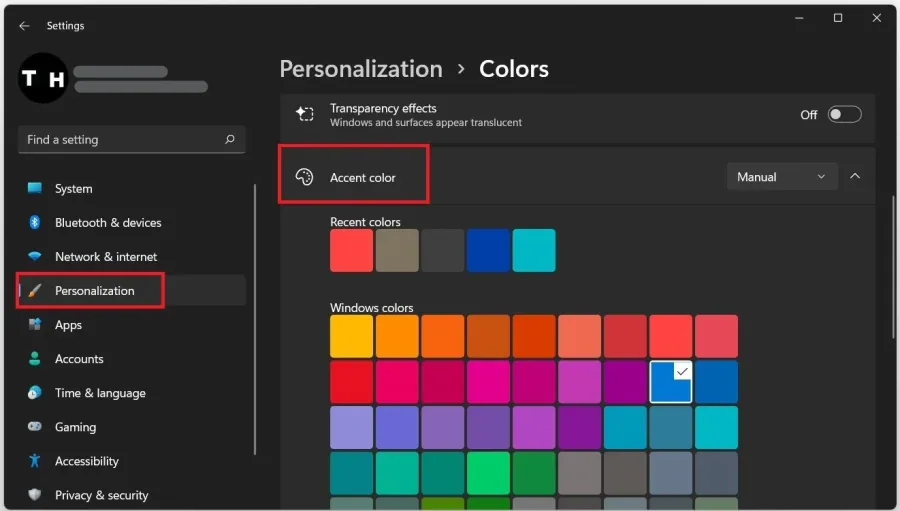
Change the Taskbar Colors
After verifying these settings, navigate back to your main Personalization options. Click on Colors. Expand the Accent color, and you will find the Show accent color on Start and taskbar options. While this option is enabled, you can apply your selected accent color to your taskbar! Choose a Windows color, or click View colors to select any color you choose.
Transparent Windows 11 Taskbar
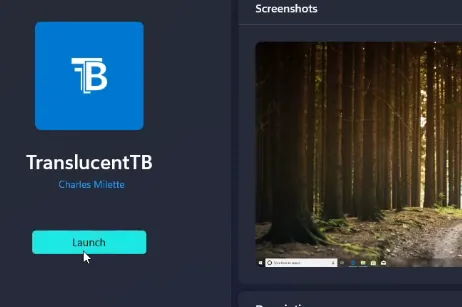
A simple app can make your taskbar transparent! Open up your Microsoft Store application and search for TranslucentTB to find this free-to-install application. Click Free, and Windows will take a moment to download and install the application. When it’s done, click on Launch, and you will be greeted with a pop-up message, telling you that you can tweak the taskbar’s appearance with the tray icon. In your taskbar, click on the TB icon, to access its settings and play around with them to see what works best for you. When selecting Exit, you will exit out of the application and revert your taskbar back to normal. To re-apply the changes, simply search for TranslucentTB in your start menu search.
How to Change the Taskbar Size
You can also change the size of your taskbar by making a change in your registry editor. Simply search for Registry Editor in your start menu search to open it up. If you cannot find it here, open this dialogue box using the Windows key + R shortcut. Type regedit and hit enter. On the window, navigate to HKEY_CURRENT_USER\Software\Microsoft\Windows\CurrentVersion\Explorer\Advanced

Right-click anywhere within the Registry editor right side panel and choose New -…
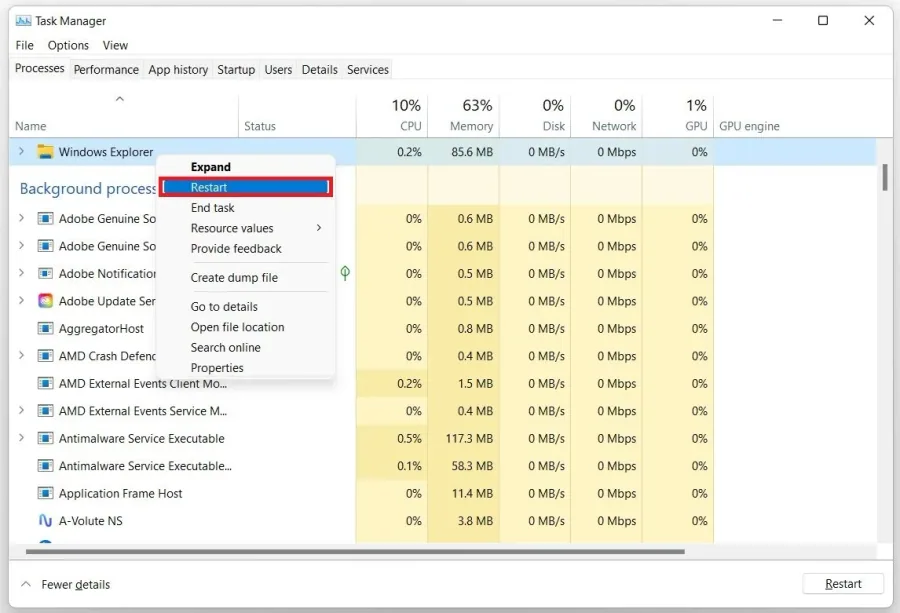
Right-click anywhere within the Registry editor right side panel and choose New -> DWORD (32-bit) Value. Set the name of this DWORD to TaskbarSi.; Double-click TaskbarSi to set its value. For a small taskbar, make sure to set the value to 0. The default taskbar size is 1, and to make it larger, set this value to 2. Based on your preference, set the value as 0 or 2, assuming you don’t like the new default size of the taskbar in Windows 11. Notably, icons from third-party apps will look a little pixelated when you use the large taskbar. After setting your preferred value, restart your PC for the changes to take effect. Alternatively, you can also open up your task manager. Search for Task Manager in your start menu search to open it up. Under Apps, right-click Windows Explorer and select Restart. This will allow the changes in your Registry Editor to take effect without restarting your PC.
Video walkthrough
If it does not work
- If the current interface differs, compare it with the recorded video walkthrough.