
Windows 11 · Windows
Windows 11 - How To Fix Snipping Tool Not Working - This App Can’t Open Error
Original source date
Answer
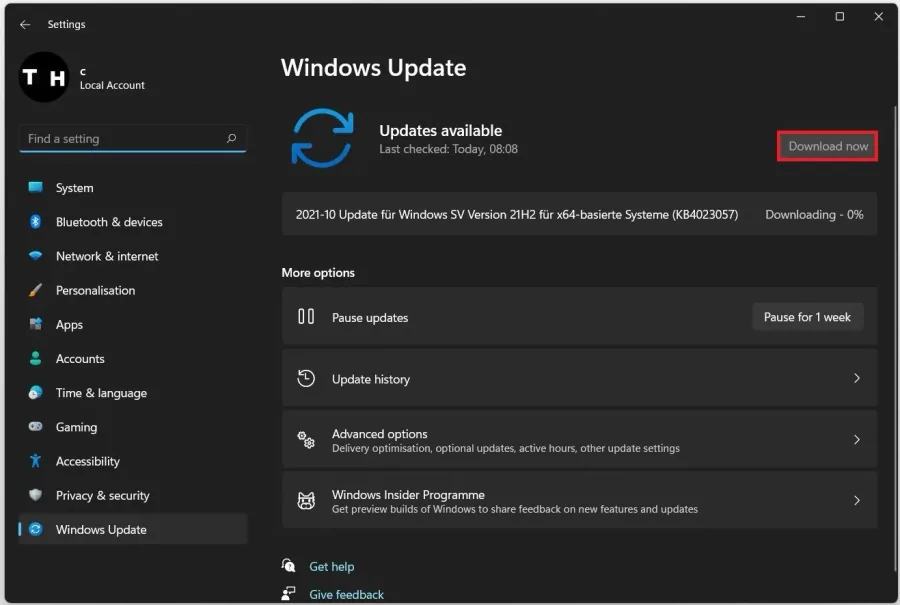
Ensure that your Windows 11 version is up to date. Search for Update in your start menu search to open your Check for updates system settings window. Click on Check for Updates, Download Now or Install Now. After downloading the latest update, restart your PC before following the next step. Sometimes, this can already fix your Snipping Tool not working problem.
Update the Windows Operating System
Ensure that your Windows 11 version is up to date. Search for Update in your start menu search to open your Check for updates system settings window. Click on Check for Updates, Download Now or Install Now. After downloading the latest update, restart your PC before following the next step. Sometimes, this can already fix your Snipping Tool not working problem.
Enable Clipboard History
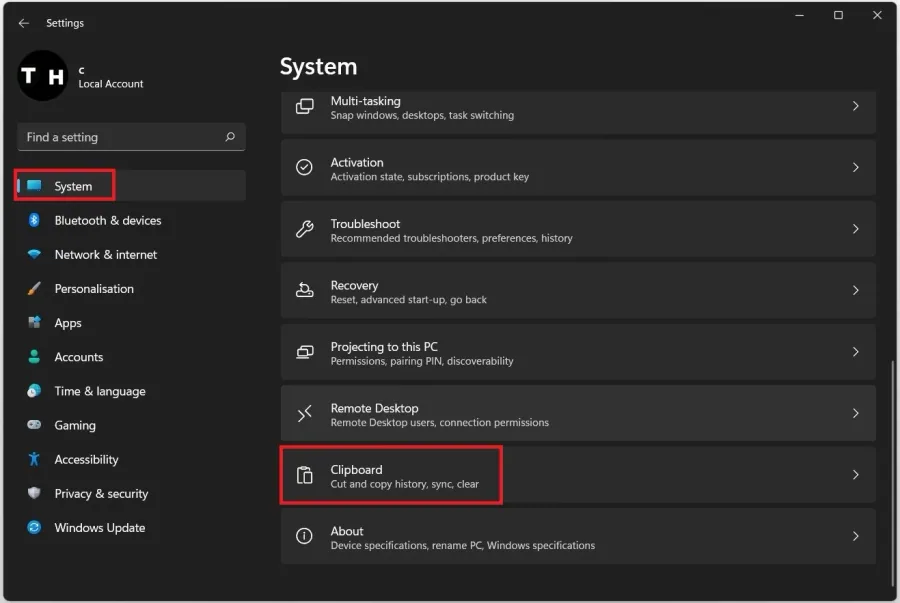
Turn on your clipboard and clipboard history in your system settings. Open up your settings window, and under System, scroll down and select Clipboard.
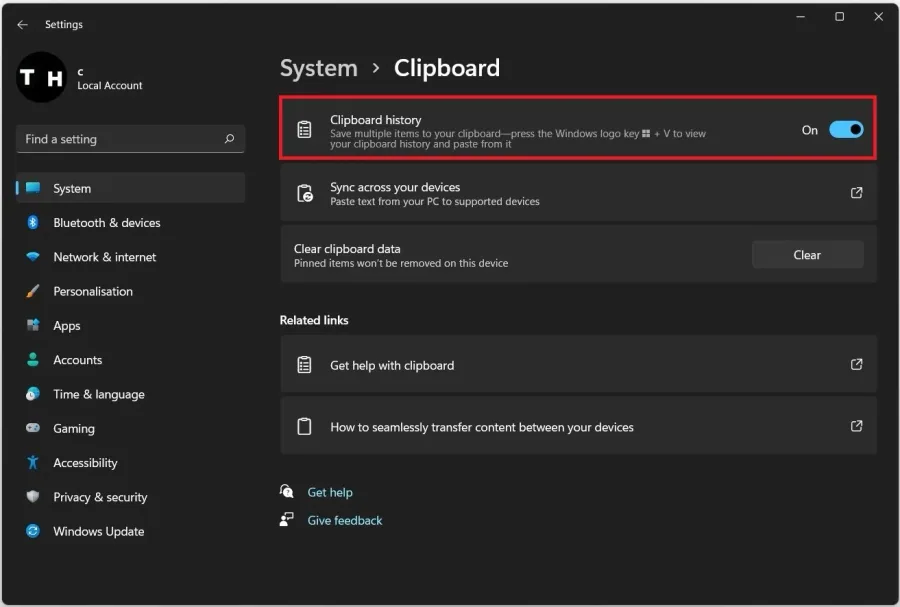
Turn on the Clipboard History toggle
Turn on the Clipboard History toggle.
Repair the Snipping Tool App
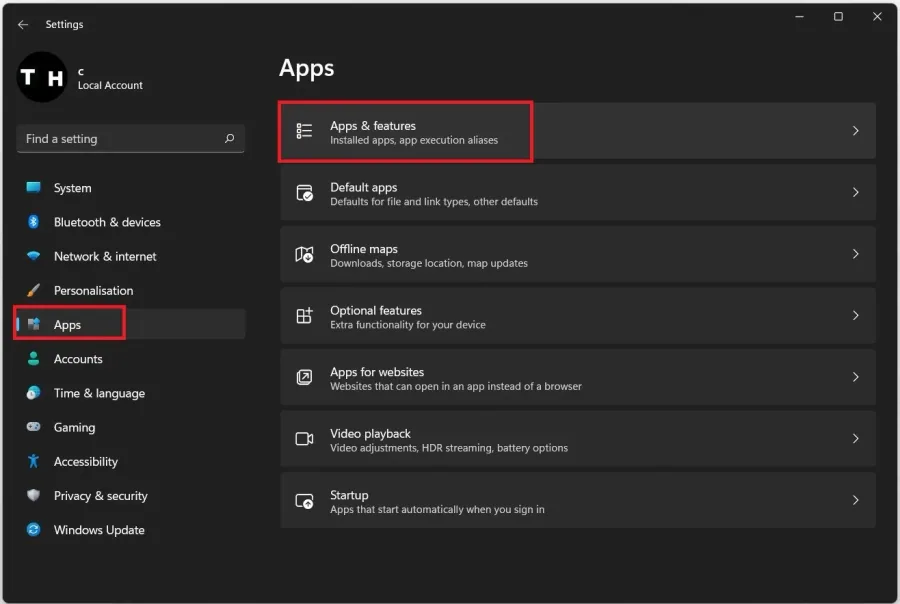
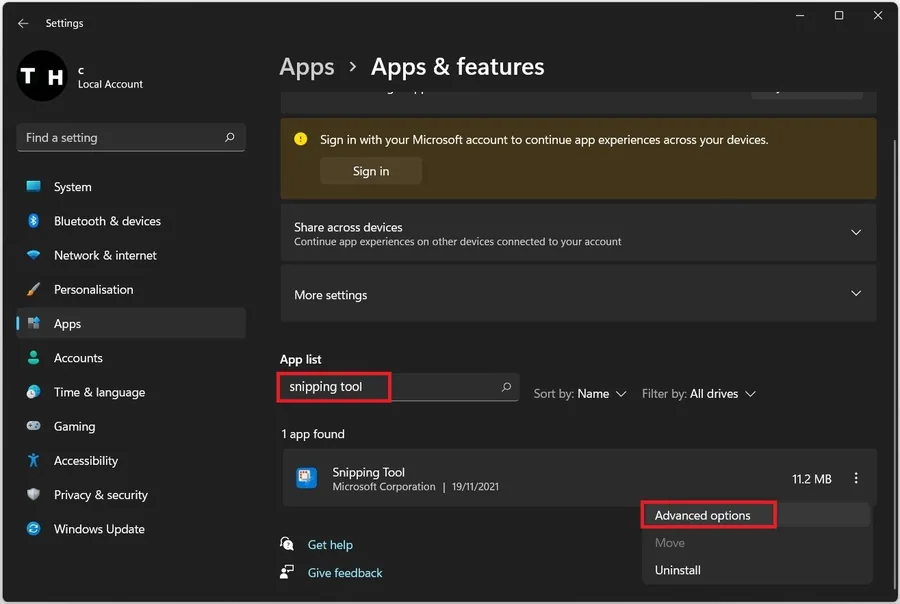
If the problem persists, navigate to the Apps tab in your settings window. Click on Apps & Features, and under Apps list, search for Snipping Tool.
Click on the burger menu for your Snipping Tool and select Advanced options
Click on the burger menu for your Snipping Tool and select Advanced options.
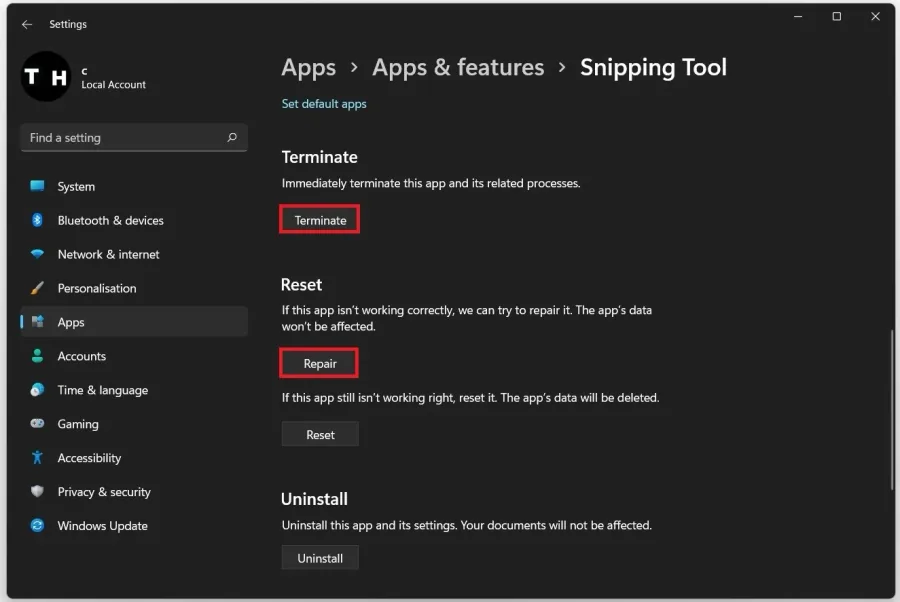
Lastly, under Terminate, click on Terminate to prevent the application from running
Lastly, under Terminate, click on Terminate to prevent the application from running. Next, click on Repair. This will take a second to repair the Snipping Tool and can sometimes fix the Snipping Tool problem on Windows 11.
Set the Date & Time Settings Automatically
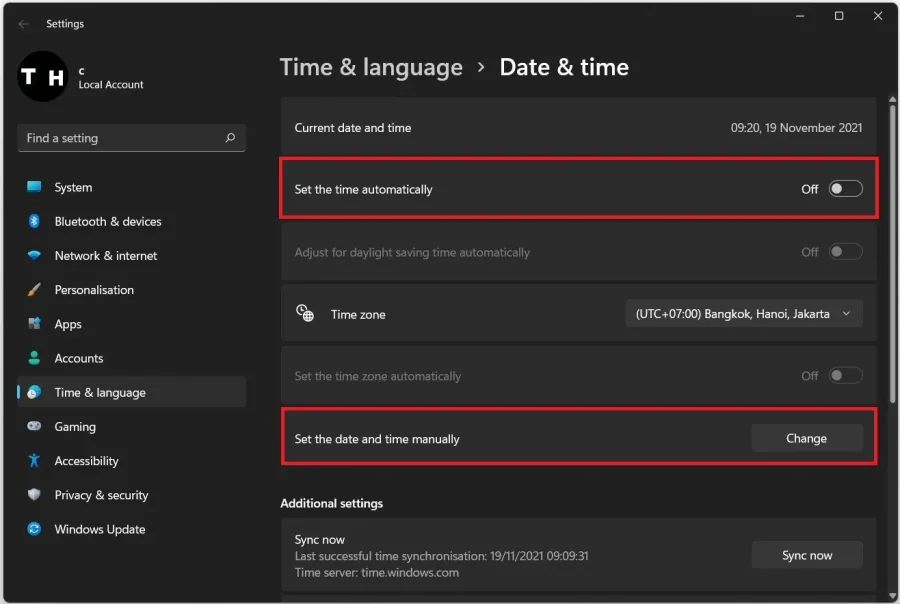
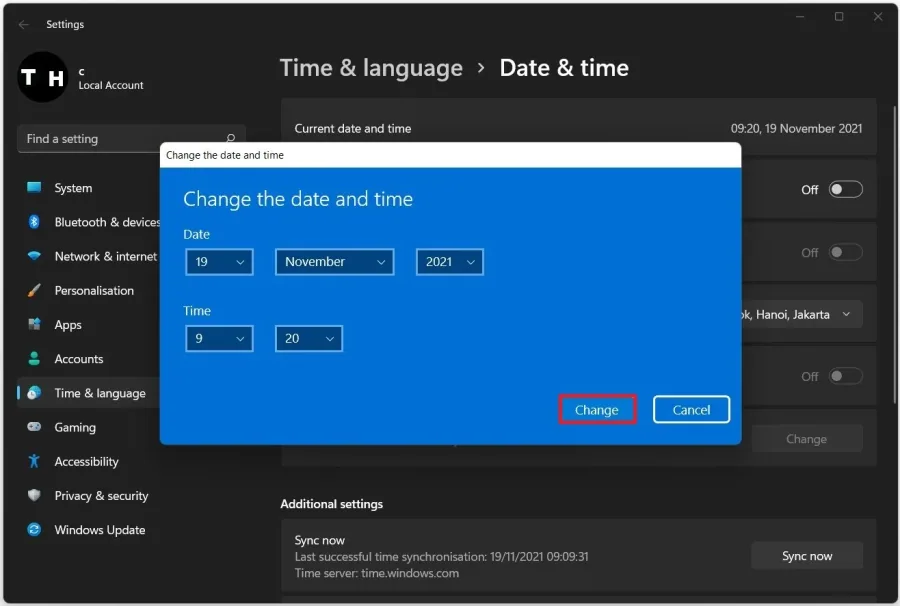
Manually changing your system time has resolved the snipping tool not working problem for many users. Right-click your date and time in your start menu and select Adjust time and date. Your settings window will open up, and here, disable the Set the time automatically option. Below, click on Change to Set the time and date automatically. Change your date and time, and then you can try to use your Snipping Tool.
After using your snipping tool, you can change your Date & Time options to Set th…
After using your snipping tool, you can change your Date & Time options to Set the time automatically again and your Snipping Tool application should work fine again.
Video walkthrough
If it does not work
- If the current interface differs, compare it with the recorded video walkthrough.