Windows 10 · Windows
How To Change The Alert Animation In Streamlabs OBS
Original source date
Answer
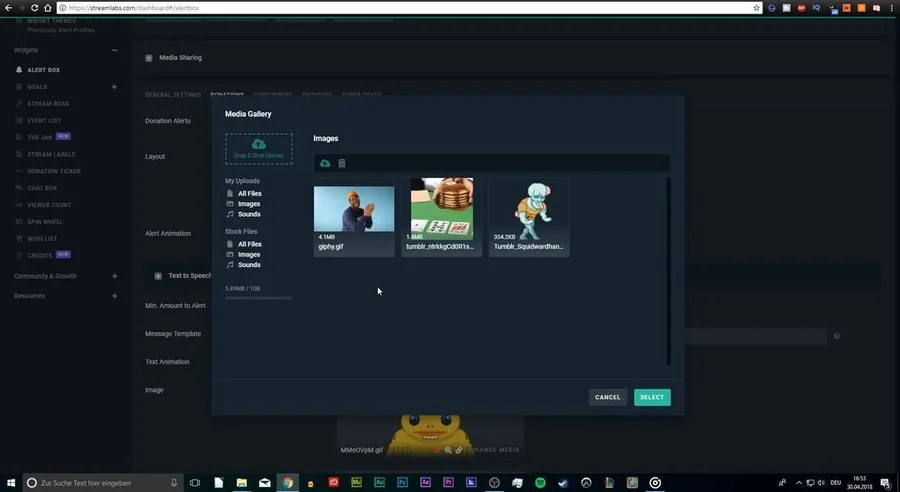
Go to streamlabs.com and log in with your YouTube or Twitch account. Next, make sure that your animation is saved in GIF format and saved on your PC; Navigate to the Alert Box tab, where you can choose between Donations, Subscribers, Sponsors, and Super Chats if you log in with your YouTube account.; On the donations tab, you can click Change Media here to change the default GIF to the one saved on your PC and drag and drop it there; you may have to wait a few seconds until it is uploaded.; Click Select and change the sound donation volume, duration, and delay. Don't forget to save your changes before going to the following tabs.
Streamlabs Website
Go to streamlabs.com and log in with your YouTube or Twitch account. Next, make sure that your animation is saved in GIF format and saved on your PC; Navigate to the Alert Box tab, where you can choose between Donations, Subscribers, Sponsors, and Super Chats if you log in with your YouTube account.; On the donations tab, you can click Change Media here to change the default GIF to the one saved on your PC and drag and drop it there; you may have to wait a few seconds until it is uploaded.; Click Select and change the sound donation volume, duration, and delay. Don't forget to save your changes before going to the following tabs.
Video walkthrough
If it does not work
- If the current interface differs, compare it with the recorded video walkthrough.