Gaming · Platform not recorded
How To Add Minecraft To The Steam Library
Original source date
Answer
Open up Steam and navigate to your Library. At the bottom, select Add A Game and then Add a Non-Steam game. On the new window, search for the Minecraft.exe application and select Add selected programs. Right-click Minecraft in your library, and select Properties. Here you will be able to change the application's name and the icon if you want to.
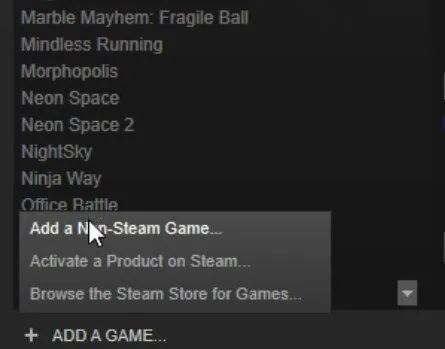
Add a Non-Steam Game
Open up Steam and navigate to your Library. At the bottom, select Add A Game and then Add a Non-Steam game.
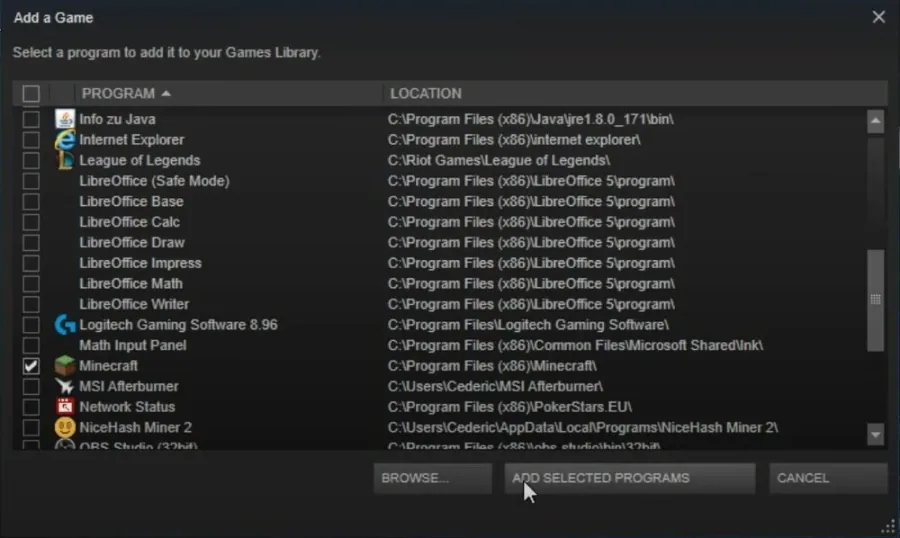
On the new window, search for the Minecraft.exe application and select Add select…
On the new window, search for the Minecraft.exe application and select Add selected programs. Right-click Minecraft in your library, and select Properties. Here you will be able to change the application's name and the icon if you want to.
Video walkthrough
If it does not work
- If the current interface differs, compare it with the recorded video walkthrough.