
Gaming · Windows
Valorant - How To Fix Network Lag, Stuttering & Packet Loss - Windows 10
Original source date
Answer
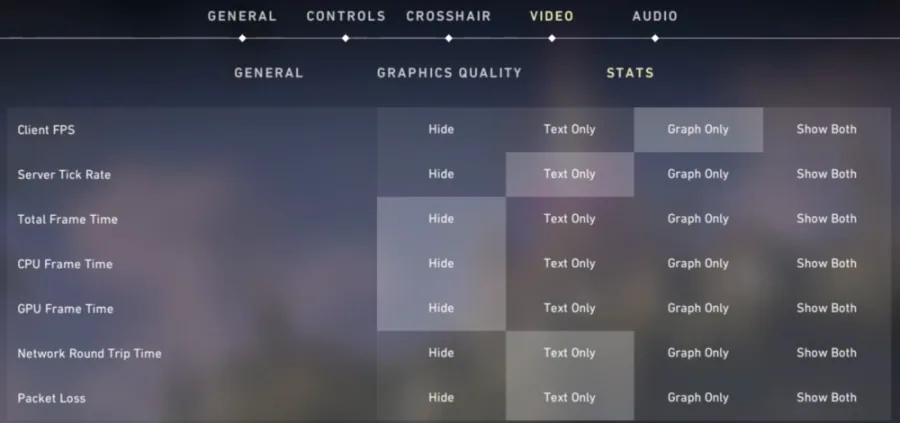
Open up Valorant and navigate to your Video settings. Under Stats, enable the Server Tick Rate and Network Round Trip Time options. This will help you troubleshoot where the network-related issues are coming from. If you experience high server-sided latency, the issue might not be on your end but rather related to the server you are playing on. Check out the links below to preview the Valorant server status in your region. The riot games service status will give you important information regarding server maintenance and other issues. Riot Games Service Status; Valorant Twitter
Preview your Packet Loss & Network Info when playing Valorant
Open up Valorant and navigate to your Video settings. Under Stats, enable the Server Tick Rate and Network Round Trip Time options. This will help you troubleshoot where the network-related issues are coming from.
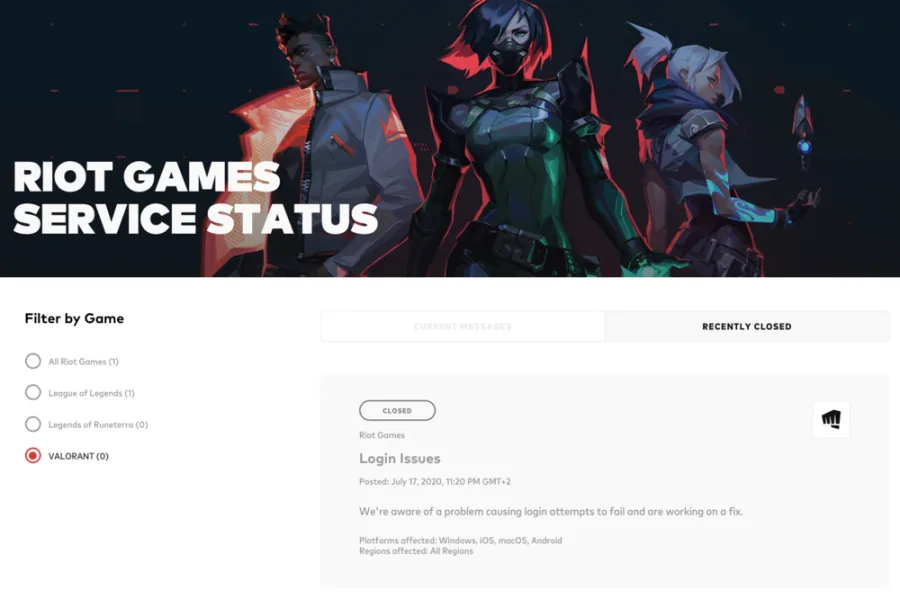
Verify the Valorant Server Status in your Region
If you experience high server-sided latency, the issue might not be on your end but rather related to the server you are playing on. Check out the links below to preview the Valorant server status in your region. The riot games service status will give you important information regarding server maintenance and other issues. Riot Games Service Status; Valorant Twitter
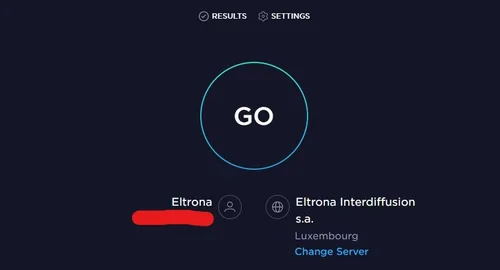
Test your Network Connection & Latency
To test your internet connection and latency to the closest server, you can use 3rd party websites, such as Speedtest. Using Speed-Test services to preview the approximate up- & download speed of your connection and the latency to their server can help a lot in figuring out if network-related issues are caused by your connection or by the server you’re trying to connect to. Ensure that your latency (ping) is averaging below 100 ms. A connection with high latency will induce packet loss to the server and will create lag and rubberbanding while in-game Use an ethernet cable to connect to your PC to improve your network connection. In case you are forced to use a wireless connection, then make sure to restart your router (or modem) if you haven’t done this in a while and reduce the number of devices connected to the same network.
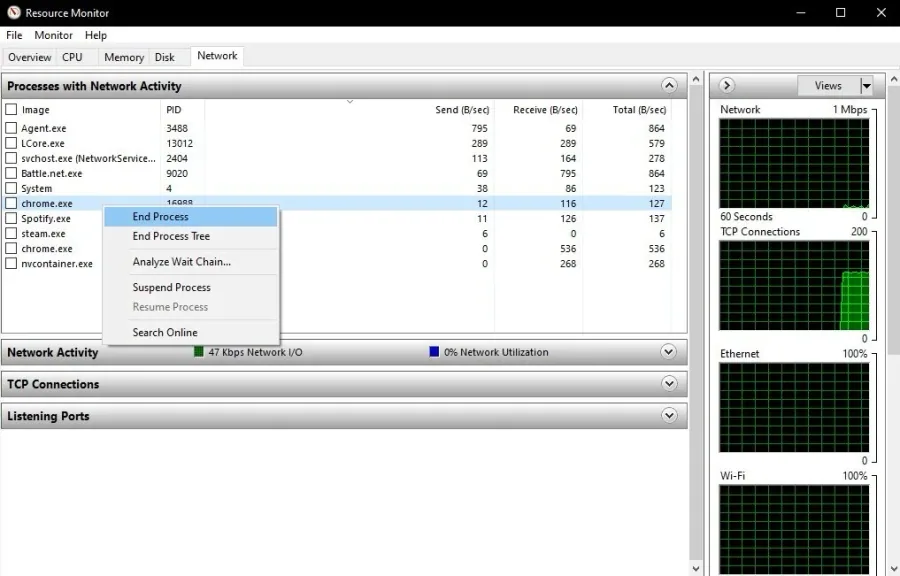
End Network-Intensive Processes on your PC
Access your Resource Monitor by opening up your Task Manager. Right-click your taskbar to open up your task manager. Under Performance, select Open Resource Monitor. On the new resource monitor window, open the Network tab to find the Processes with network activity. After a few seconds, you will see every process using your network connection on your system. This might be your browser running in the background, Steam, or a download bottlenecking your connection. We suggest you only end the processes that you know won't break your operating system. In the tab below, you can preview your network utilization in percentage.
Command Prompt
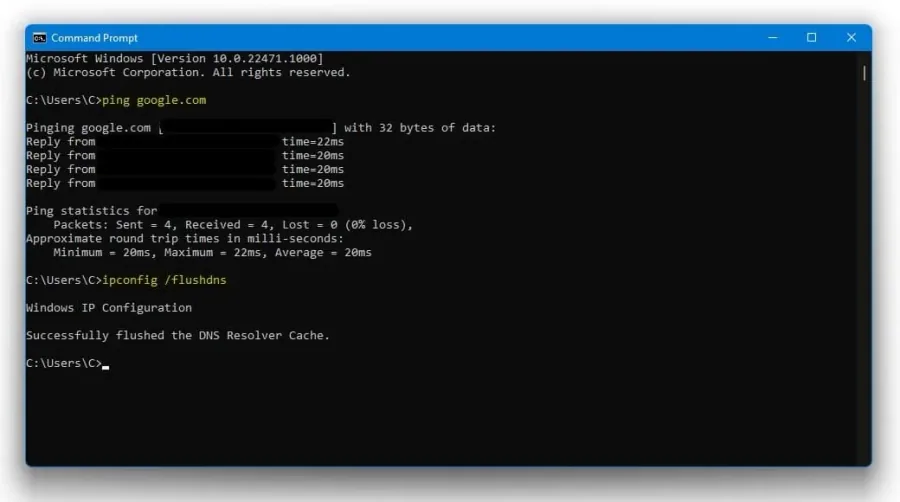
Open up your command prompt by searching for CMD in your taskbar search. The next two commands will help you test and improve your latency and packet loss if your connection induces any lag or latency problems. ping google.com This command will simply check your latency and packet loss to Google’s servers. You can also ping another server, but the ping google.com command has become somewhat of a benchmark in recent years. ipconfig /flushdns This command will reset your network connection by flushing its DNS resolver cache. This command will in any case, help improve your latency issues.
Change your DNS Server Addresses
Your DNS server address connection can cause network-related issues. We will change this step, as it should help many users with network problems.
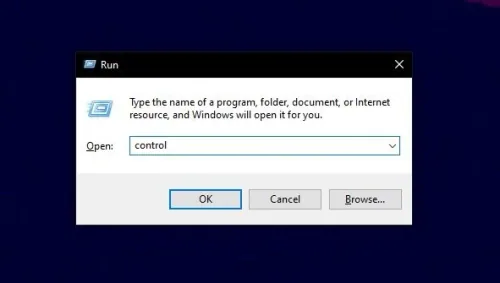
Use the shortcut Windows Key + R, and in the dialogue box, enter Control and hit…
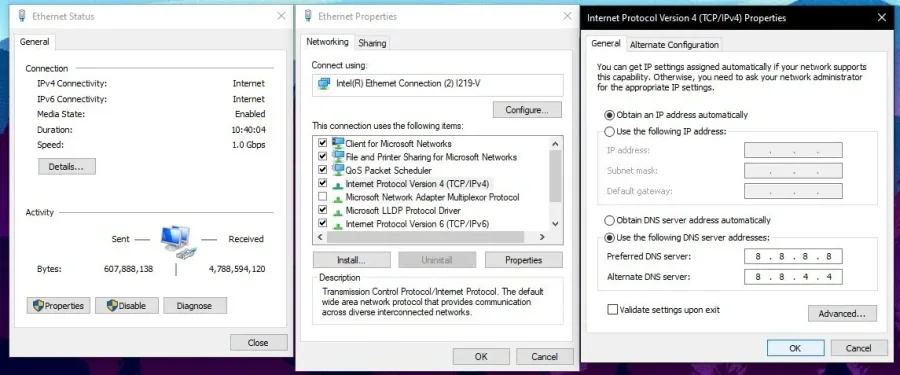
Use the shortcut Windows Key + R, and in the dialogue box, enter Control and hit enter. This will open up your control center. From there, navigate to Network & Internet, Network & Sharing Center, and here select your connection. Navigate to Properties, and lastly, double-click the Internet Protocol Version 4, as you can preview on the screenshot below. Select to Use the following DNS server addresses option, and as your preferred DNS server, use: 8.8.8.8, as your alternate DNS server, use: 8.8.4.4. These are the official public DNS server addresses from Google, which are safe to use.
Account for a VPN Connection
Make sure to account for any VPN service running on your system or turn off your VPN while in-game.
Malware & Other Applications
We suggest removing malware and preventing applications from running that could use up your available resources or change your game files. Example: Discord, CCleaner, Adobe Applications, Shadowplay, and OBS.
Verify Connection to ISP
In case you still experience latency or lag issues then make sure to verify your connection to your Internet Service Provider. You can troubleshoot this step by changing your connection to your personal hotspot for example.
Delete the Windows Temporary Files
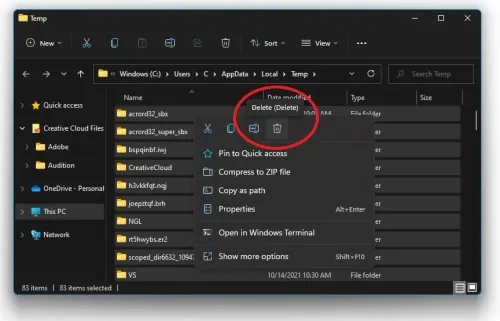
If you have issues loading maps or downloading other content, then delete your temporary Windows files. Search for %temp% in your taskbar search to open up your temporary files folder. You can safely delete everything in the folder, some files might remain, so leave them there. This can help you reduce some clutter on your hard drive.
Video walkthrough
If it does not work
- If the current interface differs, compare it with the recorded video walkthrough.