Windows 11 · Windows
How To Improve Discord Mic Quality on Windows
Original source date
Answer
Open your Discord app and navigate to your Voice & Video settings. Here, verify that your input device, which is your microphone, is set to the correct device and your audio output device. You can test your microphone by clicking the Let’s Check button below. This will show you if your mic is too loud or too quiet. You can quickly change your microphone input volume with this volume slider above, as it can sound distorted when setting it to 100%, depending on which mic you are using.
Optimize Discord Voice Settings
Open your Discord app and navigate to your Voice & Video settings. Here, verify that your input device, which is your microphone, is set to the correct device and your audio output device. You can test your microphone by clicking the Let’s Check button below. This will show you if your mic is too loud or too quiet. You can quickly change your microphone input volume with this volume slider above, as it can sound distorted when setting it to 100%, depending on which mic you are using.
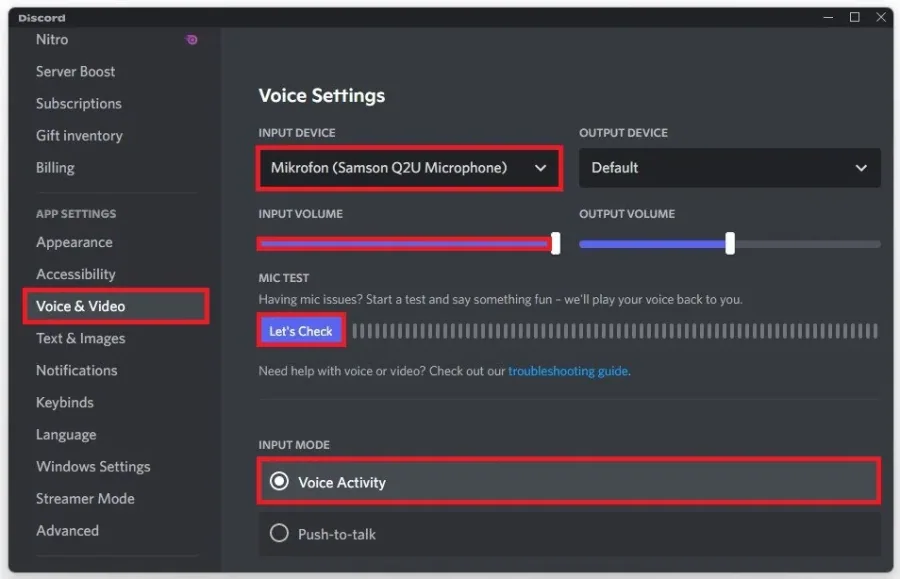
As the Input Mode, we prefer to use Voice Activity, but feel free to use Push-to-…
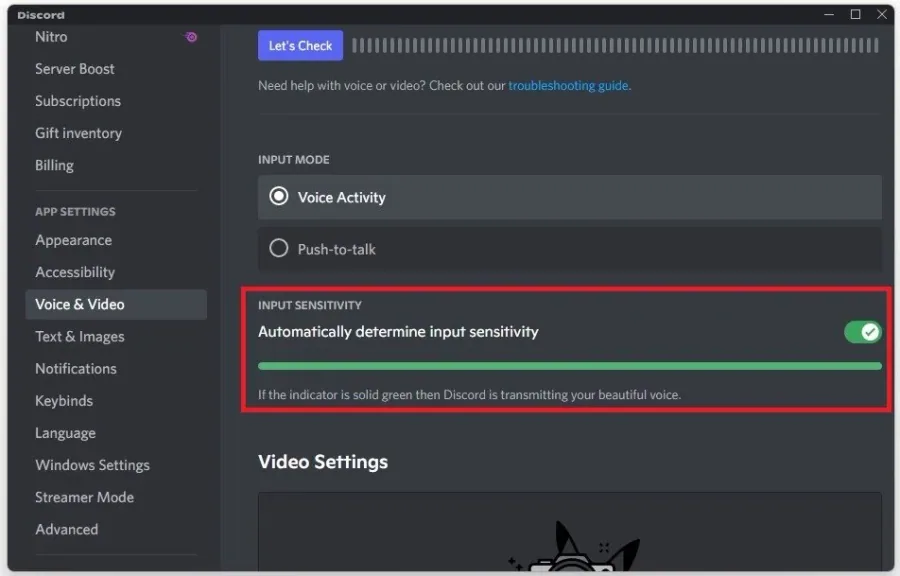
As the Input Mode, we prefer to use Voice Activity, but feel free to use Push-to-talk, which is especially helpful when you have a lot of background noise. All of the next sound settings will be set so that you can get the best mic quality out of Discord, but depending on your PC’s performance or network connection, you might want to change some of these along the way.Enable the Automatically determine input sensitivity which is especially helpful for your listeners as they don’t have to adjust your incoming volume.
Advanced Discord Voice Settings
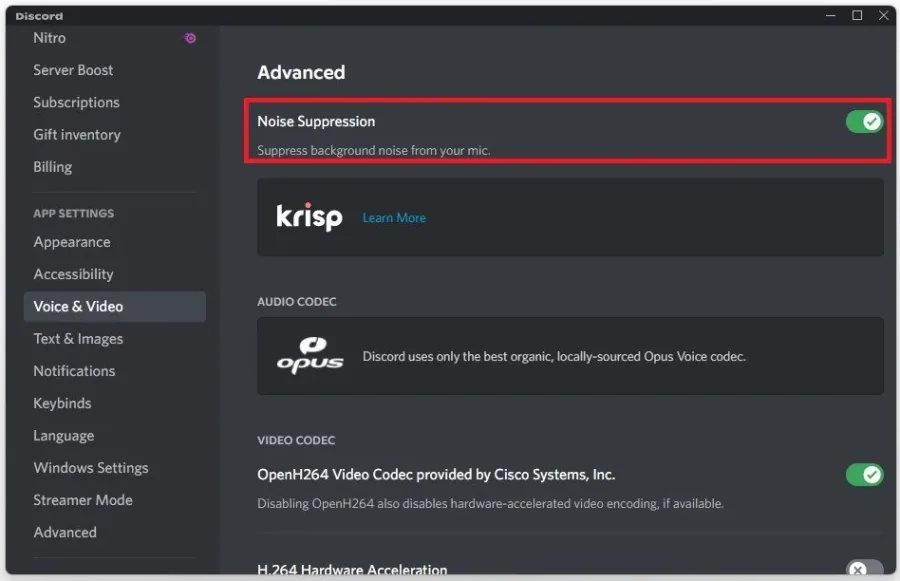
In your Advanced Voice settings, enable Noise Suppression. This will, in most cases, reduce background noise transmitted through your mic. If you are far away from your microphone, or if your voice is quiet, Discord might have problems picking up your voice and separating it from your background noise. If this is the case, then disable this option for now.
Under Voice Processing, enable Echo Cancellation, and leave Noise Reduction disab…
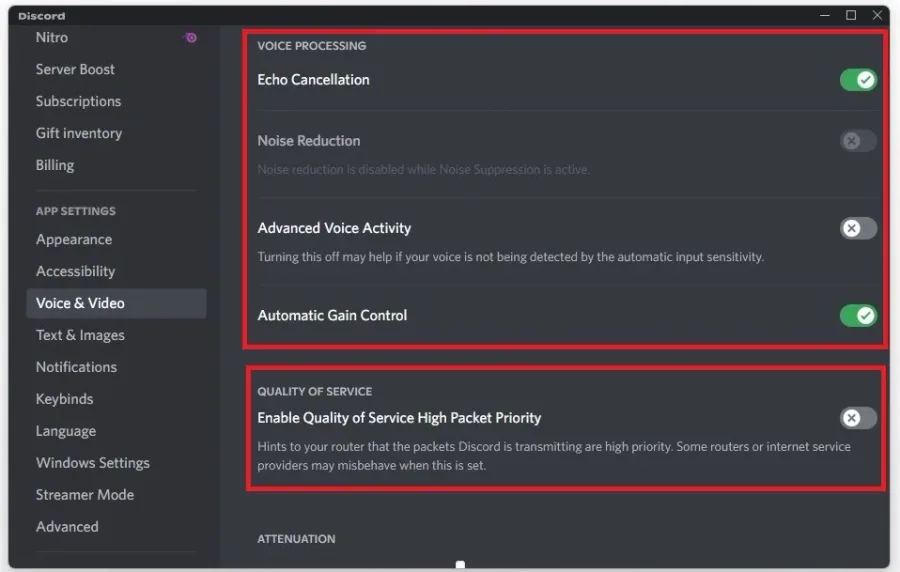
Under Voice Processing, enable Echo Cancellation, and leave Noise Reduction disabled, as you can’t enable it when Noise Suppression is in use. I prefer to leave the Advanced Voice Activity option disabled, as Discord always transmits my voice using my particular setup. Still, if the application does not detect your voice, enable this option. Enable Automatic Gain Control for the best voice quality, and then we will look at your Quality of Service setting below. This option will prioritize your network connection to Discord and ensure that if it gets unreliable, it will try to keep your voice connected. I’d suggest disabling this option if you’re using a good network connection. Some users have reported that all other applications or games have a much weaker connection after enabling Quality of Service High Packet Priority, but this might come down to your network bandwidth.
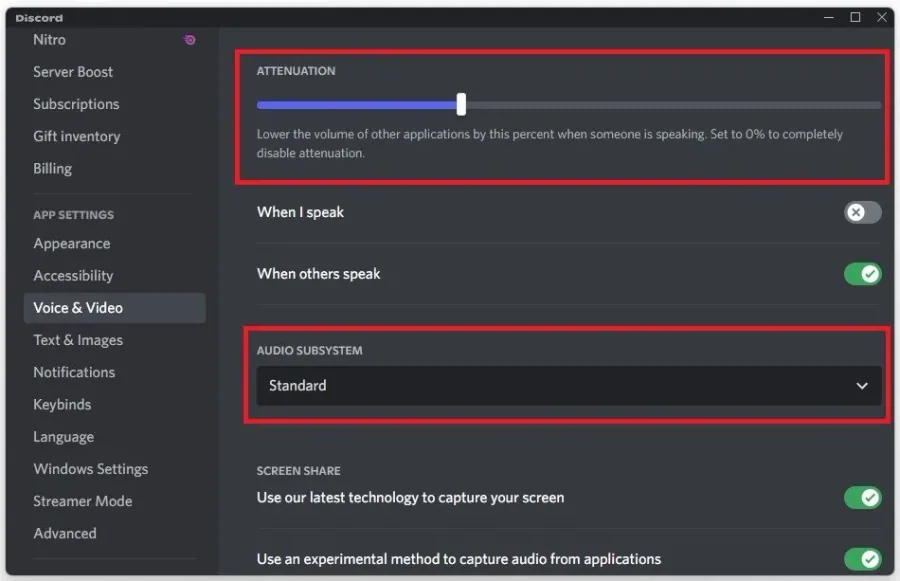
The Attenuation option will come down to personal preference
The Attenuation option will come down to personal preference. Set the volume decrease of other applications when you speak or when others speak using Discord. Depending on your use case, this can be very helpful. To disable this feature, turn the volume slider to 0%. Set your Audio Subsystem to Standard. You can use Legacy if you notice that some users have trouble hearing you, but you have to restart Discord after making changes to your Audio Subsystem for the changes to apply.
Faulty Microphone Check
After closely examining your Discord voice settings, you might still notice bad microphone quality when using the application. This can be caused by a faulty device, outdated drivers, or your network connection. Ensure that no other application uses your microphone or can change your microphone sound output, such as voice changers.
Windows Sound Settings
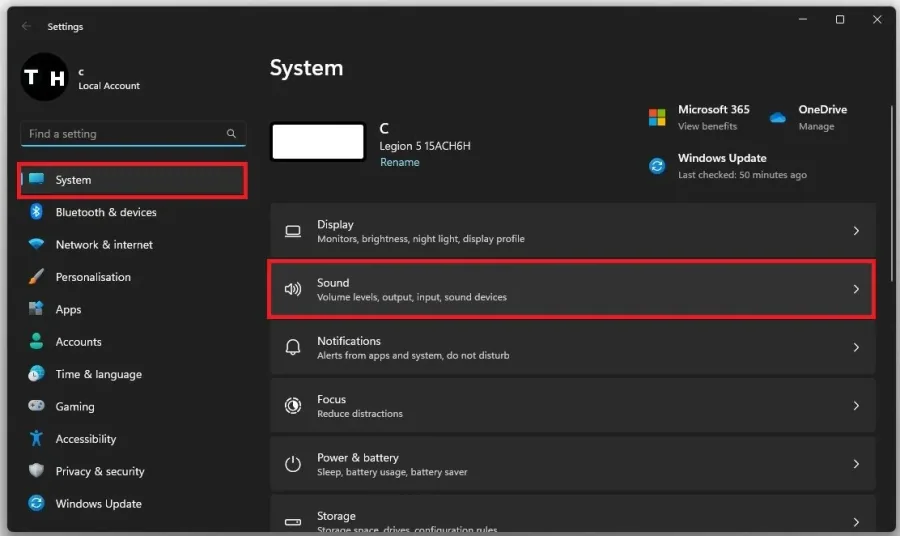
Open up your Windows settings. Under System, click on Sound.
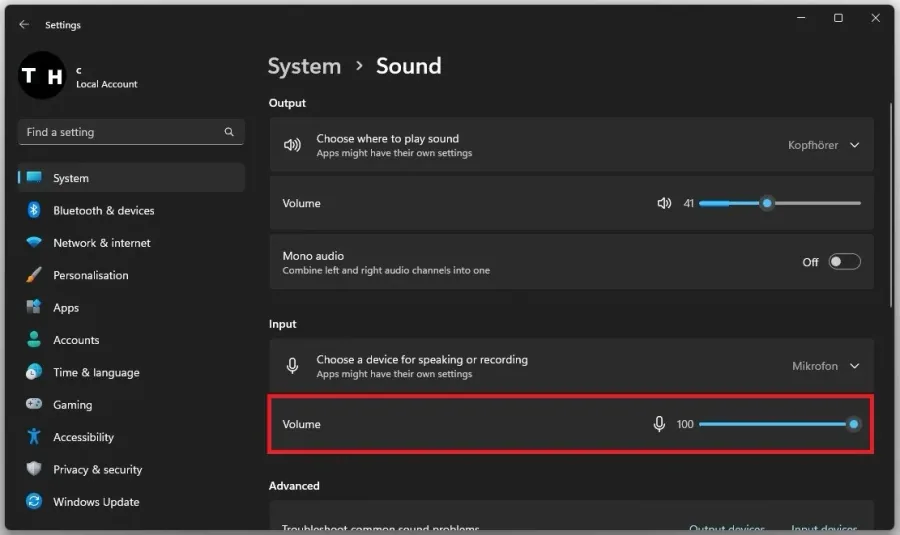
Under Input, ensure that your microphone volume is not muted
Under Input, ensure that your microphone volume is not muted. Some microphones work best when setting their volume to 100%, but I had experiences where this would only distort my voice when using Discord. Play around with the volume until you find the best volume.
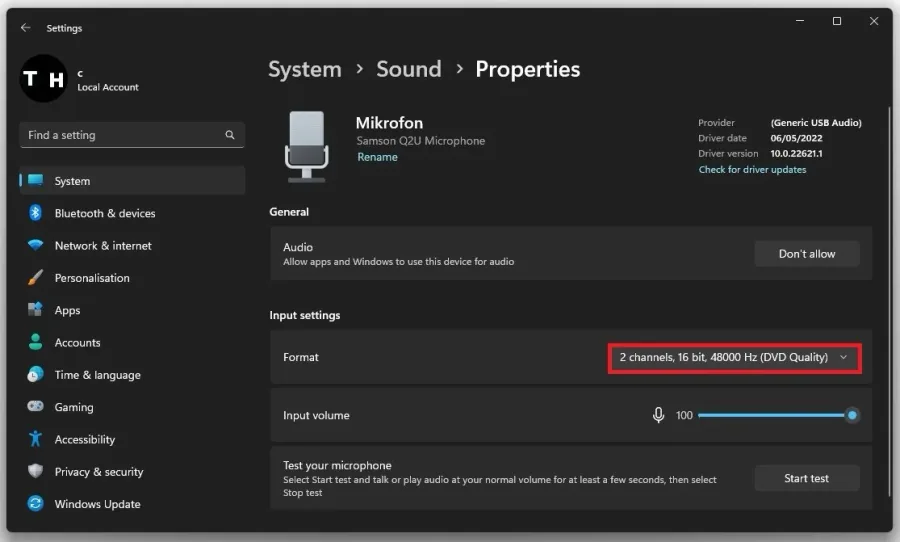
When selecting your microphone in this list of devices, you have the option to ch…
When selecting your microphone in this list of devices, you have the option to change your Format, which should be set to 2 channels, 48’000 Hz or 44’100 Hz, whichever is available to you.
Troubleshoot Common Sound Problems
You can troubleshoot your input device for common sound problems in your sound settings. This will take a couple of seconds to scan and verify if you have any easily preventable issues with your mic.

Advanced Audio Device Properties
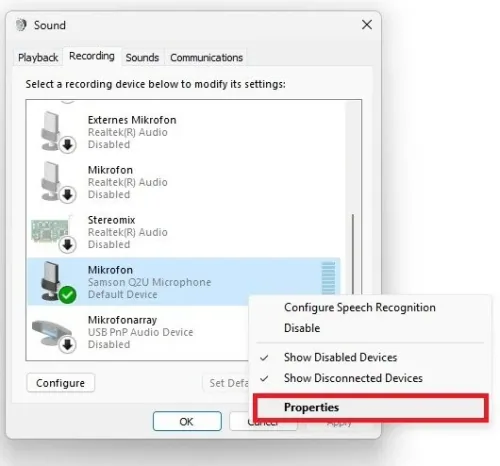
If nothing helps you, then scroll down and select More sound settings to open up your Sound Control Panel. In the Recording section, ensure your preferred microphone is set to the default device and disable all other mics in this list of devices. Next, right-click the mic you wish to use and navigate to its Properties.
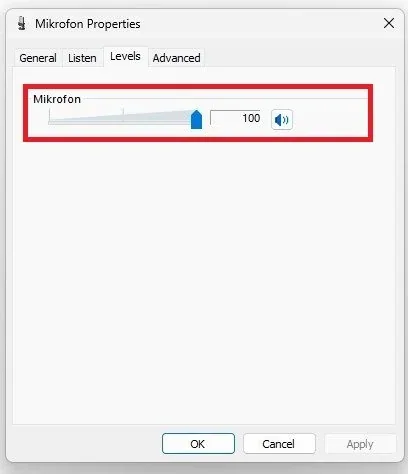
In the Levels tab, make sure that your mic is not muted
In the Levels tab, make sure that your mic is not muted.
In the Advanced section, allow the two exclusive mode options, allowing Discord t…
In the Advanced section, allow the two exclusive mode options, allowing Discord to make changes, such as adjusting the mic volume.

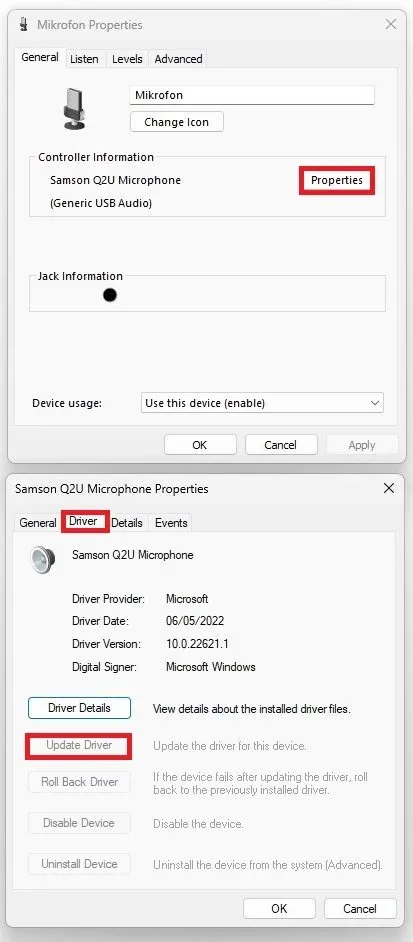
In the General tab, click on Properties, and lastly, in this panel, make sure tha…
In the General tab, click on Properties, and lastly, in this panel, make sure that the device’s driver is up to date in the Driver section. You can then close all of these windows and verify if your voice quality has improved when using Discord.
Windows Update
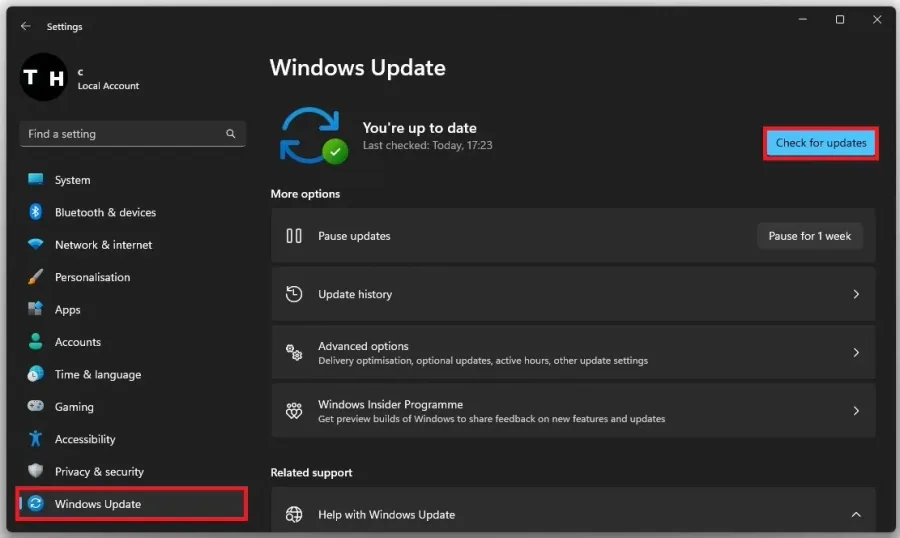
If this is not the case, you should head back to your Windows settings. Click on Check for Updates or Download and Install Now in the Windows Update tab. This will take a couple of minutes to download the latest update, and you should restart your PC to install the update.
Reinstall Discord Application
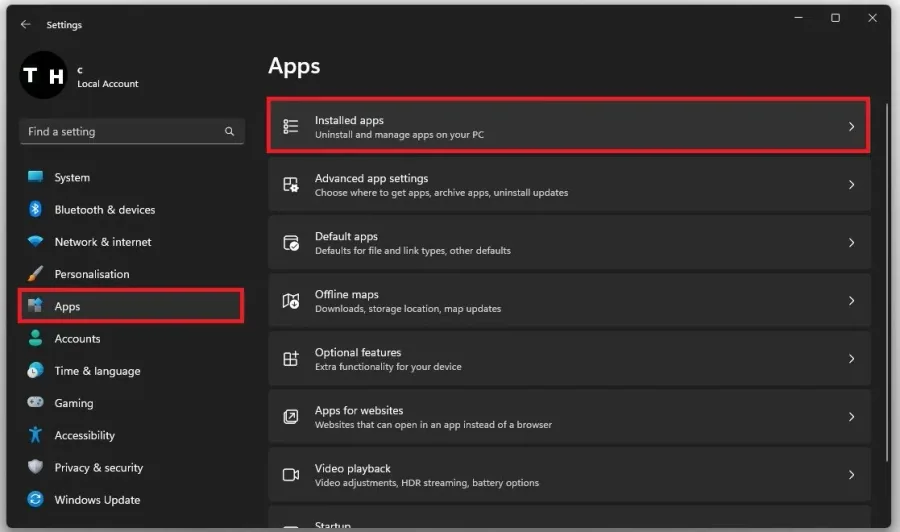
As a last resort, you will have to reinstall Discord, as sometimes your installation can be corrupted or otherwise damaged. In your Windows settings, navigate to Apps, and click on Installed Apps.
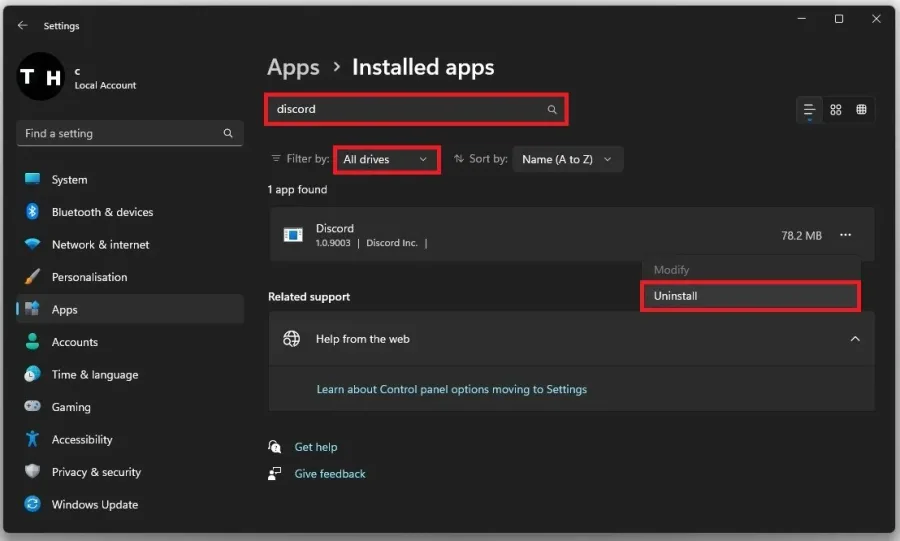
You can then filter this list by all drives and search for Discord
You can then filter this list by all drives and search for Discord. The Discord app should show up. Click on the burger menu on the right-hand side and select Uninstall.
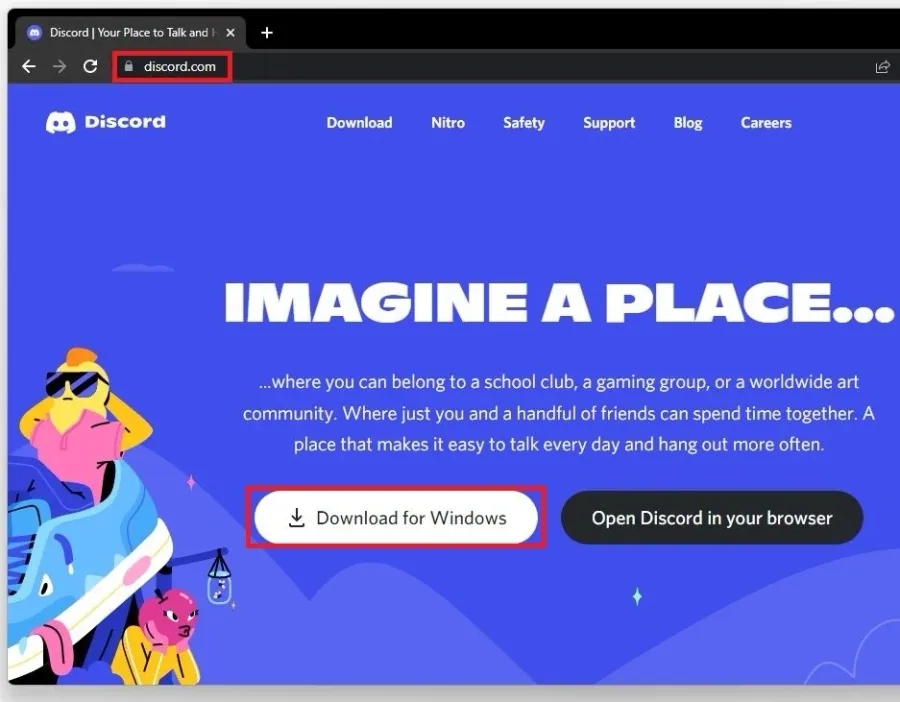
After the uninstallation, open up your favorite browser and navigate to discord.c…
After the uninstallation, open up your favorite browser and navigate to discord.com, where you can download the installer for Windows, MacOS, or Linux. While installing the app, you can change the install location to your SSD, which can, in turn, also prevent issues such as bad microphone quality.
Video walkthrough
If it does not work
- Why is my Discord mic quality poor on Windows?. There could be several reasons for poor mic quality on Windows, such as outdated drivers, improper settings, background noise, or poor network connectivity.
- Can I improve mic quality without purchasing a new mic?. Yes, you can improve mic quality by adjusting settings in Discord and Windows, using filters to remove background noise, and updating your audio drivers.
- How do I reduce background noise on my mic?. You can use noise suppression filters available in Discord or install third-party software like Krisp or RTX Voice to eliminate background noise.
- How can I troubleshoot if my mic quality doesn't improve?. You can troubleshoot mic issues by checking network connectivity, changing audio input settings, and resetting Discord settings.