
Gaming · Windows
Destiny 2 - Best Settings For Low-End PC’s & Laptops
Original source date
Answer
Open up your Settings and navigate to the Gameplay tab. Enable the FPS Display option to enable the FPS counter on the top right of your screen. This will help you determine which changes help you out the most. In the Video tab, set the window mode to fullscreen and your resolution to your native monitor resolution. Below, you can lock your framerate with your monitor’s refresh rate. If you can hold your FPS cap of 60 or 144, then set it to your monitor’s refresh rate, but in case you experience lag and drop frames while in-game, we suggest disabling vSync. Below, cap your FPS to a value your system can consistently hold, preferably above your refresh rate. Your FOV can slightly reduce your performance in case your GPU is bottlenecking your performance.
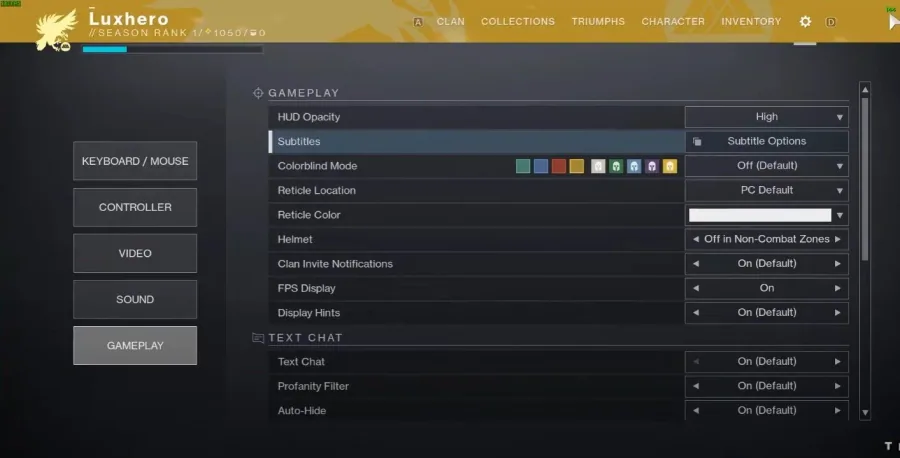
Destiny 2 Gameplay Settings
Open up your Settings and navigate to the Gameplay tab. Enable the FPS Display option to enable the FPS counter on the top right of your screen. This will help you determine which changes help you out the most.
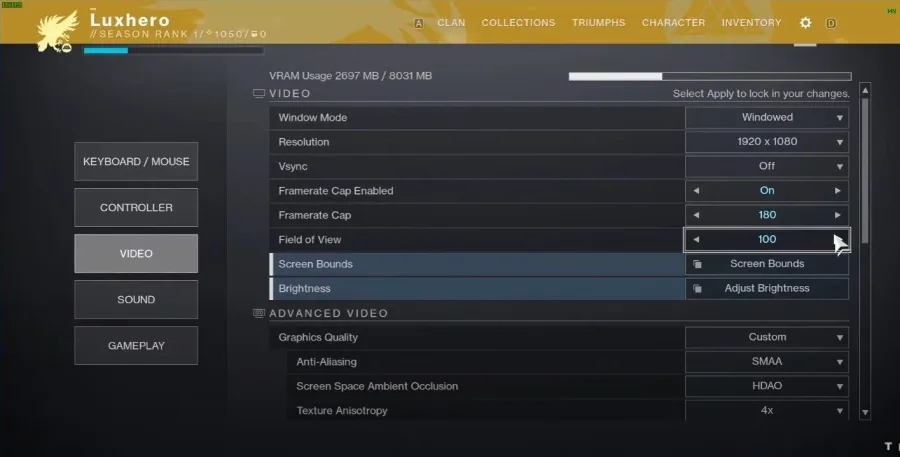
Destiny 2 Video Settings
In the Video tab, set the window mode to fullscreen and your resolution to your native monitor resolution. Below, you can lock your framerate with your monitor’s refresh rate. If you can hold your FPS cap of 60 or 144, then set it to your monitor’s refresh rate, but in case you experience lag and drop frames while in-game, we suggest disabling vSync. Below, cap your FPS to a value your system can consistently hold, preferably above your refresh rate. Your FOV can slightly reduce your performance in case your GPU is bottlenecking your performance.
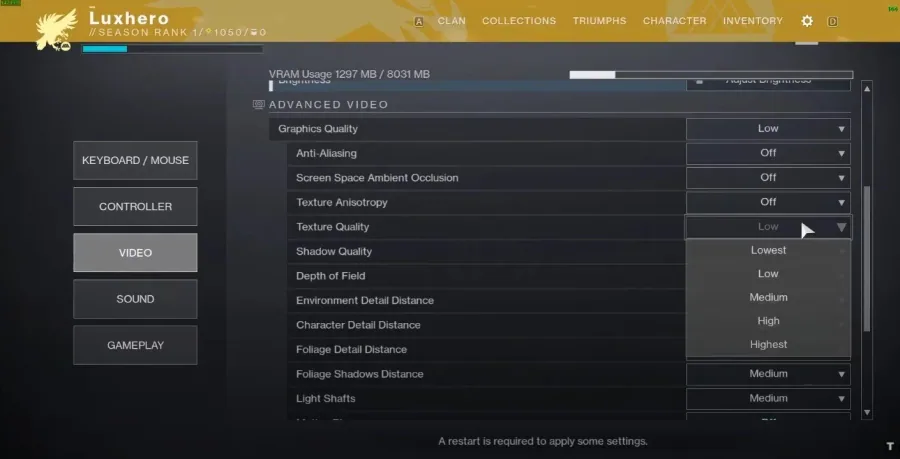
Destiny 2 Advanced Video Settings
In your Advanced Video Settings, set the Graphics Quality preset to Low. This will lower most of the advanced video settings. If you have some performance to spare, you can increase the Texture Quality. We suggest lowering the Shadow Quality to Lowest and to turn off the Depth of field. Motion blur will not impact your performance, but we prefer to disable this option.
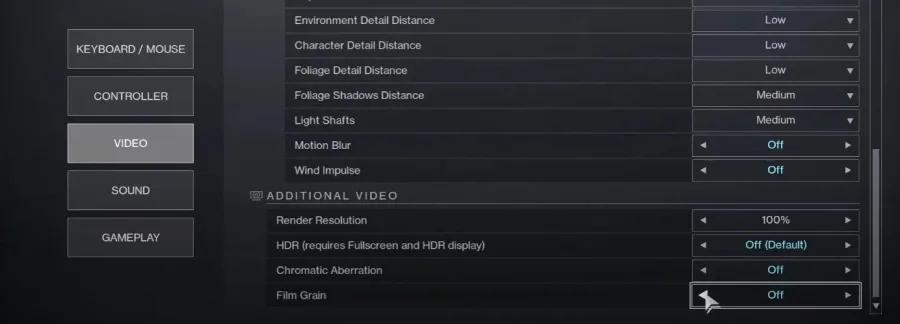
Additional Video Settings
In your Additional Video Settings, you can reduce the render resolution if the game is not playable on your system. This will improve the performance, but the visual quality will suffer a lot. We suggest setting this option to around 90% and to play a game to see how well it runs on your system in case you regularly experience lag and FPS drops. Disable HDR and Chromatic Aberration and Film Grain in case you are like us and prefer fewer visual effects, which should also increase your performance by a bit.
Video walkthrough
If it does not work
- If the current interface differs, compare it with the recorded video walkthrough.