
Gaming · Windows
Cultivation Tales FPS Optimization Guide for Low-End PC & Laptop
Original source date
Answer
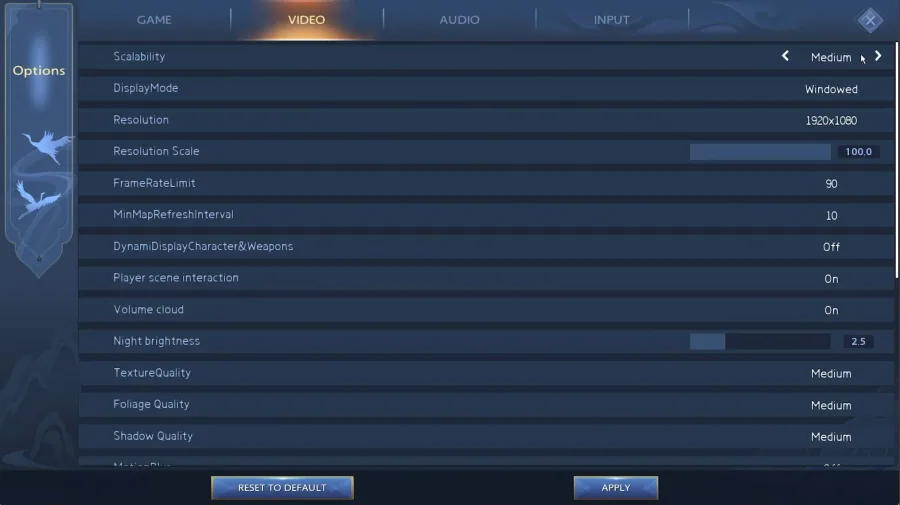
Ppen up Cultivation Tales and navigate to your in-game settings. In the Video section, set your graphics preset to Low or Medium. These settings will heavily depend on your available resources, and we will optimize them for low-end PCs. Below, set the Display Mode to Fullscreen. The Resolution option should be your native monitor resolution if you’re playing in fullscreen mode. You must reduce the Resolution Scale by a bit if you experience lag or overall low system performance while in-game. This will improve your performance, but the visual quality will suffer greatly. Limit your FPS to 90, which is the highest limit at the moment. The Dynamic Display of Character and Weapons option can induce lag when enabled. Disable this option for now, and if you have some performance to spare after applying the subsequent tweaks, then feel free to enable it and see if it’s worth it on your system. Enable the Player Scene Interaction and Volume Cloud options below. The Night Brightness option will have little to no impact on your performance, and I like the default option. Below, you will want to reduce the Quality settings if your graphics card is bottlenecking your performance. Especially the Texture and Shadow Quality settings should be set to Low or Medium. I prefer to disable Motion Blur, set Sharpen to Low and Anti Aliasing, and disable V-Sync. Don’t forget to apply your changes.
Cultivation Tales Video Settings
Ppen up Cultivation Tales and navigate to your in-game settings. In the Video section, set your graphics preset to Low or Medium. These settings will heavily depend on your available resources, and we will optimize them for low-end PCs. Below, set the Display Mode to Fullscreen. The Resolution option should be your native monitor resolution if you’re playing in fullscreen mode. You must reduce the Resolution Scale by a bit if you experience lag or overall low system performance while in-game. This will improve your performance, but the visual quality will suffer greatly. Limit your FPS to 90, which is the highest limit at the moment. The Dynamic Display of Character and Weapons option can induce lag when enabled. Disable this option for now, and if you have some performance to spare after applying the subsequent tweaks, then feel free to enable it and see if it’s worth it on your system. Enable the Player Scene Interaction and Volume Cloud options below. The Night Brightness option will have little to no impact on your performance, and I like the default option. Below, you will want to reduce the Quality settings if your graphics card is bottlenecking your performance. Especially the Texture and Shadow Quality settings should be set to Low or Medium. I prefer to disable Motion Blur, set Sharpen to Low and Anti Aliasing, and disable V-Sync. Don’t forget to apply your changes.
Change the Cultivation Tales Process Priority
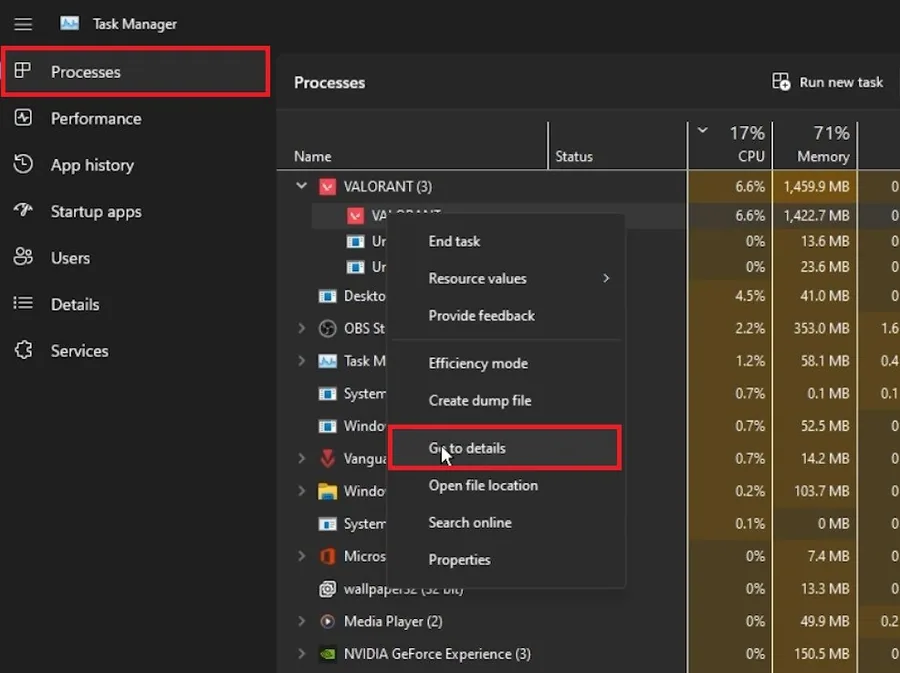
After optimizing the in-game settings, leave the game running and open up your Task Manager. In the Processes tab, right-click the TalesOfWild process and select to go to Details.
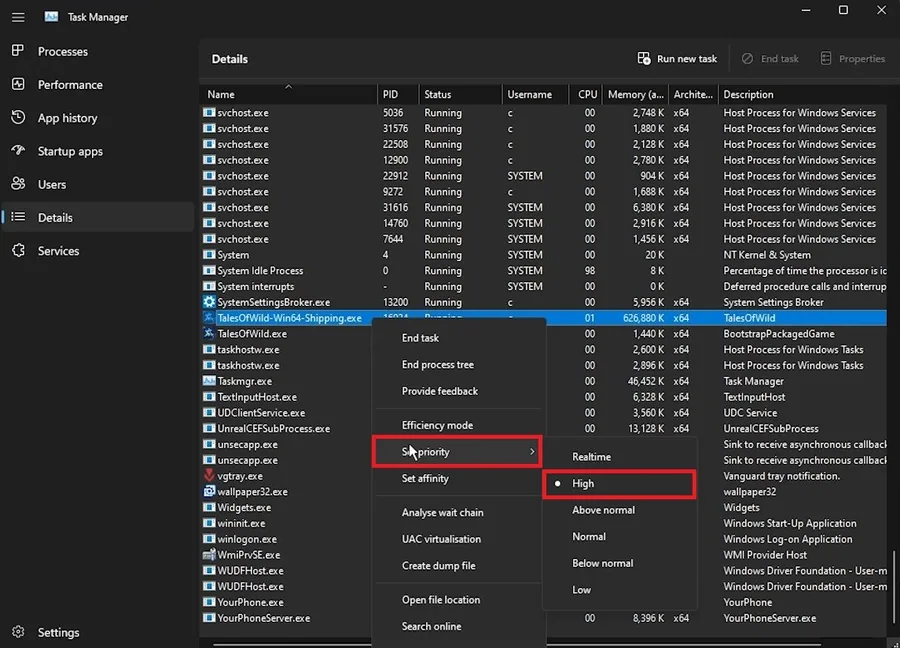
In the Details tab, the TalesOfWild process should be highlighted
In the Details tab, the TalesOfWild process should be highlighted. Simply right-click the process to set its priority to high. This will help run the game on your system, especially if other applications are running in the background.
In the Processes tab, you should prevent programs from running, such as Steam, OB…
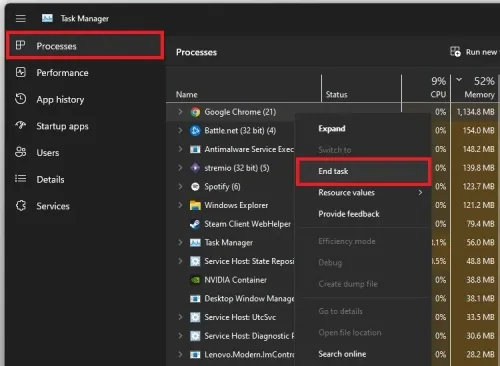
In the Processes tab, you should prevent programs from running, such as Steam, OBS, Chrome or any other resource-intensive application.
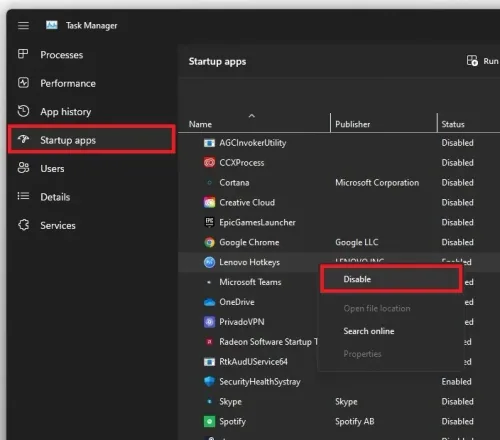
To reduce lag in the future, you can prevent programs from starting up on system…
To reduce lag in the future, you can prevent programs from starting up on system boot in the Startup apps section of your task manager. As you can see, most of these apps are disabled for me to prevent the overall load on my system. You can then proceed to close the game and your task manager.
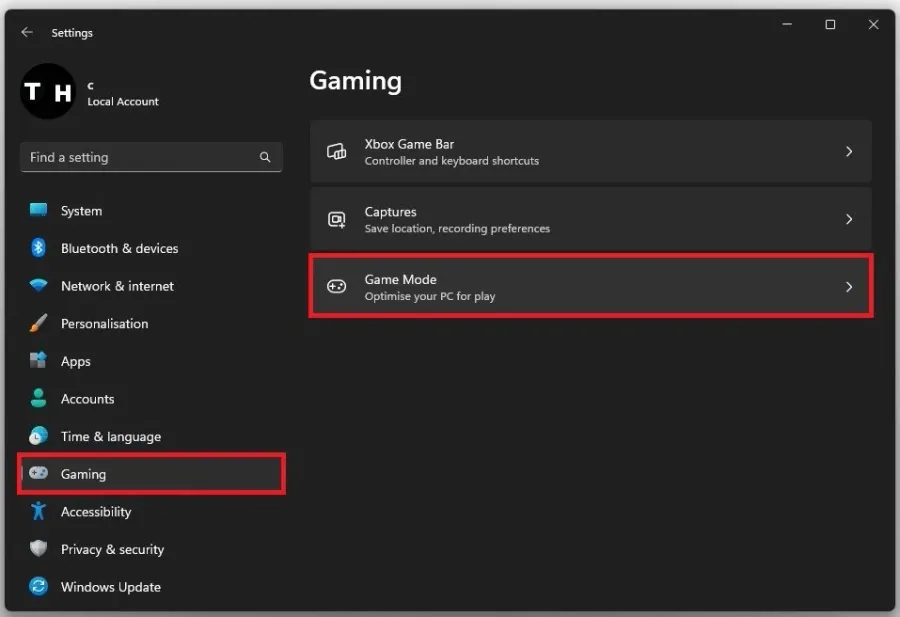
Enable Windows Game Mode
Open up your Windows settings to further boost your frame rate for Cultivation Tales. Under Gaming, click on Game Mode.
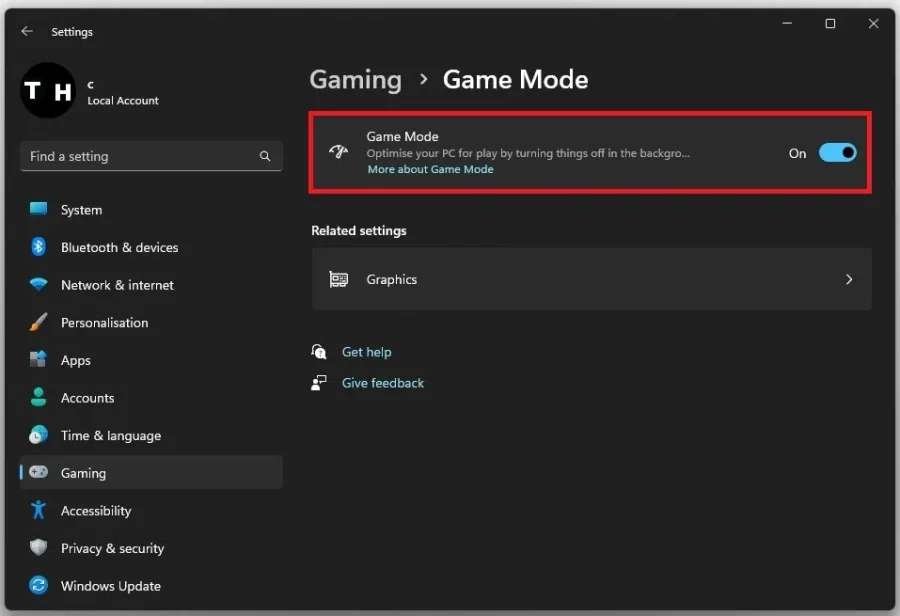
In theory, Game Mode should prevent Windows Update from performing driver install…
In theory, Game Mode should prevent Windows Update from performing driver installations, and sending notifications, as well as help achieve a more stable frame rate while in-game. Make sure to enable Game Mode to help run Cultivation Tales on your PC. In your Related settings, select Graphics.
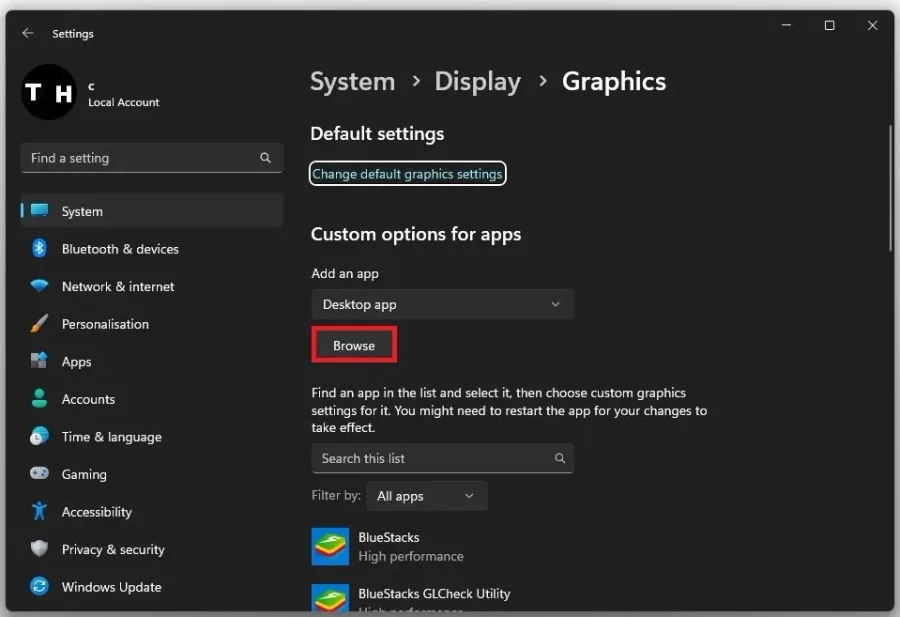
Cultivation Tales Custom Graphics Settings
Click on Browse, to change some custom graphics settings for Cultivation Tales. Click on Browse, to change some custom graphics settings for Cultivation Tales.
In your File Explorer, navigate to the drive on which you saved the game on
In your File Explorer, navigate to the drive on which you saved the game on. The file path for the Steam version is: Program Files > Steam > steamapps > common > LostMaze and here select the TalesOfWild exe application.
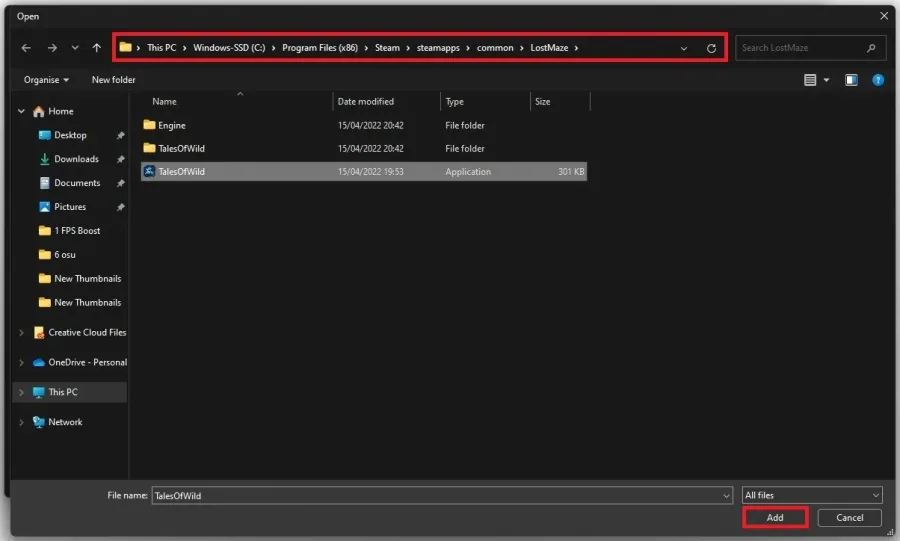
This will add Cultivation Tales to the list below
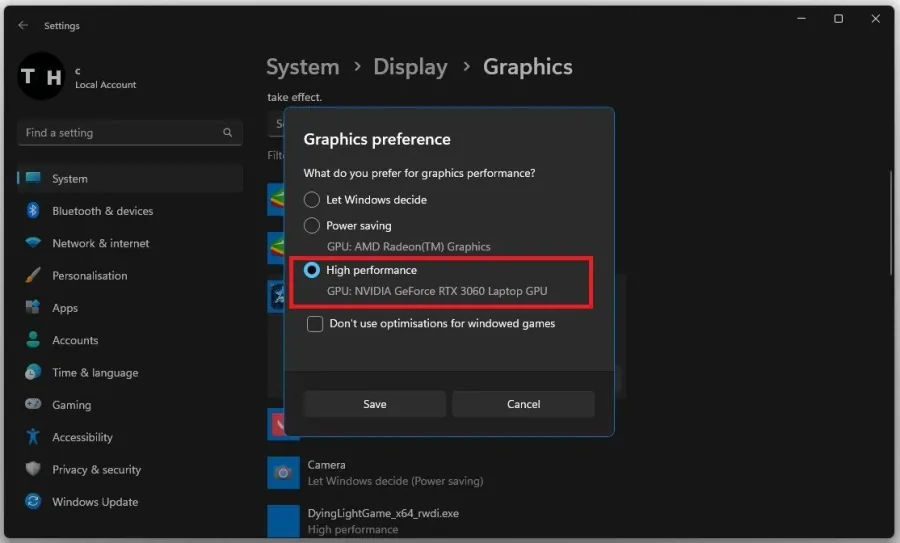
This will add Cultivation Tales to the list below. When selecting Options for the game, make sure to set the Graphics preference to High performance, which in most cases, will take advantage of your graphics processor to help run the game on your system.
Windows OS Update
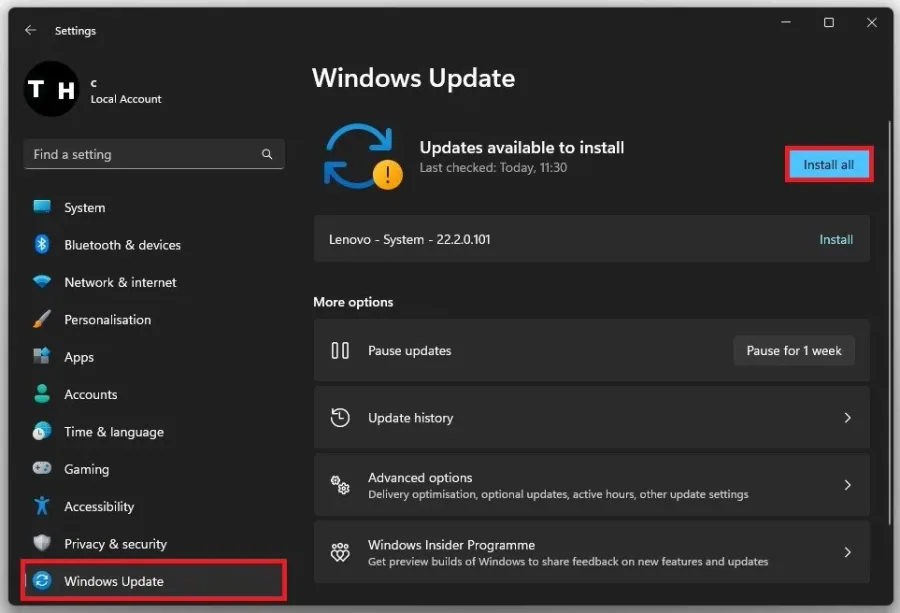
Keep your Settings window open and search for Update to get to your Windows Update settings. Make sure to check for recent updates, and if there is an update available to you, download it before restarting your PC, which will install the update for you.
Update Graphics Driver
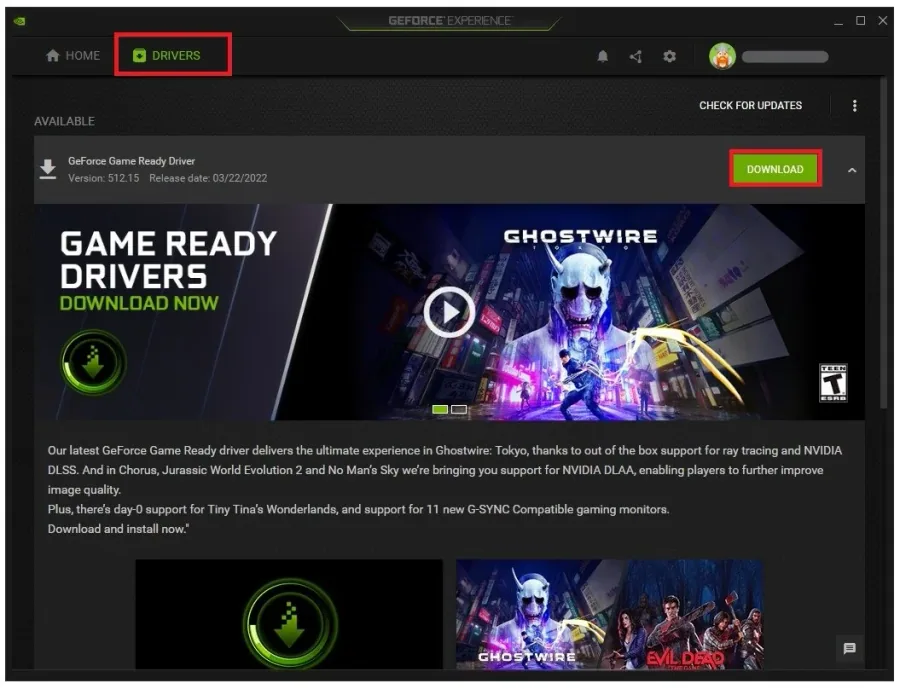
The next step will be shown for NVIDIA GPU users, but you can apply the same options and changes using the AMD Radeon Software. I suggest using the GeForce Experience application to update your graphics driver, which should be done from time to time. In the Drivers tab, click on Download, which will automatically download and install the latest driver. Repeat this step every few months to ensure you get the most out of your hardware.
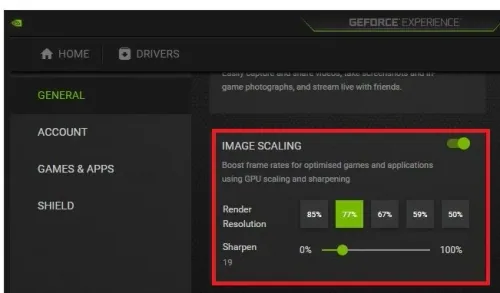
Enable NVIDIA Image Scaling
The last significant step in this application is hidden in your settings. Access your GeForce Experience settings, and in the General section, scroll down to enable NVIDIA Image Scaling. NVIDIA Image Scaling can help run the game at a higher resolution. This will allow you to decrease your in-game resolution and get a great visual experience. Play around with your resolution settings and play a bot game to see how much this improves your in-game performance.
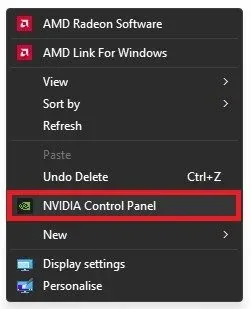
NVIDIA Control Panel Options
Right-click your desktop to access your NVIDIA Control Panel. On Windows 11, right-click your desktop, select Show More Options, and then you can click on NVIDIA Control Panel.
Under Manage 3D Settings, click on Program Settings
Under Manage 3D Settings, click on Program Settings. Make sure to select Cultivation Tales in this list of recently used applications. If you cannot find the app, click on Add.
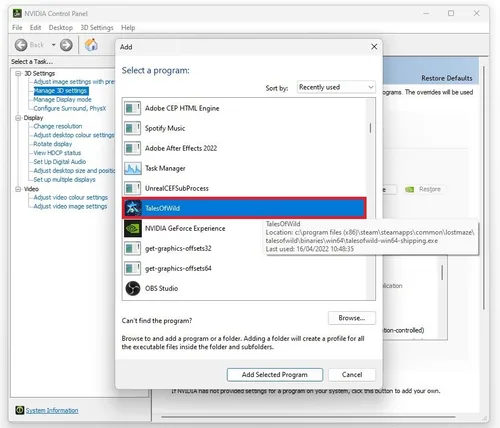
Sort the list by recently used or alphabetically and select Cultivation Tales to…
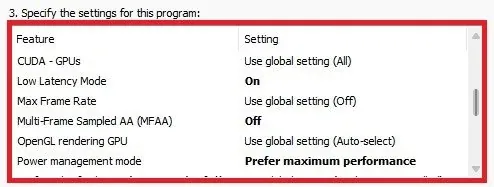
Sort the list by recently used or alphabetically and select Cultivation Tales to add it to the previous list. After adding the Cultivation Tales application, we will change some of the settings for this program below. By now, the Image Scaling option should be enabled, as we have before. Disable the Anisotropic Filtering and Antialiasing options. Next, enable Low Latency Mode, disable Multi-Frame Sampled AA and set the Power Management Mode option to Prefer Maximum Performance. It will take a second to apply your changes, next launch Cultivation Tales on your PC, and enjoy a higher frame rate and better overall gaming experience.
Video walkthrough
If it does not work
- If the current interface differs, compare it with the recorded video walkthrough.