
iOS · iPhone & iPad & Android
How To Overlay a Video in CapCut & Make It Transparent
Original source date
Answer
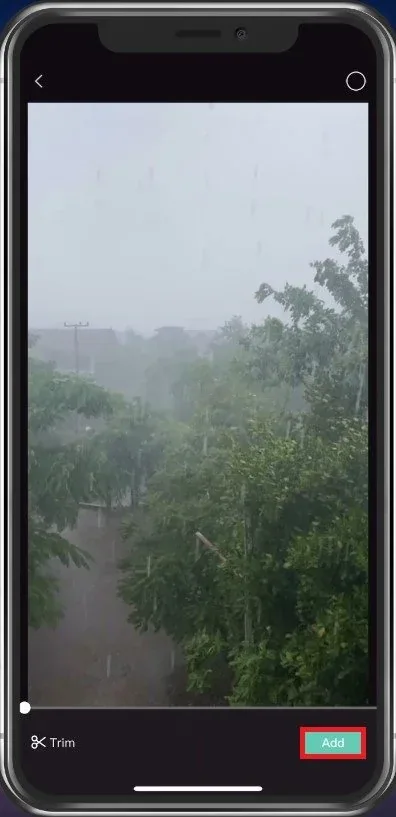
First, open CapCut and select create a new project. Proceed to import your main video, on which you will later overlay the transparent video.
Import Video to CapCut
First, open CapCut and select create a new project.
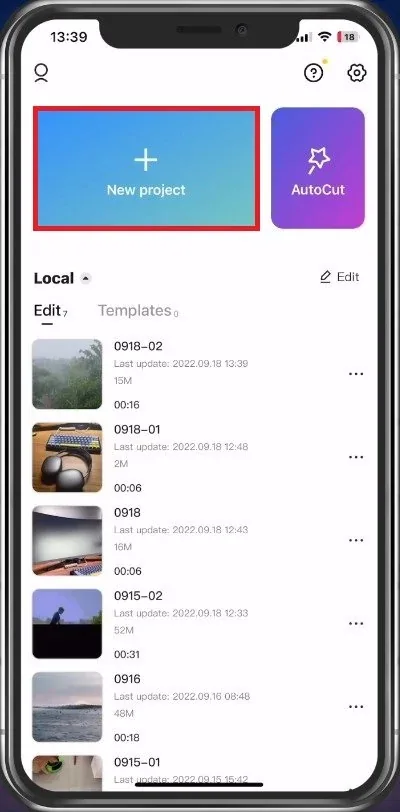
Proceed to import your main video, on which you will later overlay the transparen…
Proceed to import your main video, on which you will later overlay the transparent video.
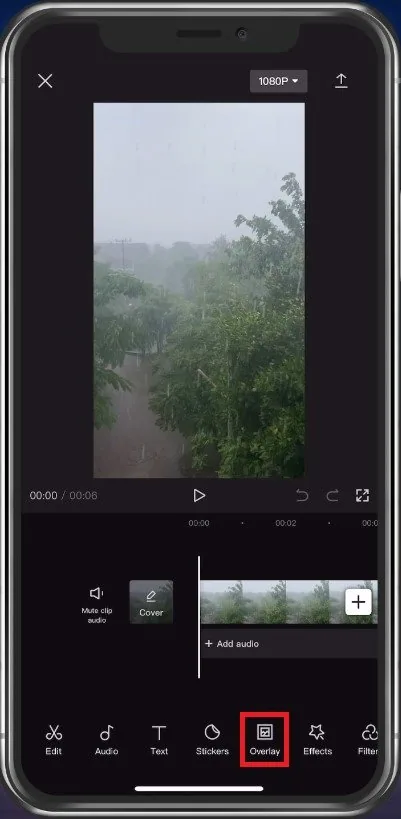
Add Overlay Video
When this is done, tap on Overlay at the bottom of your screen.
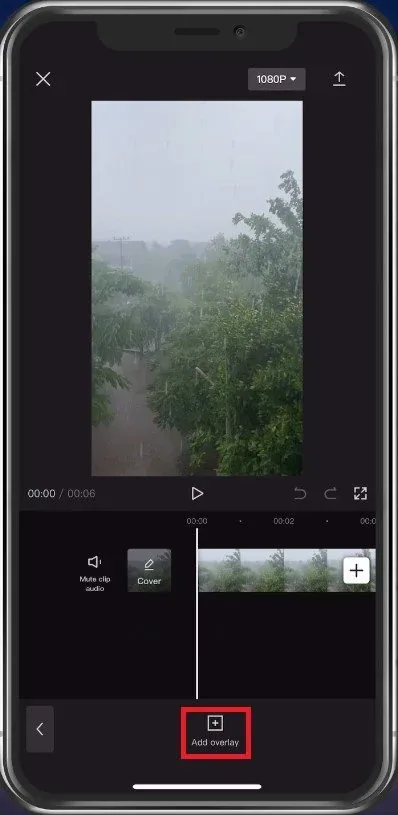
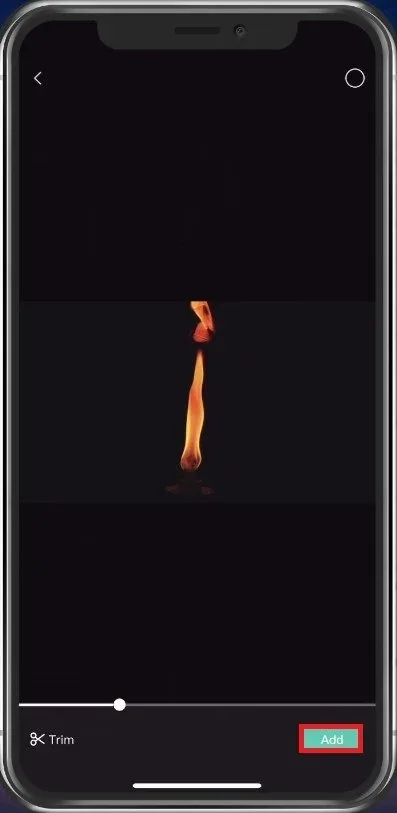
Tap on Add overlay, which will allow you to choose the video which will play on t…
Tap on Add overlay, which will allow you to choose the video which will play on top of your existing video.
It’s suggested to have a solid one-colored background, such as black or green, to…
It’s suggested to have a solid one-colored background, such as black or green, to make it easier for the application to remove the background.
Expand Overlay Video
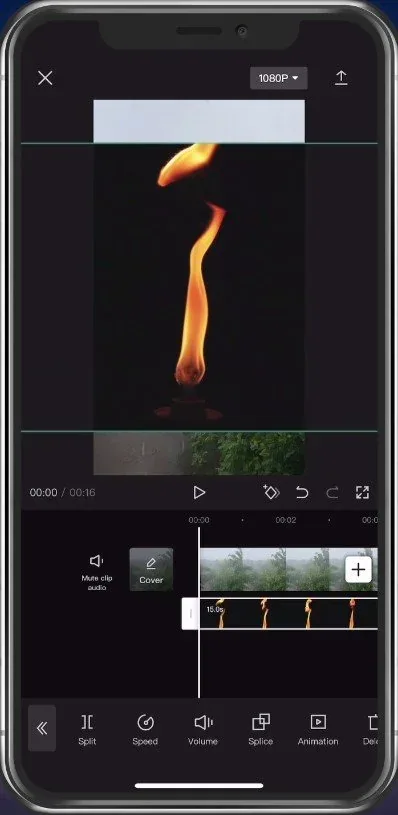
When this is done, you may see that your overlay is not entirely covering your original video. Tap on your overlay video and expand it to cover the entirety of your video footage below.
Use Splice To Remove Background
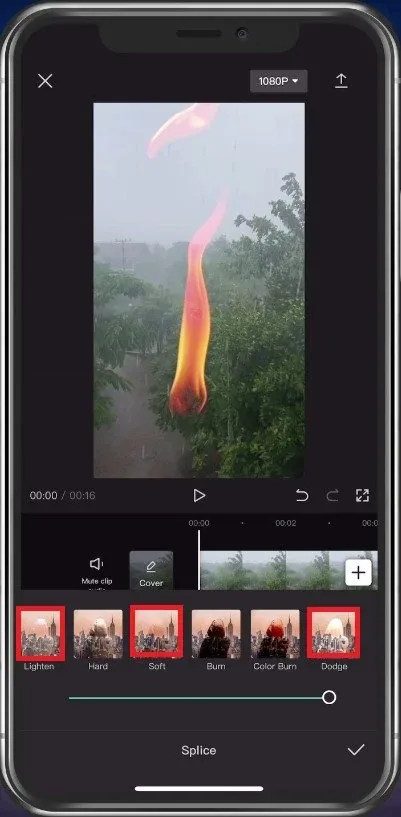
Next, tap on the Splice option in your toolbar. Depending on the base color of your overlay, you will have to use different options, such as Lighten, Soft, or Dodge. Using a black background, I will proceed with the Lighten option. The slider below will allow you to adjust the opacity, which should be set to around 70, but feel free to reduce it even more if it looks better with your footage. Tap on the arrow icon next to the slider to indicate that you’re done adding the second video as an overlay. You can play the video before making any last adjustments when all of this is done.
Change Video Frame Rate & Resolution
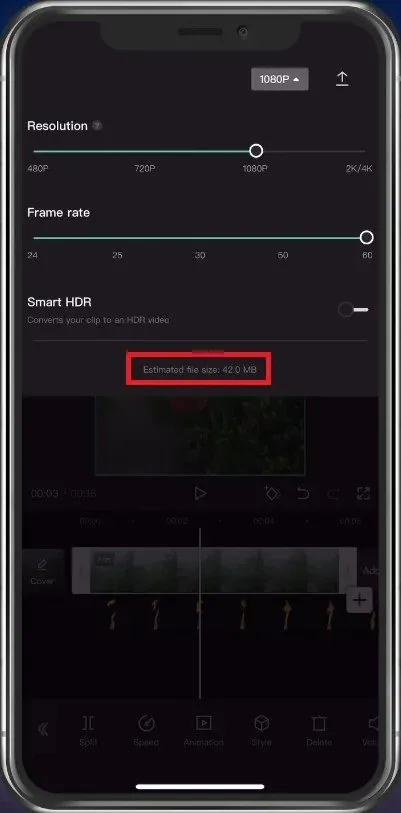
Before exporting your video, tap on the button next to the export arrow at the top of your screen. Here, increase the Resolution and Frame rate to ensure that your video resolution matches your original video. After exporting the video, you can preview the estimated file size at the bottom of this window.
Export CapCut Video
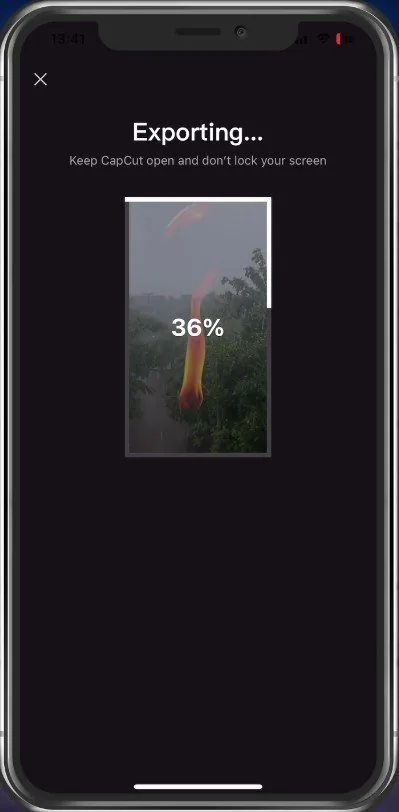
Lastly, tap on the arrow icon to start exporting your project. Depending on your selected videos and device performance, this can take anywhere from a second to a couple of minutes.
Video walkthrough
If it does not work
- How do I import a video into CapCut for editing?. To import a video into CapCut, simply tap on the "Projects" tab located in the bottom right corner of the app. From there, select the "+" sign and choose "Import" to import a video from your camera roll or cloud storage.
- How do I adjust the transparency of a video in CapCut?. To adjust the transparency of a video in CapCut, go to the "Layers" tab and select the video you want to adjust. From there, you can use the transparency slider to adjust the transparency of the video to your desired level.
- Can I overlay multiple videos in CapCut?. Yes, you can overlay multiple videos in CapCut. Simply import all the videos you want to use, and adjust the transparency of each video in the "Layers" tab to create a seamless overlay.
- How do I add text or captions to my overlay video in CapCut?. To add text or captions to your overlay video in CapCut, go to the "Text" tab and select the type of text you want to add. From there, you can adjust the text's color, font, size, and placement to create a professional-looking video.
- Can I adjust the duration of an overlay video in CapCut?. Yes, you can adjust the duration of an overlay video in CapCut. Simply select the video in the "Layers" tab, and use the "Trim" feature to adjust the length of the video to your desired duration.